As part of our platform consolidation, this content will be moving to Unity.com by March 31st, 2025.
Preview the new location and updated resources here.
Gluon is a tool designed for users who typically work on a single branch with files that can't be merged (typically, binaries such as images, animations, or documents). These users usually coordinate teamwork collaboration by locking file access. Repositories are normally huge and include very large binaries.
The typical users of the tool are artists involved with game development teams. However, the tool is not restricted to only game teams.
Here are a few scenarios that might help you decide whether Gluon is a good fit for you and your team:

Important!
Before running Gluon, you must configure the locking system function. To do that, the server file, lock.conf must be correctly set up. The lock.conf file allows you to lock files upon checkout, preventing others from modifying those files while you are working on them. By controlling file access in this way, you avoid merging files that can't be merged.
For additional information, read how to create and configure the server lock.conf.
To use Gluon for the first time, you must create your first workspace by configuring the Plastic SCM server (IP address or Name). If you need help with this setup, we recommend that you consult with your sysadmin.
This server configuration step usually only takes a few minutes to complete:
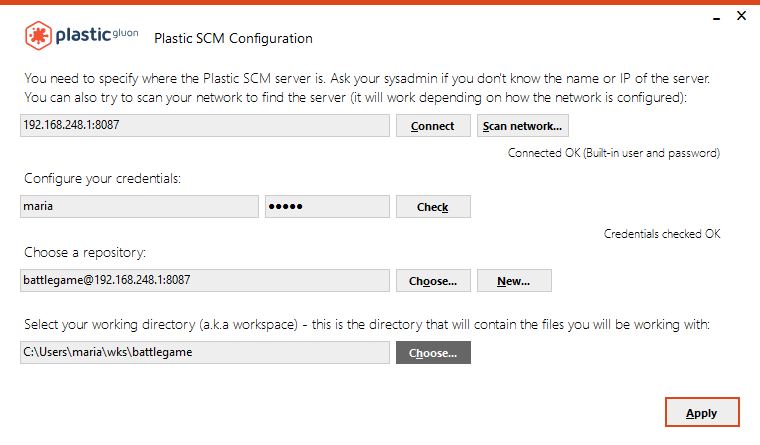
Once you have secured the IP address and port for the server by asking the sysadmin or scanning the network, click Connect. The server will then detect the user-authentication mode and begin the process of connecting you to the server by prompting you to enter the following information:
The configuration is now complete, and you are now ready to start working with Gluon.
A workspace is your working directory that will contain the project files you create, modify, delete, and so on. To start configuring your workspace:
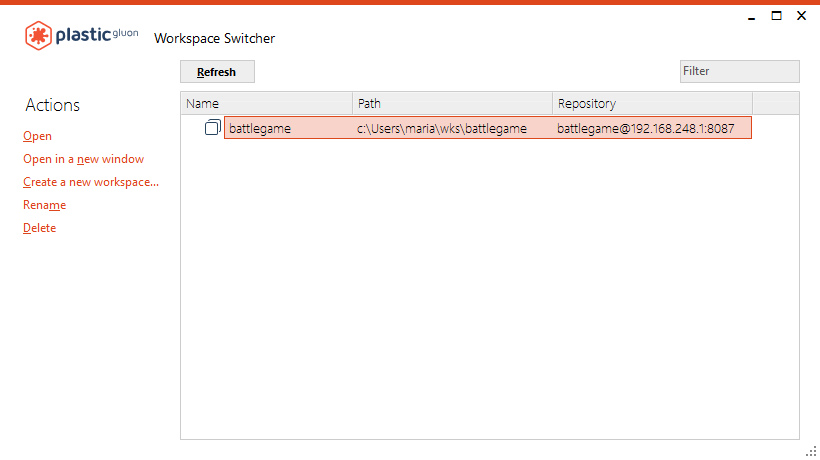
You will see an empty folder/directory like the one below (with 0 bytes size):
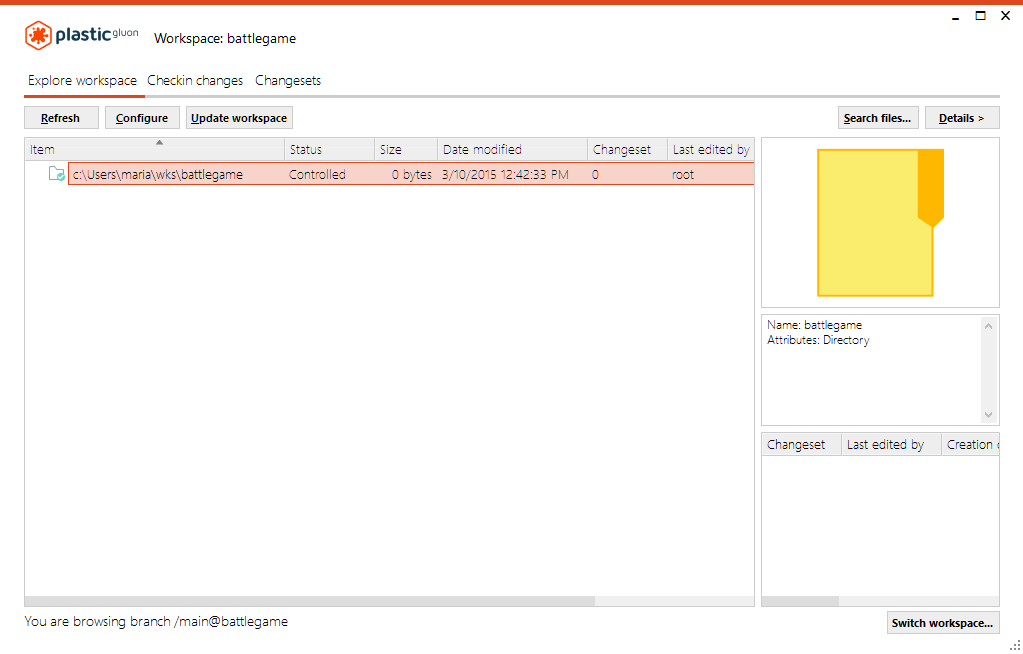
You can now select the files you want to work on by selecting them from the repository.
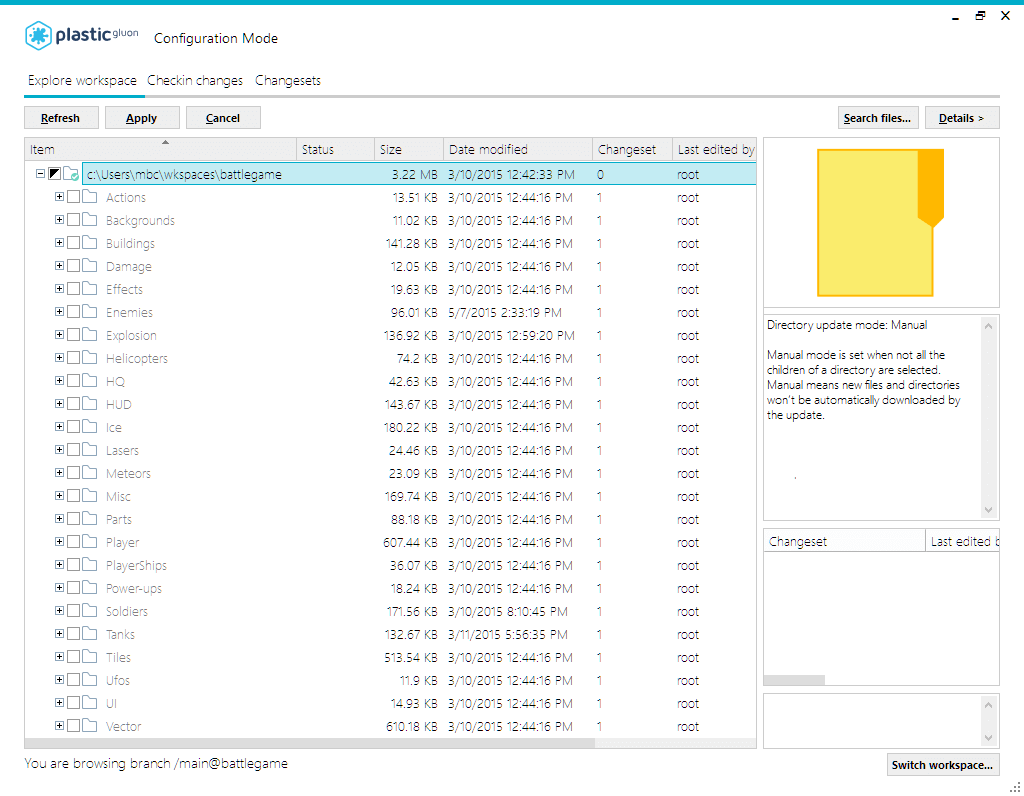
This is a super cool feature because the Configuration Mode view allows you to select (load) or deselect (unload) the files or directories (items) that you want to work with so that you don't have to load the whole repository. You can also see the size for every file/directory.
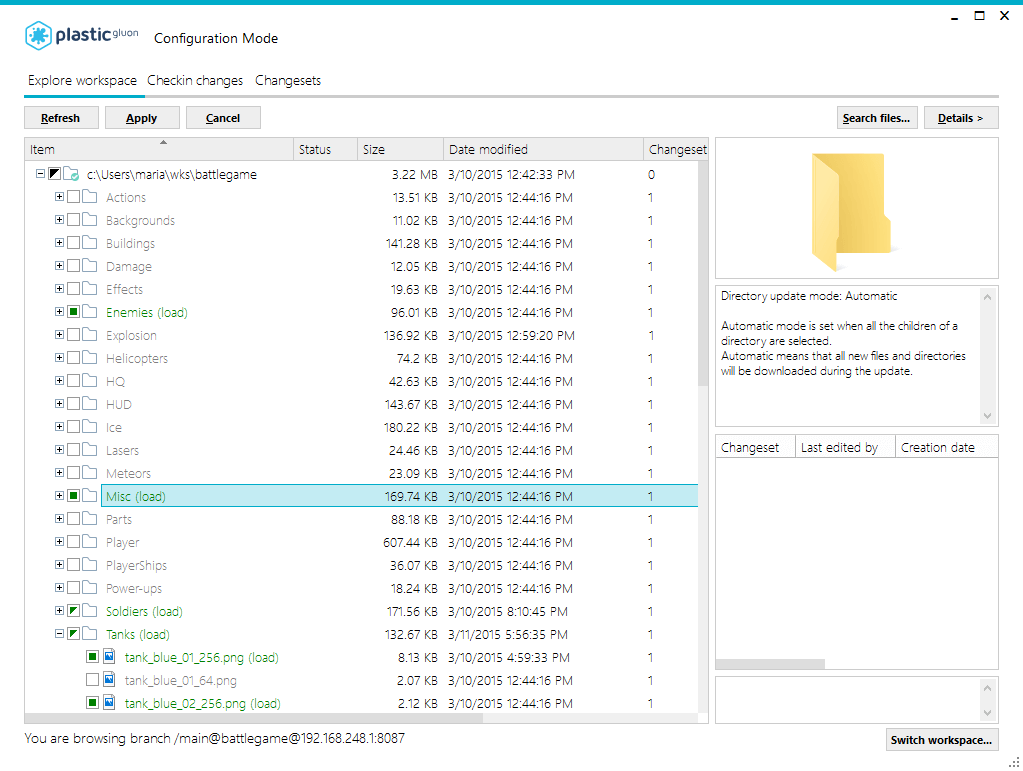
In this example, we will select only the blue + 256 files inside the Tanks and Soldiers folders as well as the complete Enemies and Misc folders.
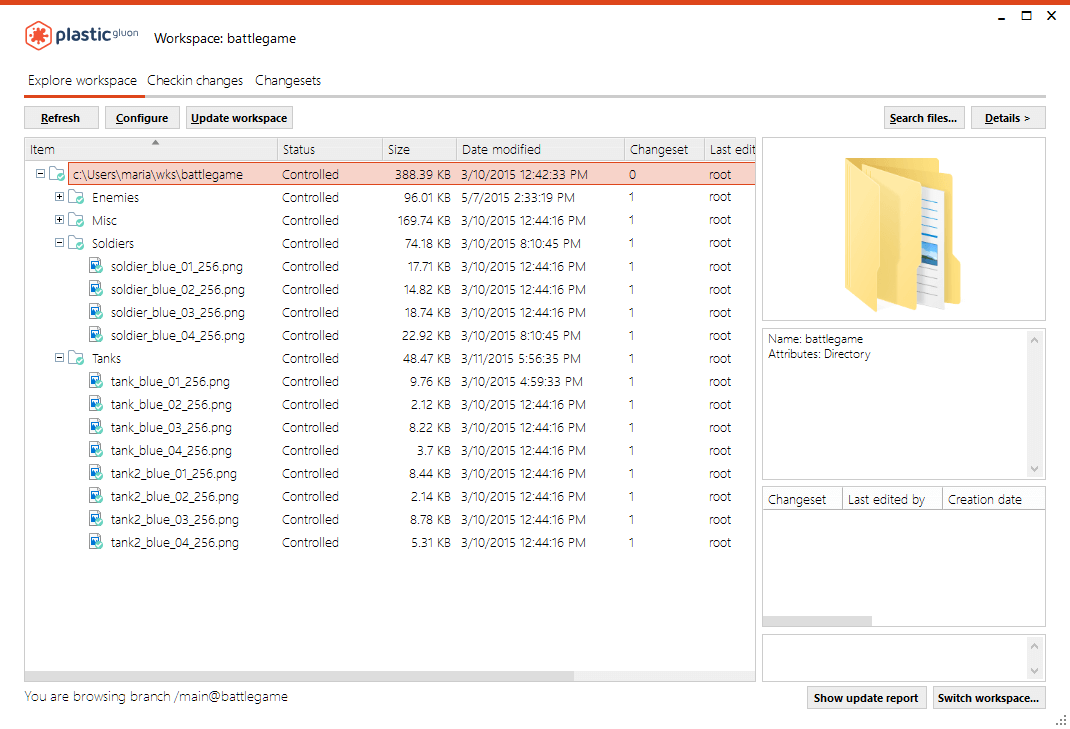
If you prefer, you can use the command line to configure your workspace. For our example above, run the cm partial configure command with the following notation:
cm partial configure +/Enemies +/Misc +/Soldiers/soldier_blue_01_256.png +/Tanks/tank_blue_01_256.pngThis example will load the complete Enemies and Misc folders and the blue_01_256.png soldier and tank pictures.
You can change the configuration at any point by downloading new items or unloading them from the workspace by clicking Configure again.
All of the loaded items have the Controlled status, which means that they are under version control.
For each selected item in the workspace window, you can:
You can configure the maximum file size to generate at the preview of a file when that file is not loaded in the workspace (Configuration mode). To do so, add the following key to your client.conf file:
<MaxPreviewFileSize>1048576</MaxPreviewFileSize>
The default value is 1 MiB (1048576 bytes). This means that if the selected, non-loaded file size is more than 1 MiB, it won't be downloaded to generate its preview. But, you will still be able to see its icon, if any, its size, and its attributes.
You can configure the Workspace view to show your loaded items in two different ways:
By default, the Workspace view appears in a directory tree mode.
To change the view mode, right-click anywhere on the workspace view and select the View as a list option:
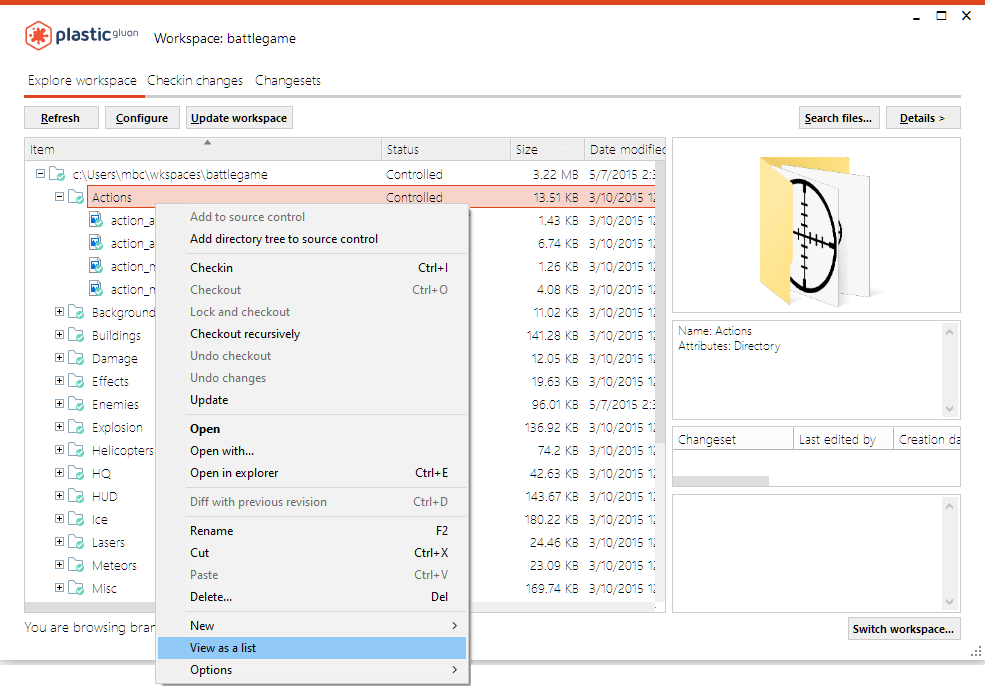
And you will see something like this:
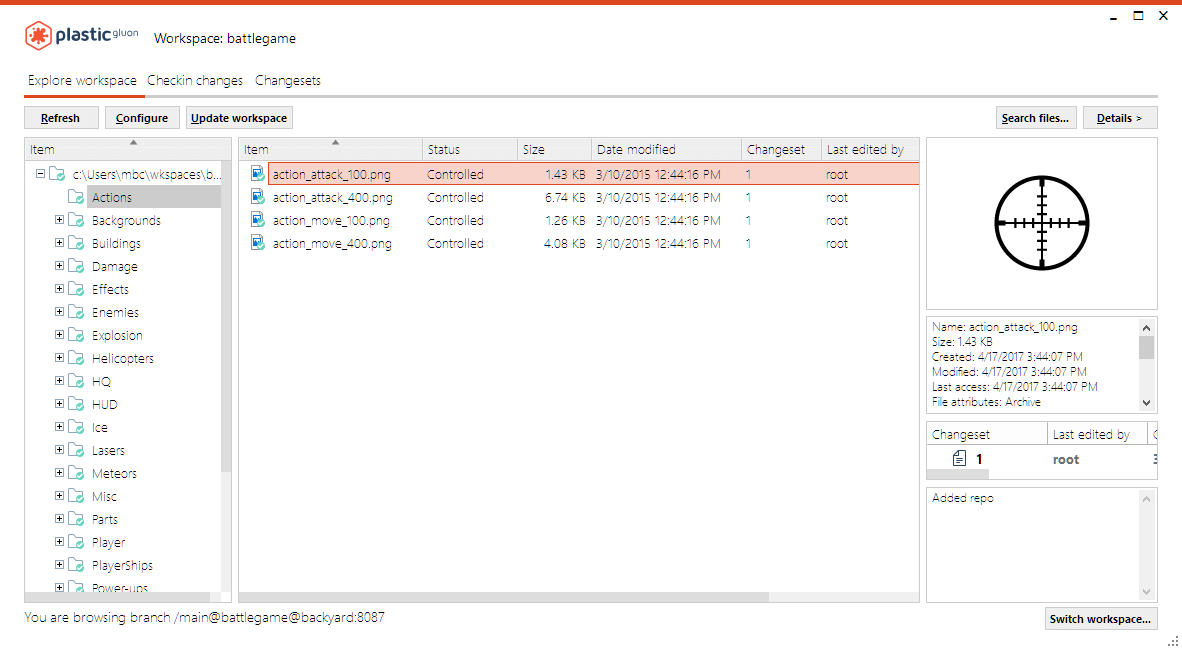
To go back to the tree mode, right-click again and select the View as a tree option.
Gluon has two modes, depending on whether you specify files within the parent folder or select the complete parent folder.
However, when you select some of the files (children) in a parent folder, Gluon identifies the folder as Manual Mode. When you select the complete parent folder, Gluon identifies the folder as Automatic Mode.
As we'll see later, the Manual and Automatic modes will determine how Gluon treats the folder during updates.
As you saw in the example, Gluon lets you configure your workspace any time by enabling you to load and unload items with a simple mouse click.
If you don't need the Misc folder for your current project, unload it from the workspace. This will reduce the number of files in your workspace. Open the Configuration Mode view so that you can choose the repository items that you want to remove from your workspace:
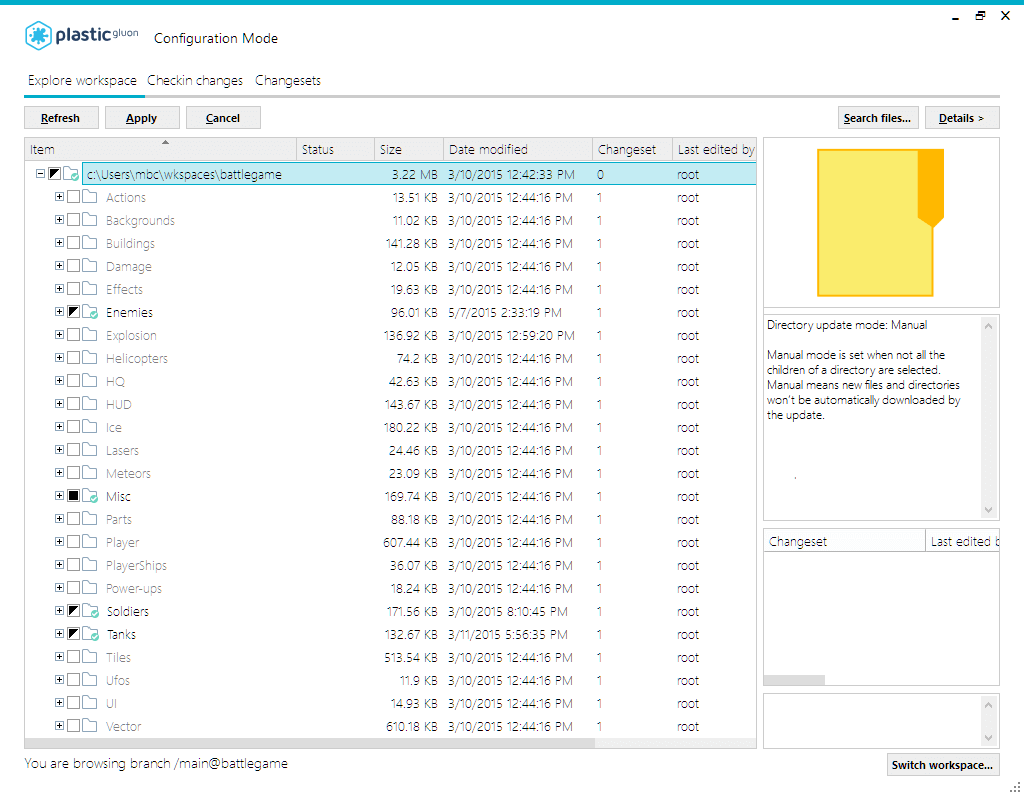
As you can see in the above image, the Misc folder is loaded as seen by the black square in its checkbox; a black triangle indicates that the folder is partially loaded.
To unload a loaded folder, you must complete two simple steps:
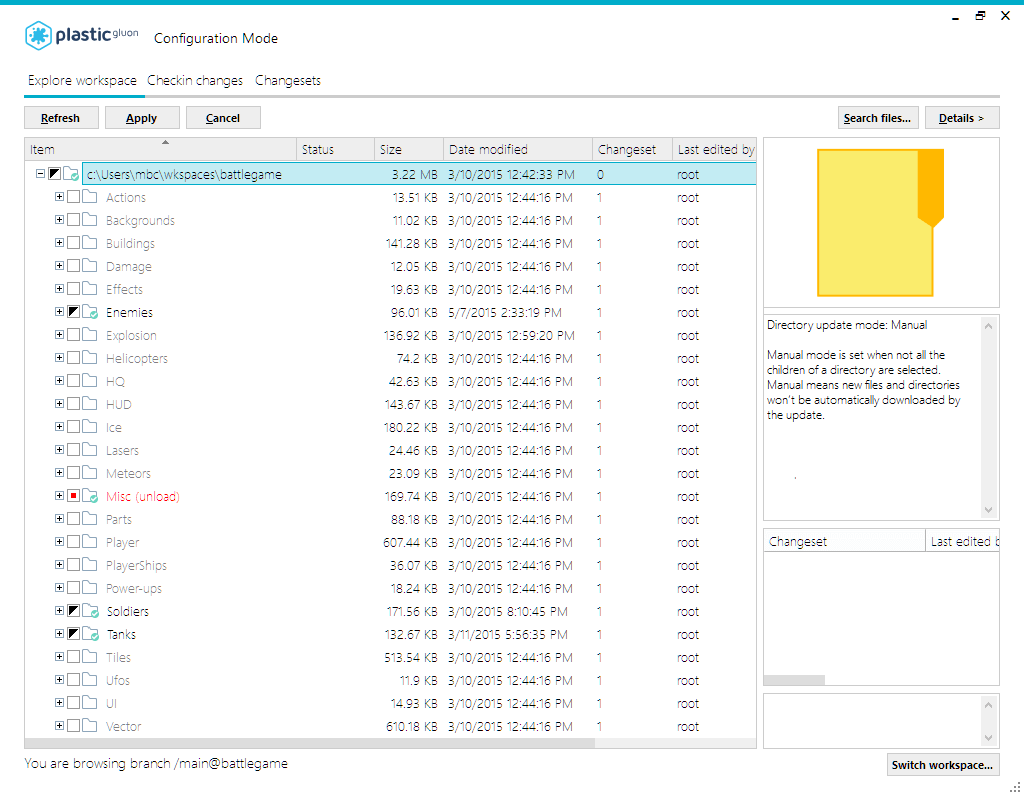
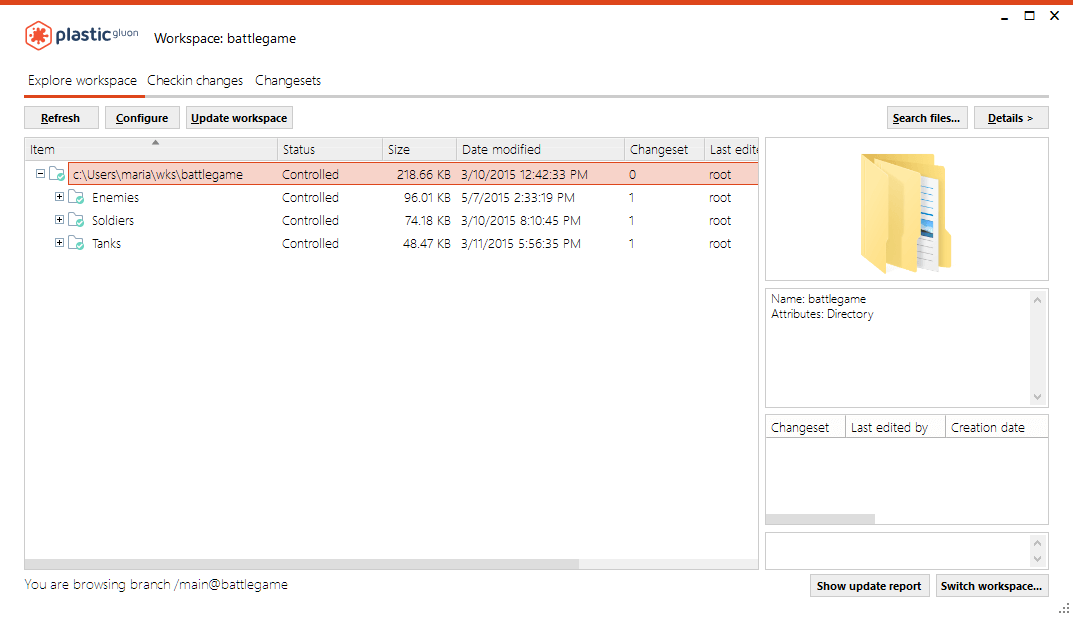
Or, you can run the following CLI command to unload the Misc folder:
cm partial configure -/Misc
If you unload a folder that contains private or ignored items, Gluon won't delete them.
This is for a security reason: We can't remove items outside Gluon's control.
As you've seen in the previous screenshots, you can see the directory sizes both in the Explore workspace and the Configure views.
In the Explore workspace, you can choose whether to exclude or include the private items when calculating the directory sizes:
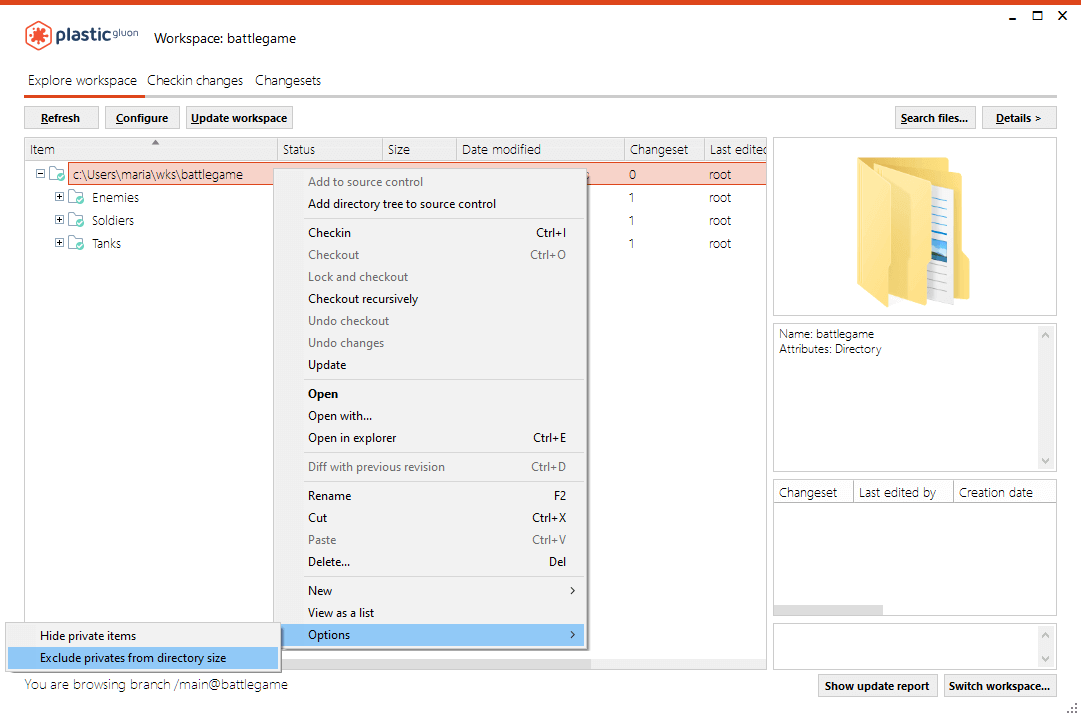
If private items are excluded, the size of the private files will still appear in the Workspace Explorer view. However, the private directory sizes will not be calculated, and all private items will be discarded when calculating controlled directory sizes.
The Show update report button lets you see a list with all the updated items. For update or partial update operations, the report contains all the changed, added, deleted and moved items. For apply configuration operations, loaded and unloaded items are listed. This report looks like:
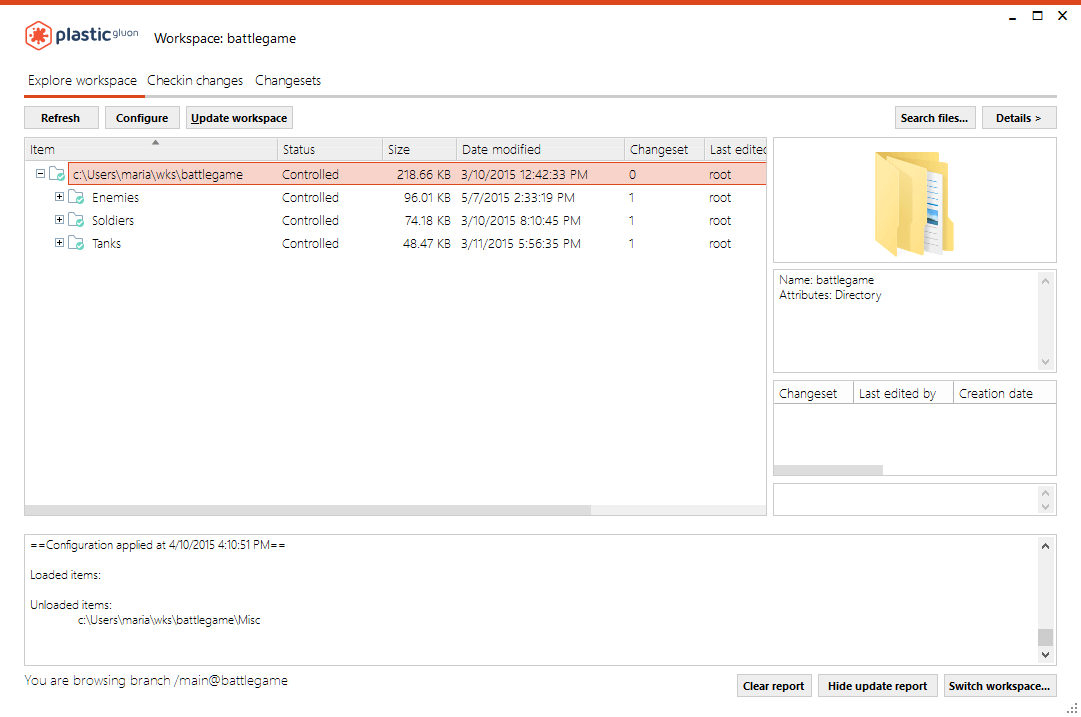
The Show update report button appears for the first time when an Update or apply configuration operation is performed. You can clean this report or hide it.
By this point, you have loaded all of the files that you will need in your workspace. Now, it's time to modify them.
To ensure that other users will not edit the same files as you, Gluon provides the Checkout feature. By checking out the file, it is locked so that only the person that checked out the file can edit it, and it is not available to others until it is checked back in. Once you have selected the files that you want to checkout, right-click any one of them and select the Checkout option from the submenu:
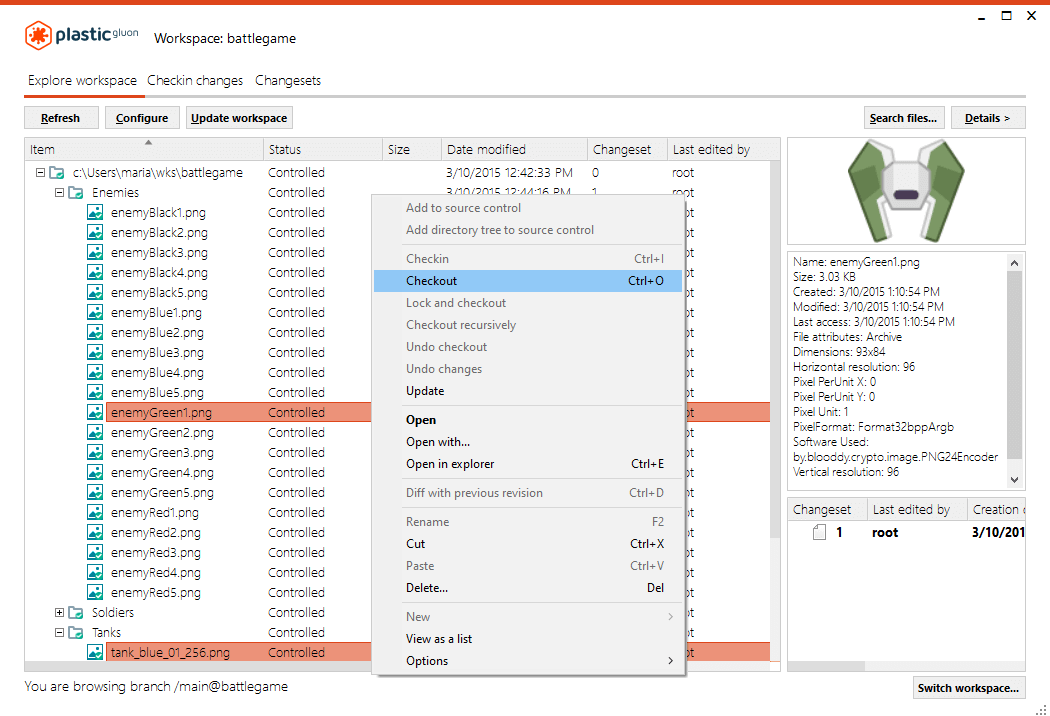
The files you select will lock and nobody can edit them until you check them back in. Once you have checked out the files, those files are marked with a new icon, the Last edited field will change from root to your user name (in this case Maria), and the status of the file will change to Checked-out (unchanged):
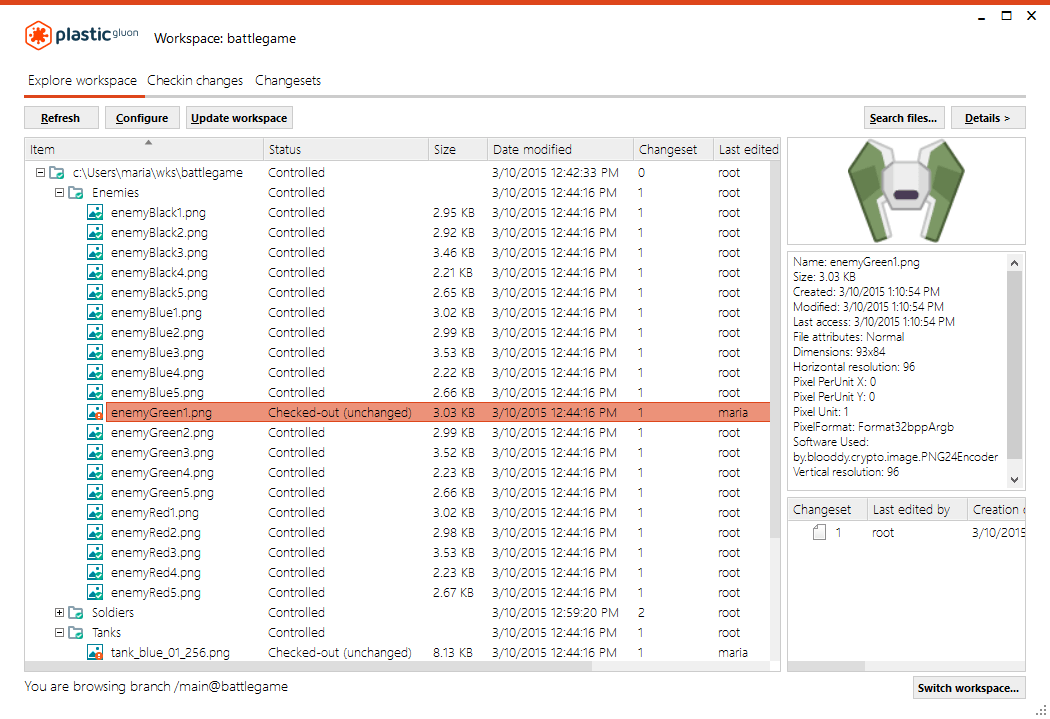
The new Checked-out (unchanged) status visually indicates that the file has been checked out or locked by you, but no changes have been made yet.
You can also checkout or lock the selected files by running the following command:
cm partial checkout c:\Users\maria\wks\battlegame\Enemies\enemyGreen1.png c:\Users\maria\wks\battlegame\Tanks\tank_blue_01_256.png The selected items are about to be checked out. Please wait ... Item c:\Users\maria\wks\battlegame\Enemies\enemyGreen1.png was correctly checked out Item c:\Users\maria\wks\battlegame\Tanks\tank_blue_01_256.png was correctly checked outYou are now ready to edit the files by dragging and dropping them into an external editing tool. The files are locked, so nobody but you can edit them.
To force the lock before the checkout, you can use the Lock and checkout option:
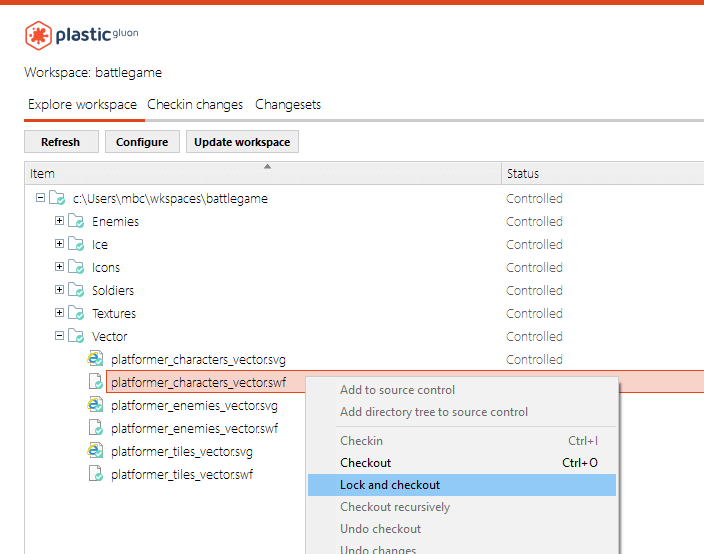
This option ensures that an appropriate lock rule for the selected file exists in the server for the repository.
If it doesn't, and you want to lock and checkout a controlled file, a new dialog displays. There, you can add the new lock rule that will be added to the repository in the server:
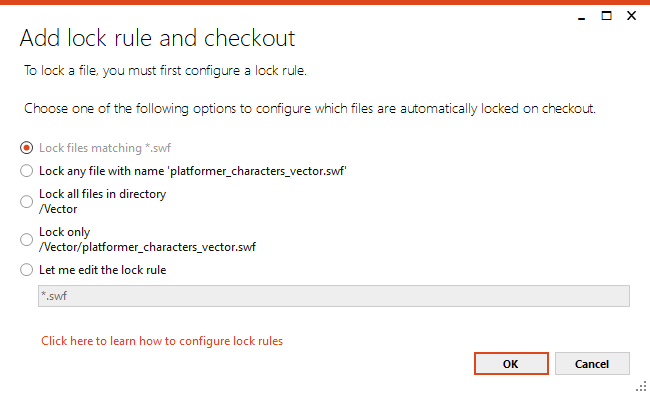
If you need to lock all of the files in a folder, select the folder, right-click it and then select the Checkout recursively option from the submenu:
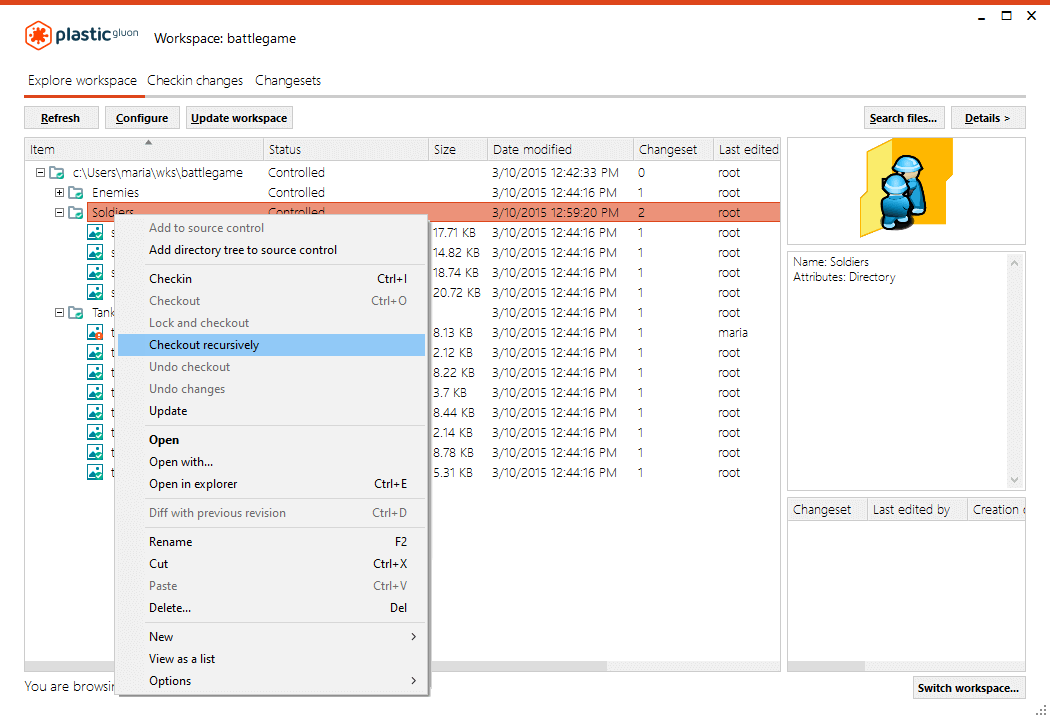
You can also run the recursive checkout from the command line:
cm partial checkout -R c:\Users\maria\wks\battlegame\SoldiersAll the items in the folder are checked out (locked), so you don't have to select each file. The result is the same as we saw before; Every file has a new icon, the Last edited field for every file in the folder changes from root to your user name (in this case, Maria), and the status of every file in the folder changes to Checked-out (unchanged):
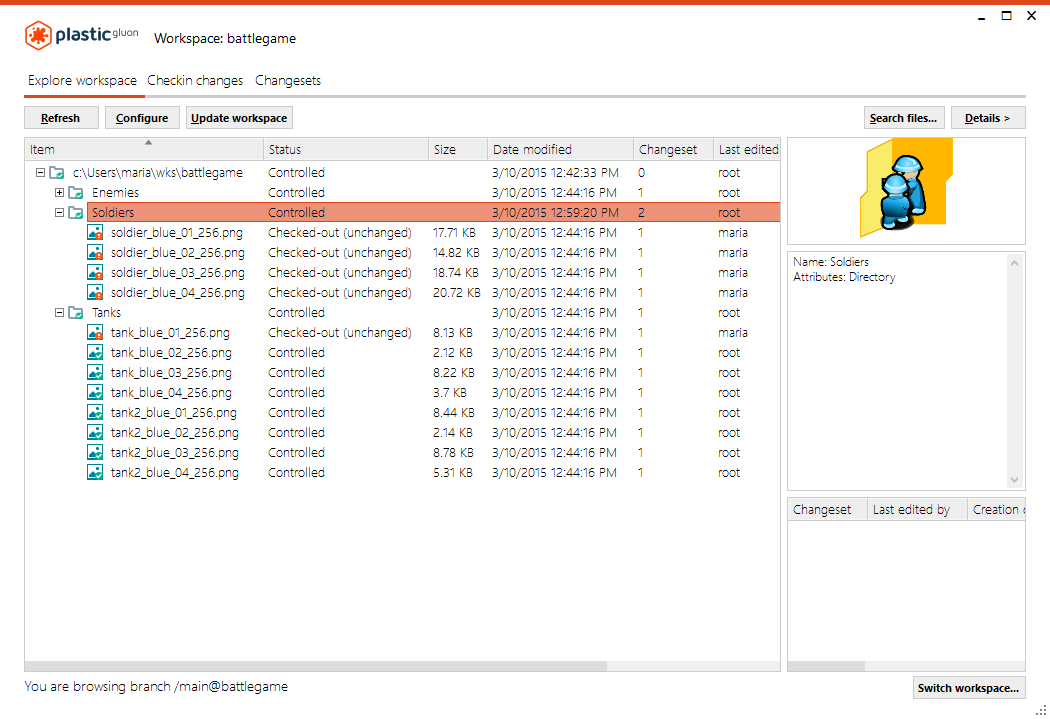
When you're done editing your files using the external tool, after refreshing the workspace view, notice the status of the edited files has changed from Checked-out (unchanged) to Checked-out (changed):
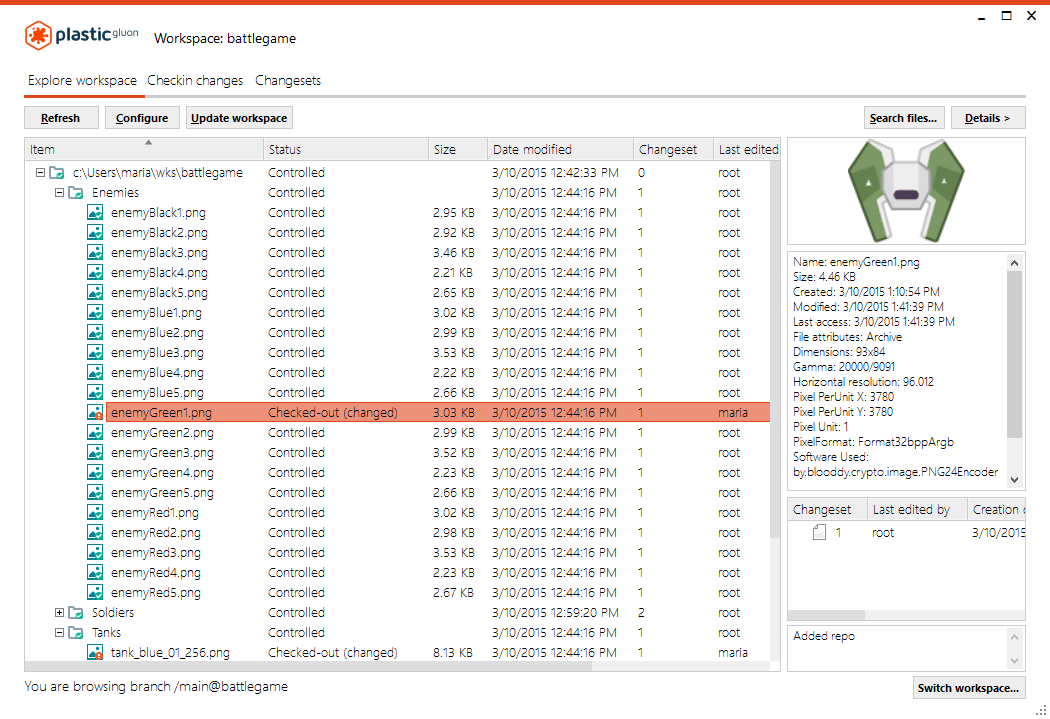
This means that your locked files were edited, and those changes were saved locally but not on the server.
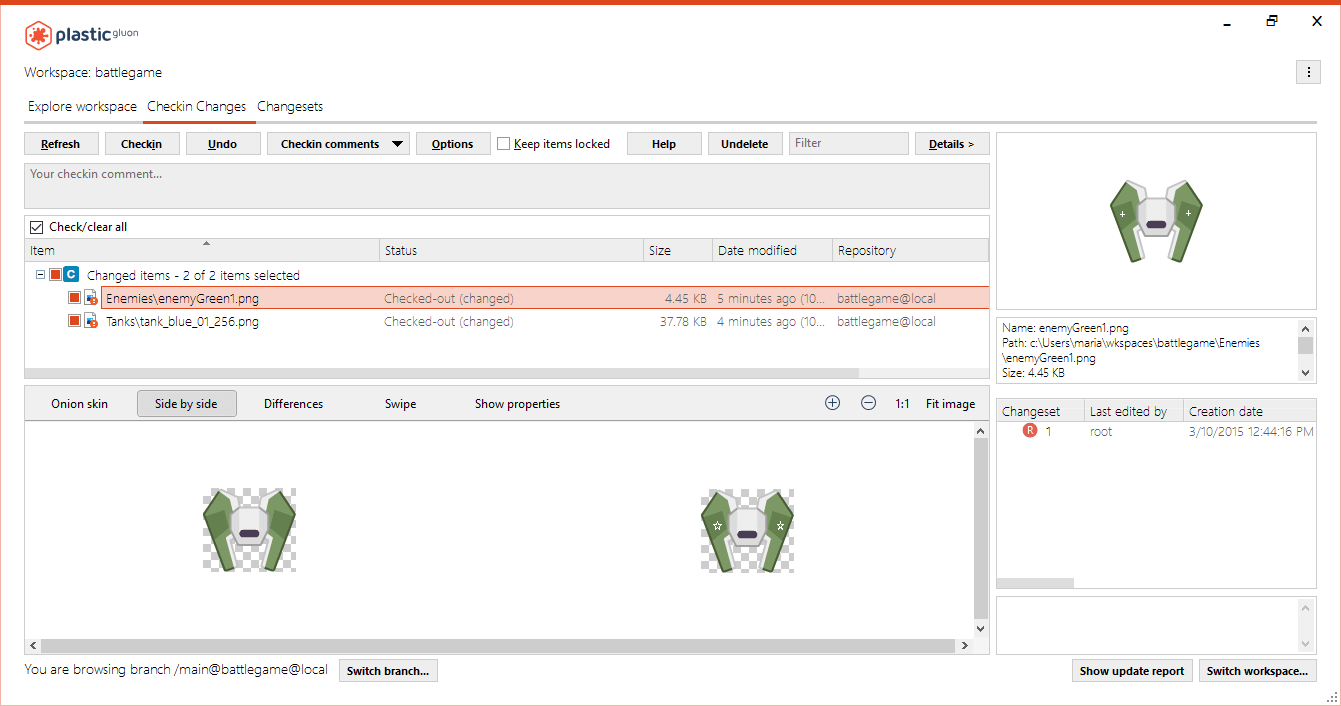
To save the changes to the server (add the changes to the repository in version control), click the Checkin changes tab. In this new window, you'll see the files you've changed, and by default, all of them are marked to be checked-in. Now, write a comment to identify the changes associated with those files and click Checkin:
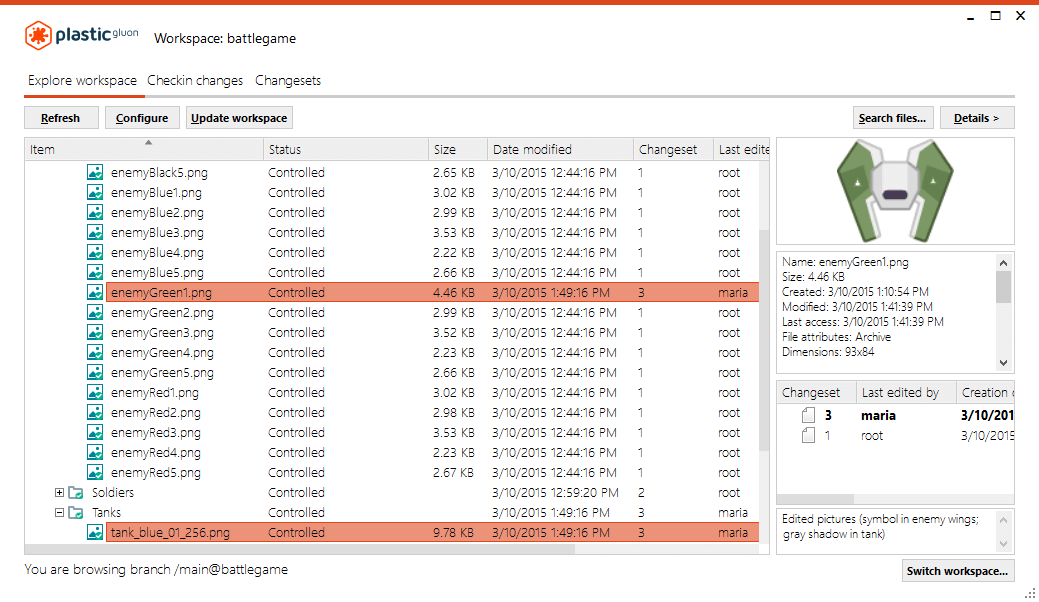
Once the Checkin operation is complete, you can go back to the workspace view (by clicking the Explore workspace tab). You'll see that the status of the checked-in files is now Controlled, indicating that the files were checked in successfully. Also, the history view displays the new changeset:
And, of course, you can checkin your changes from the command line by running one of the following:
You've done your first changes, and they are now saved on the server.
You may have noticed a panel below the History view where you can always read the comment that was entered during the checkin process. The comment shown corresponds to the comment of the selected revision in the History view. If no selection is performed, the comment for the loaded revision is shown. With this panel, you don't have to scroll through the History view horizontally to read the comment.
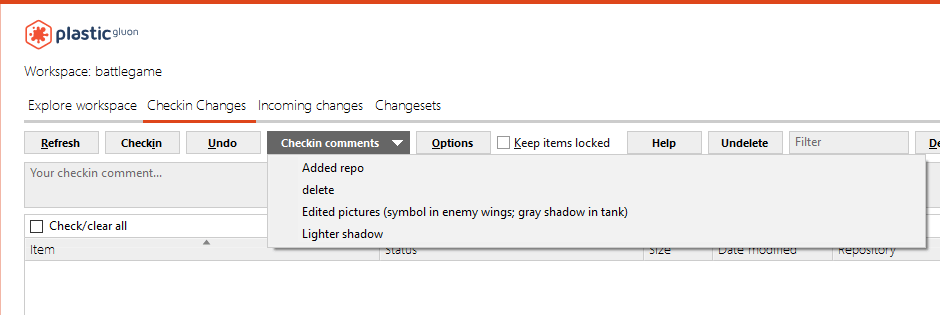
The Checkin Changes view includes a Checkin comments button that allows you to quickly fill the checkin comments text box with the previous changesets' comments:
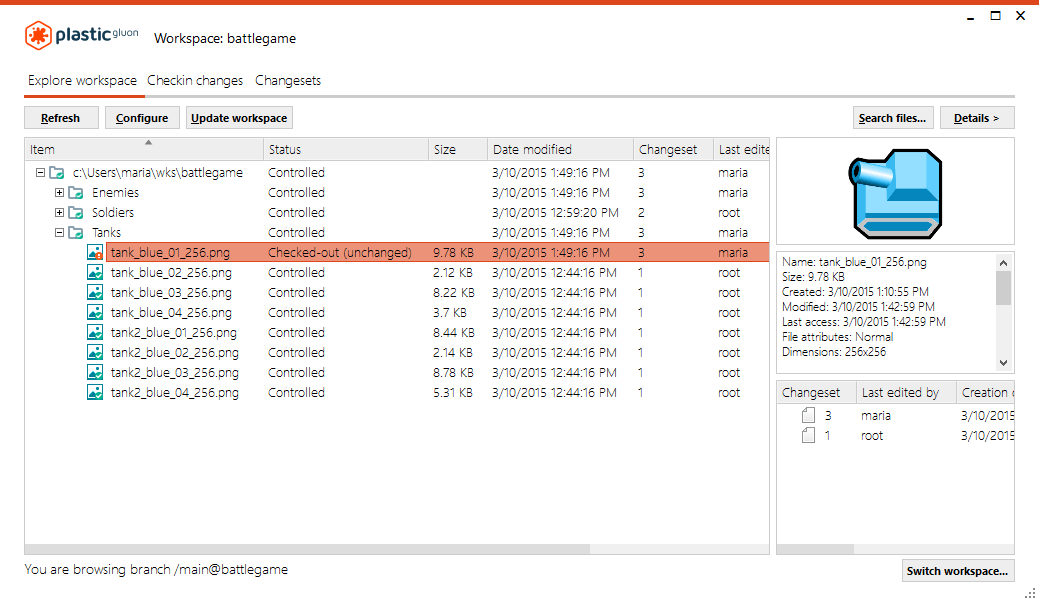
Maria has made changes and checked them in, but she realizes that she forgot to add one change to the tank_blue_01_256.png file. So, she checks it out again, and, at the same time, her teammate John wants to check it out as well.
Maria get there first so her workspace looks like this:
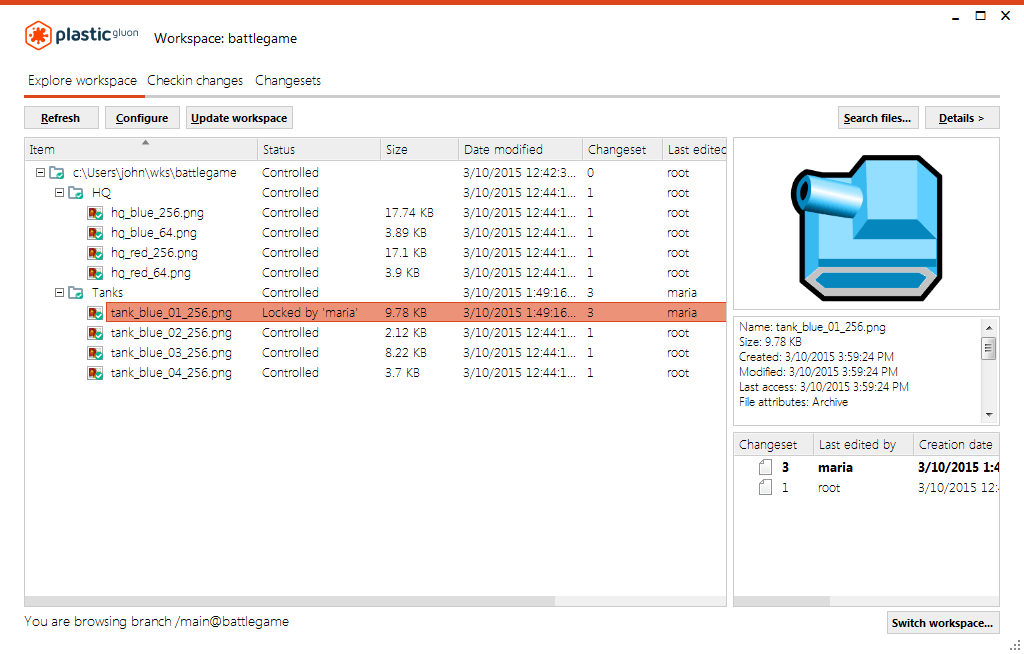
Let's go to John's workspace. He loads the folder HQ and some files from the Tanks folder. One of the files is the tank_blue_01_256.png picture. In the History view, John can see that the picture was modified a few hours ago by Maria and was checked in; so as far as he knows, the file can be edited:
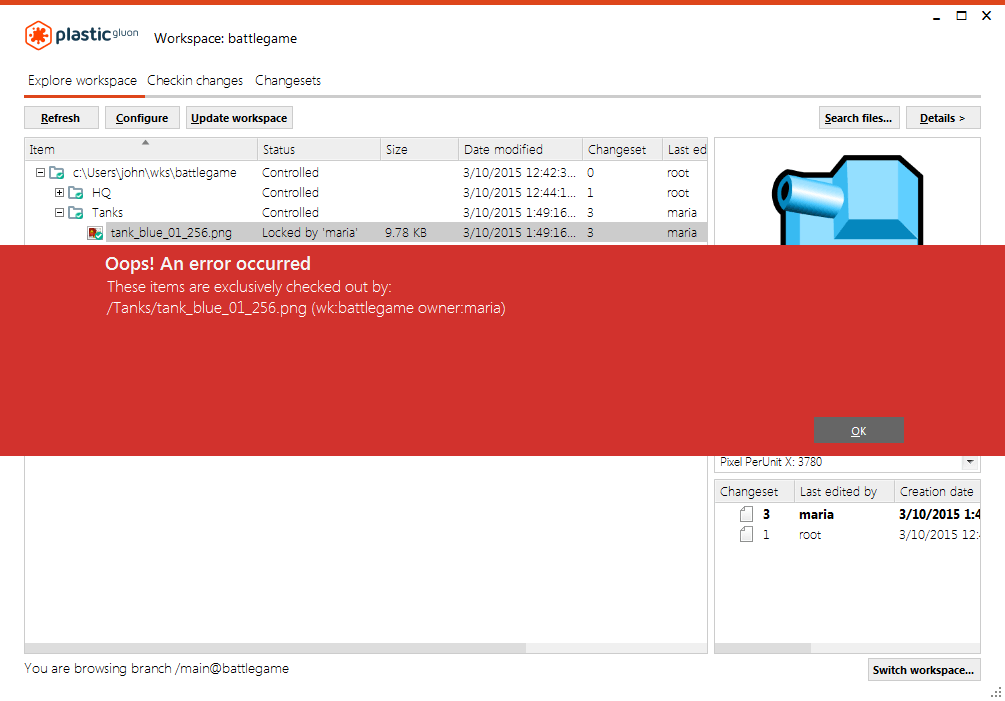
John goes ahead and tries to initiate a checkout, but he gets an error message indicating that Maria has checked out the file:
If John tries to run the checkout from the command line, he will get the same message:
cm partial co /Tanks/tank_blue_01_256.png The selected items are about to be checked out. Please wait ... These items are exclusively checked out by: /Tanks/tank_blue_01_256.png (wk:battlegame owner: maria)Gluon prevents John from editing the file while Maria is working on it. Upon closer inspection, John can see that the file status is Locked by 'maria'.
Note: Gluon always shows you the current status of every item (file or directory). Use the Refresh button.
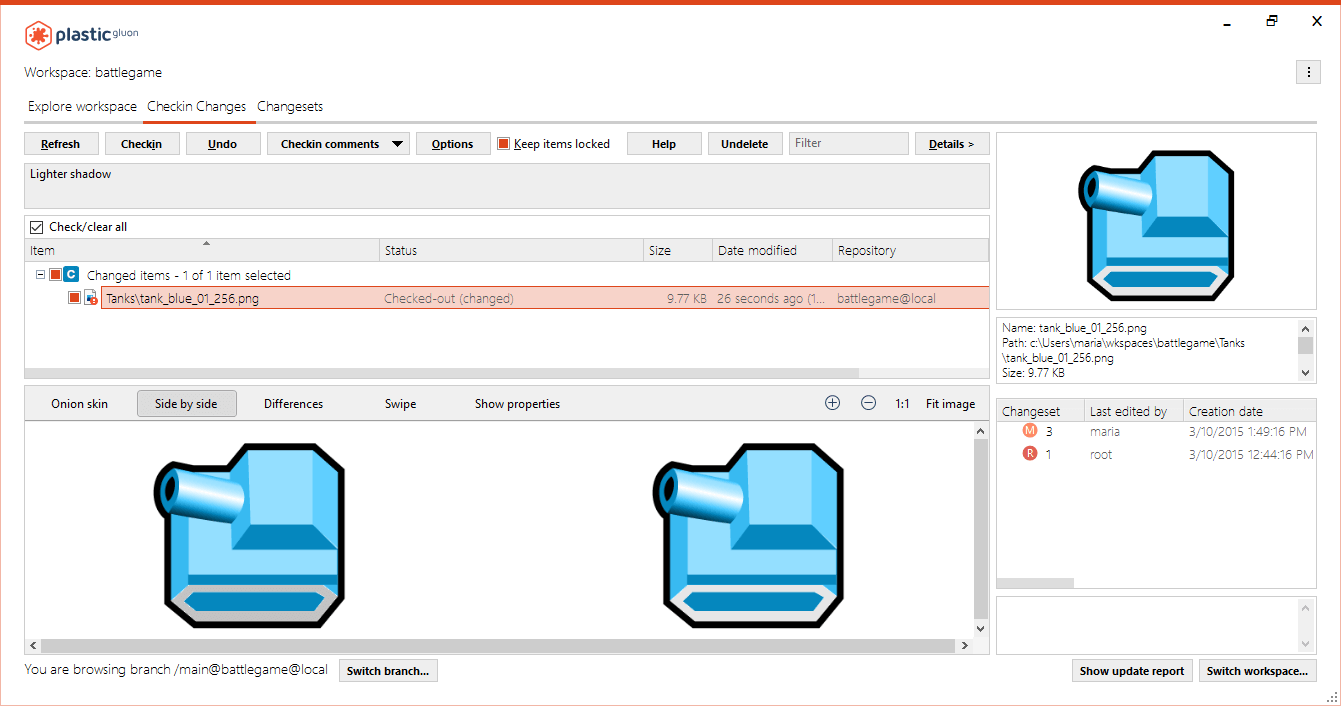
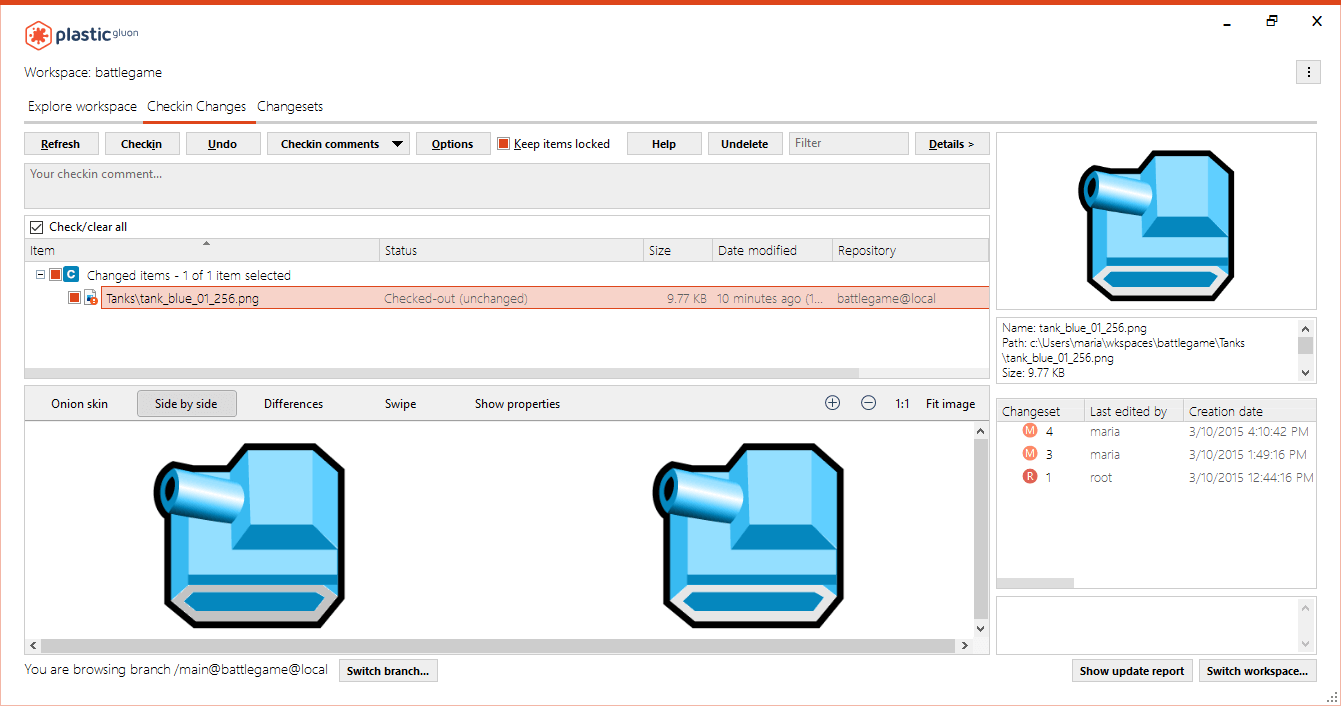
Maria decides to keep the file locked for the rest of the day because she has some additional changes to apply. She can save the changes to the server and keep the file locked by simply selecting the Keep items locked option.
She makes the changes, adds a comment, selects Keep items locked, and clicks Checkin to save her changes while John finds something else to work on:
You can also keep an item locked from the command line. Just run a checkin command and add the --keeplock option:
cm partial checkin -c="Lighter shadow" --applychanged --keeplockAfter the checkin operation is performed, you can see the latest changes saved to the server. And in the History view, you will see that Maria created a new changeset. Because she selected the Keep items locked option, the file still has a checked-out (now unchanged) status. This ensures that the file remains locked until Maria no longer needs it:
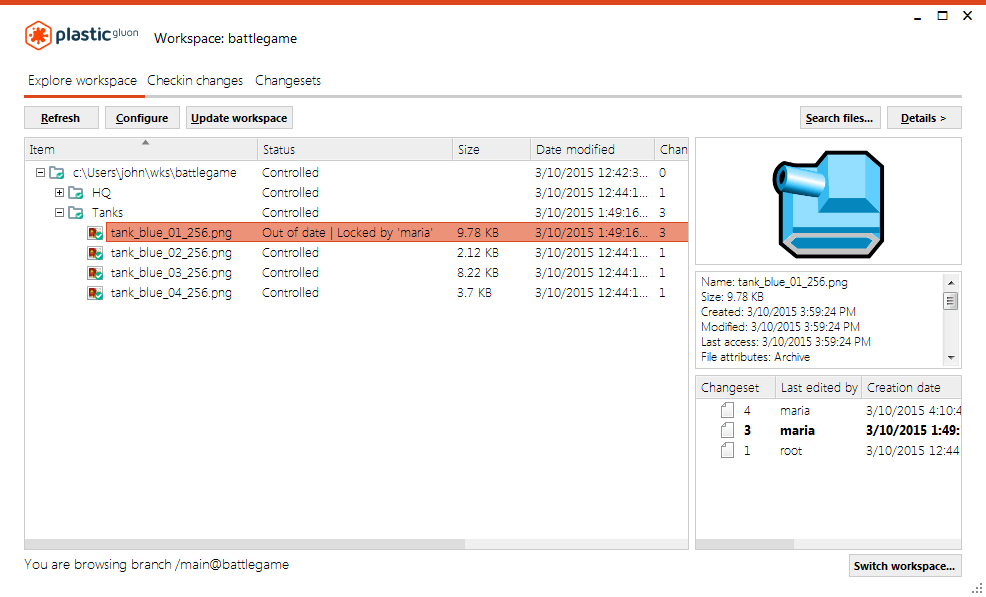
So now John, after doing a Refresh to his workspace, will see that the file is still locked and that it is Out of date, so he will wait patiently until the file is unlocked:
After a couple of days, Maria is finally ready to checkin the file and unlock it (by deselecting the Keep items locked option). This way, other users can make their changes. But the file status was Out of date, so let's look at what that means in the next section.
Before performing a Checkout action on a file or a group of files, you must ensure you have the latest revisions in your workspace.
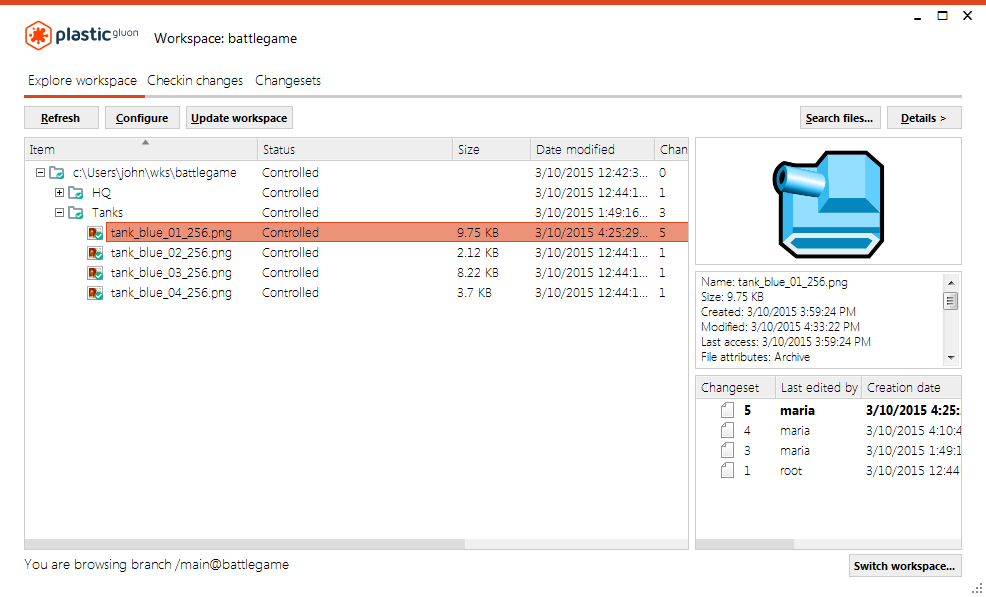
John has been waiting patiently to make changes to the tank_blue_01_256.png file. It is unlocked, but it hasn't been updated yet in John's workspace.
Here is what John's workspace looks like right now. If he refreshes the Explore Workspace view, he will see that the file he needs to modify is out of date:
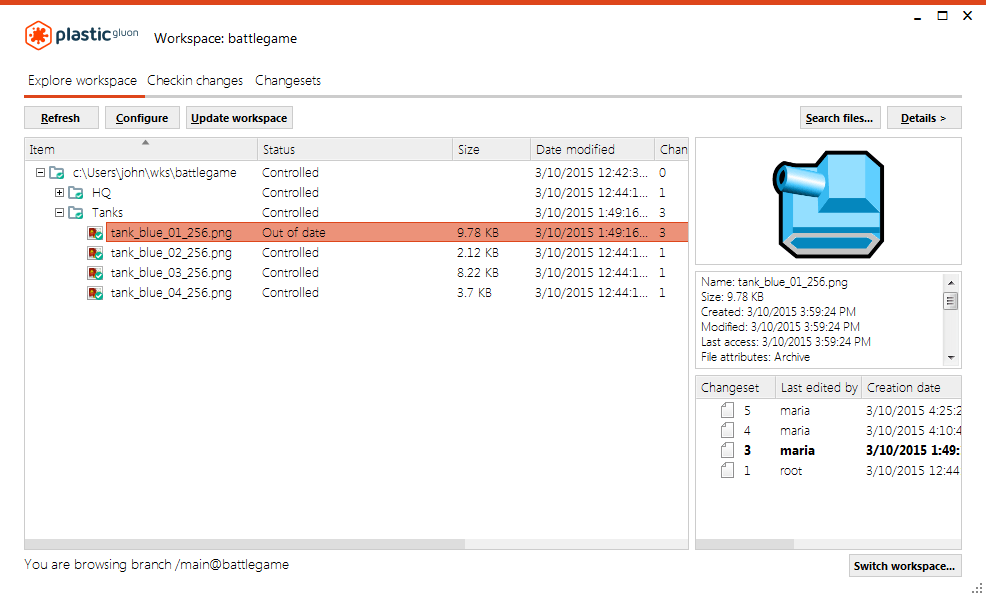
The reason it is outdated is that Maria made some changes to it. By the time John can work on it, the file displays in John's History view as the old one that was loaded in his workspace previously (changeset 3). So John has to get the latest version of this file into his workspace by running the Update option from the submenu:
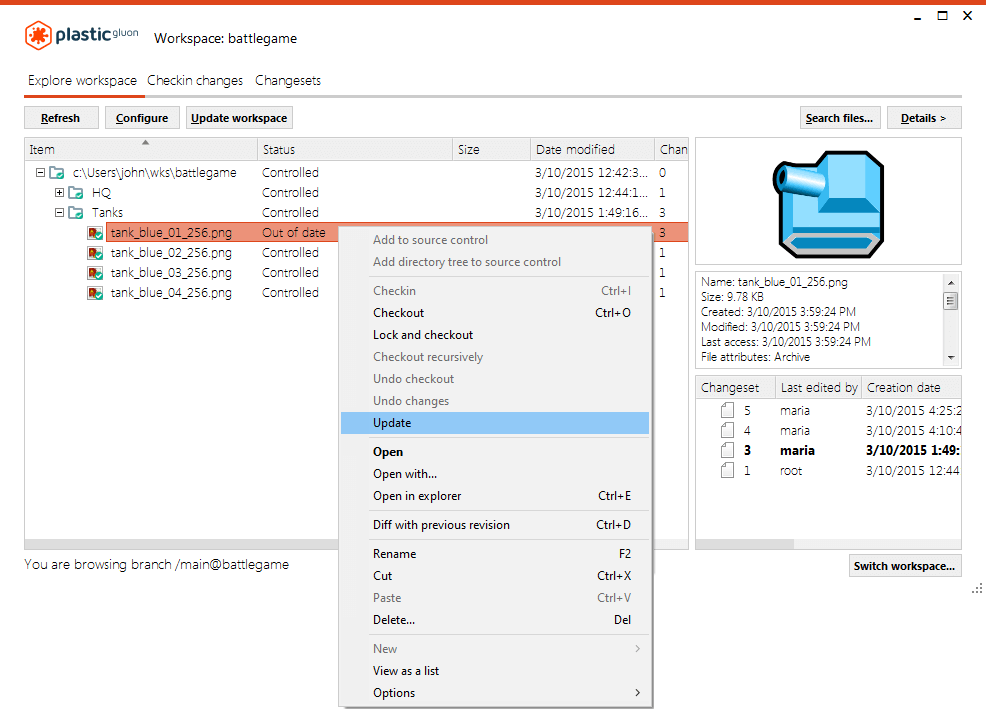
You can also run the update option from the command line:
cm partial update c:\Users\john\wks\battlegame\Tanks\tank_blue_01_256.pngBy performing the update, John loads the latest revisions of the file into his workspace (check the History view). Now that the file is updated (status is Controlled and the latest changeset is loaded), he can now do a checkout:
The short answer is NO. And John does not have to worry about it. If he tries to checkout an out-of-date item, Gluon will display an error message indicating that the file is not up to date in his workspace.
Let's look at an example.
John wants to modify and check in the enemyGreen1.png file to the server. But, he first must load it into his workspace as we saw previously:
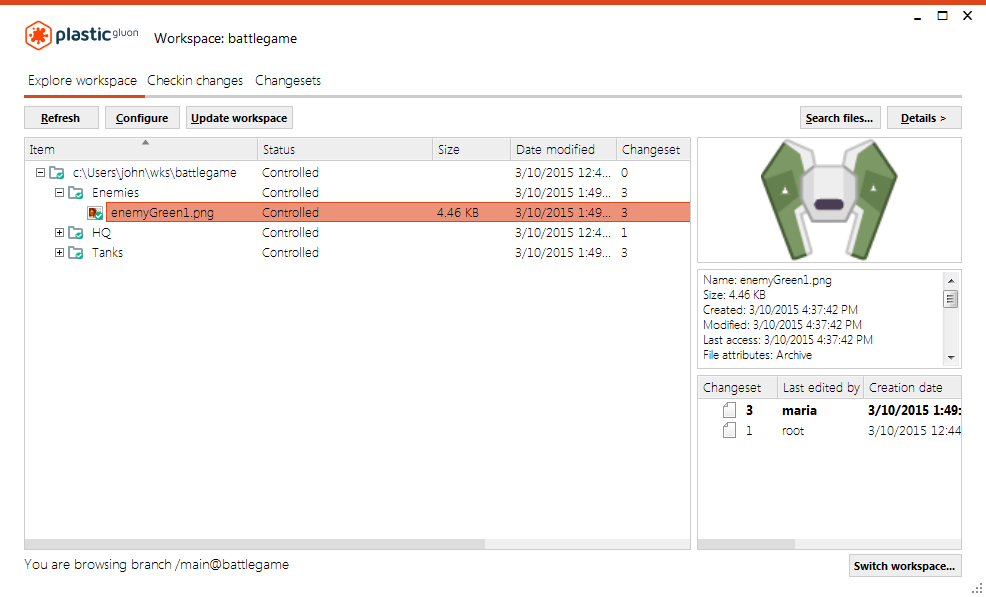
Remember how to load the item from the command line:
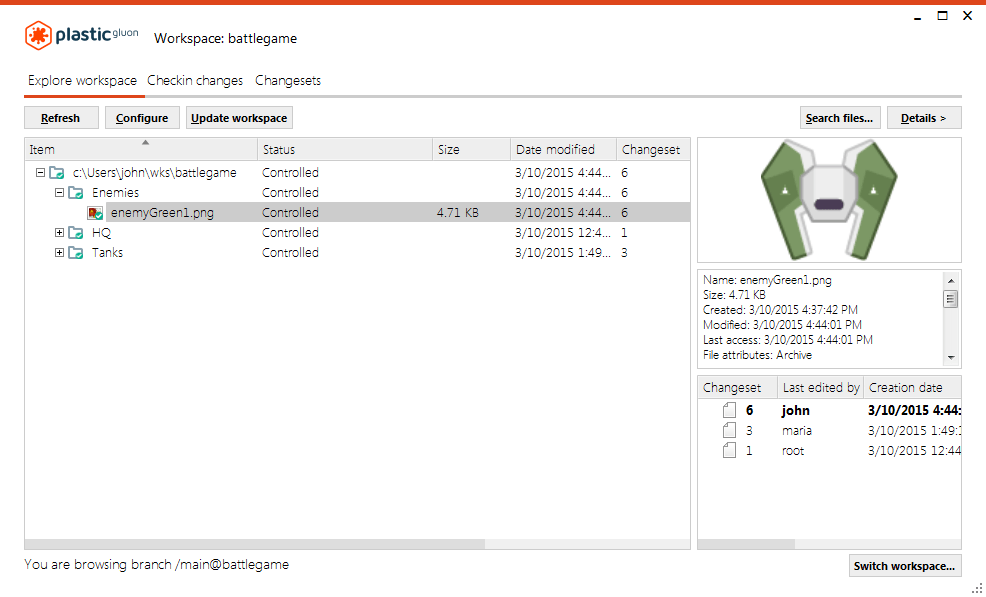
cm partial configure +/Enemies/enemyGreen1.pngJohn can now check out the file and make the modification (add a grey center point). After completing this change, he checks in the file, which results in a new changeset (changeset 6), as you can see in the History view:
Maria now realizes that she has to make a change to the same file. So, she tries to perform a checkout, but receives an error message indicating that the file is not up-to-date in her workspace:
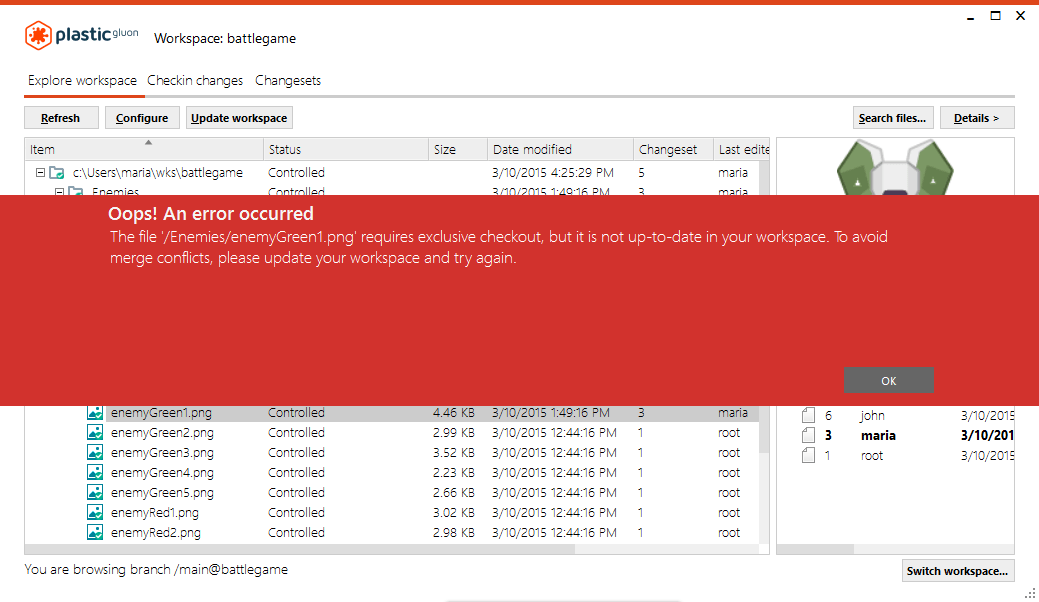
Maria will see the same error if she runs the checkout from the command line:
cm partial co c:\Users\maria\wks\battlegame\Enemies\enemyGreen1.png The selected items are about to be checked out. Please wait ... The file '/Enemies/enemyGreen1.png' requires exclusive checkout, but it is not up-to-date in your workspace. To avoid merge conflicts, please update your workspace and try again.If Maria had looked at the History view, she would have seen a newer revision of the file, updated by John. She forgot to update the file in her workspace, so she received the error. If she clicks the Refresh button, she will see that the file in her workspace is out-of-date:
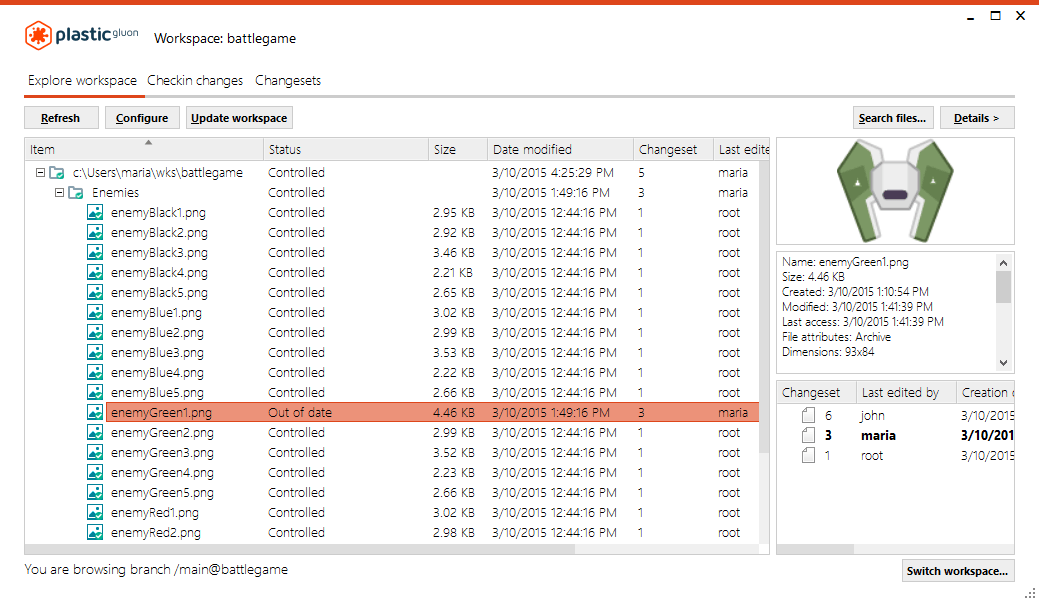
Note: Remember always to check the status of the file. If it is out of date, you must get the latest version before checking out a file.
After Maria changed the enemyGreen1.png file in her workspace, she also made some changes to the tank_blue_01_256.png image. She checked-in these changes, so newer versions of both files were created.
John has decided to edit the enemyGreen1.png file, but as you can see in his workspace, the file is out-of-date because Maria just checked it in after making her changes:
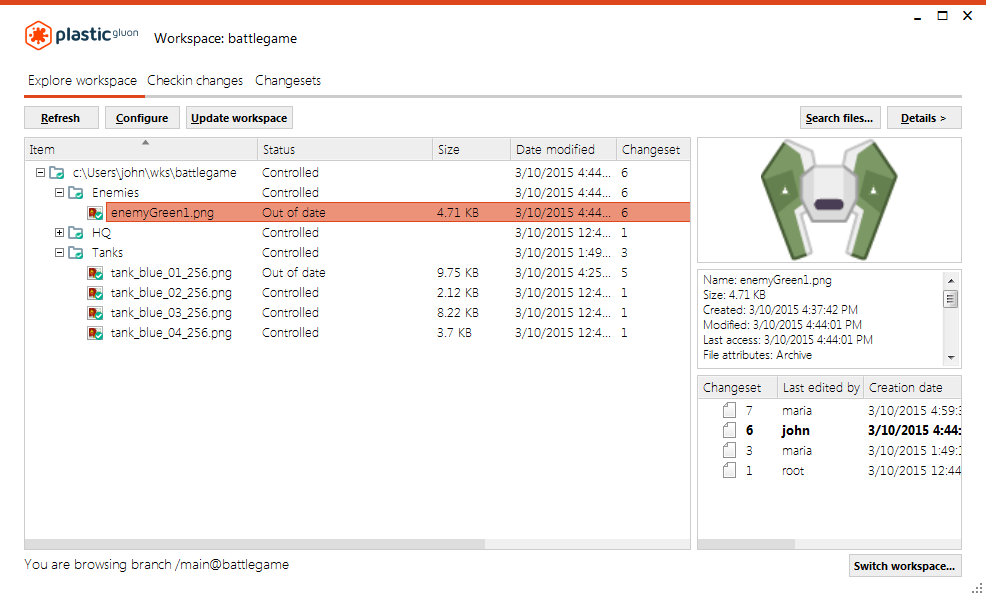
Since John is only concerned with the enemyGreen1.png file, he will need to perform an update (by selecting Update from the submenu) to checkout the file. After he performs the update, his workspace now shows that the enemyGreen1.png file is updated and loaded, however, the tank_blue_01_256.png picture still is out-of-date:
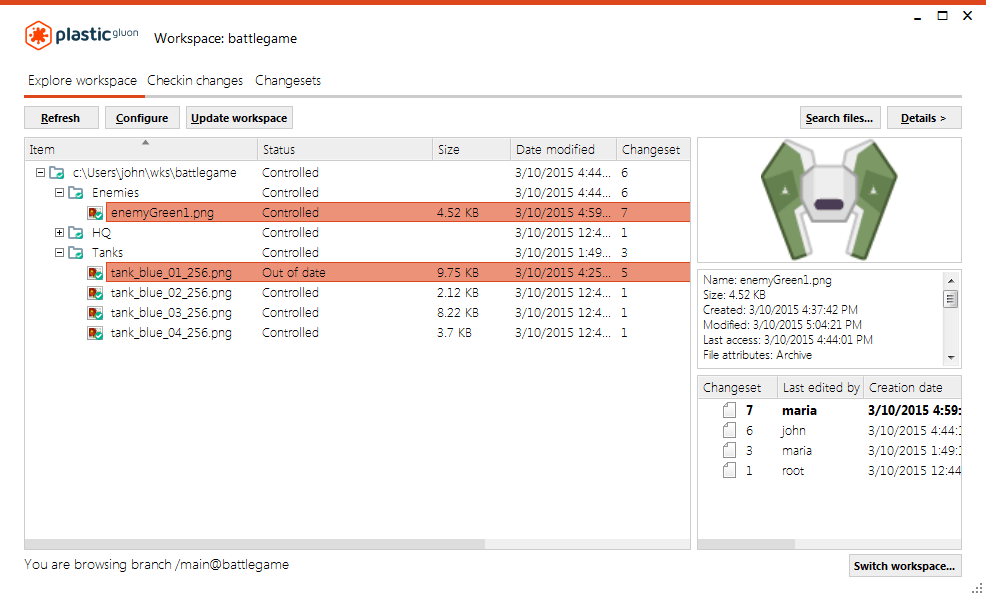
John can now perform a checkout on the enemyGreen1.png file and make the changes he wants. Once he is finished, he has to check in the changes and save them to the server (repository):
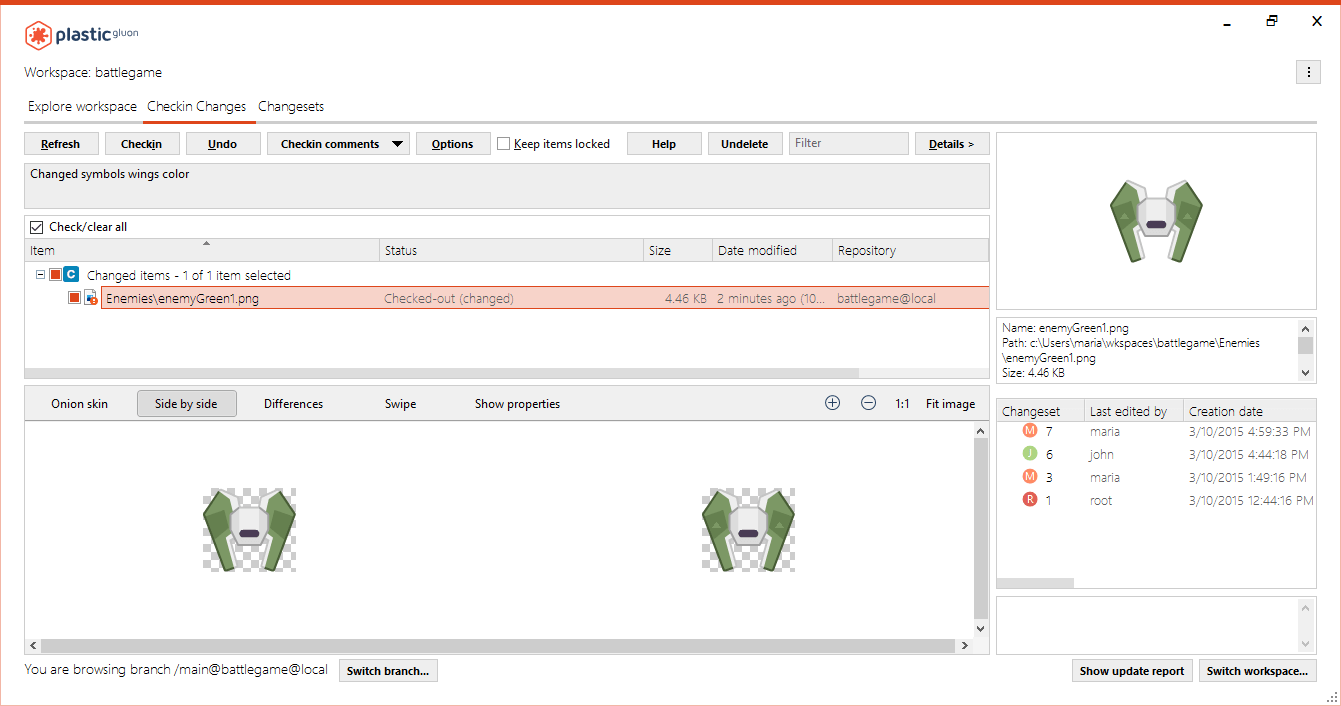
After saving the changes to the file, John's workspace updates, but the tank_blue_01_256.png file is still out-of-date. As you can see, Gluon enabled John to perform a checkin of the changed files even though there were files that were not updated in the workspace:

You may have noticed that there is an Update workspace button in your Explore workspace view:
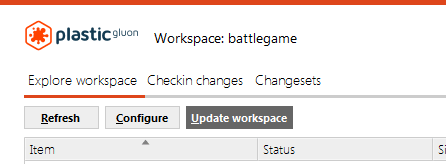
Clicking this button delivers the same result as selecting Update from the submenu but, instead of updating a specific file, the complete workspace (all files) will update so that none will be out-of-date.
You can perform an update workspace operation from the command line by running the following:
cm partial updateAs we learned previously, folders loaded into the Gluon Configuration Mode view are identified as either Manual Mode or Automatic Mode.
The mode assigned to each folder determines whether new files added to the folder will download into your workspace or not.
If John performs a checkout to add new changes to the enemyGreen1.png file, the status of the file becomes Checked-out (unchanged):
Remember how to checkout the file from the command line:
cm partial checkout c:\Users\john\wks\battlegame\Enemies\enemyGreen1.png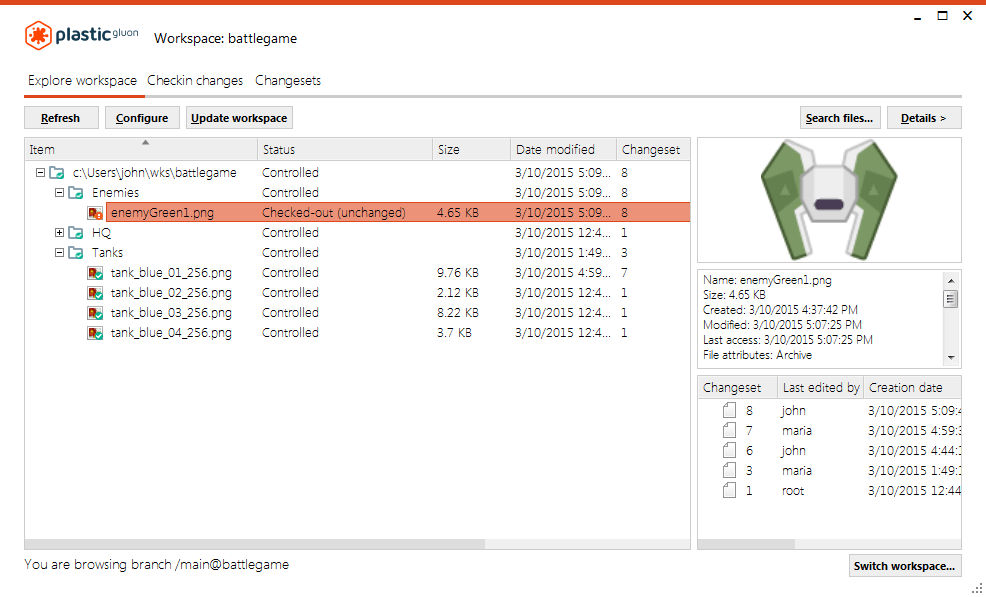
If he opens the file using his favorite editor, modifies it, and saves the changes, he needs to click the Refresh button to see the status updated to Checked-out (changed):
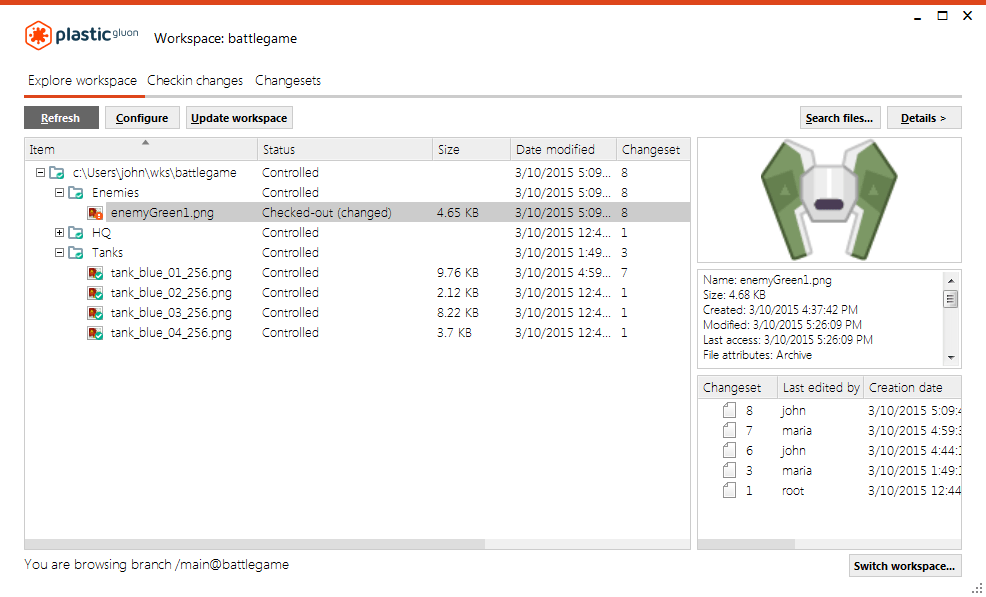
Unfortunately, John realizes too late that he was not supposed to make the change because he did not get the actual requirement from the Project Manager. So now he needs to undo what he did. Luckily, Gluon makes this very easy.
All John must do is right-click the file that he needs to undo, and the following submenu will open:
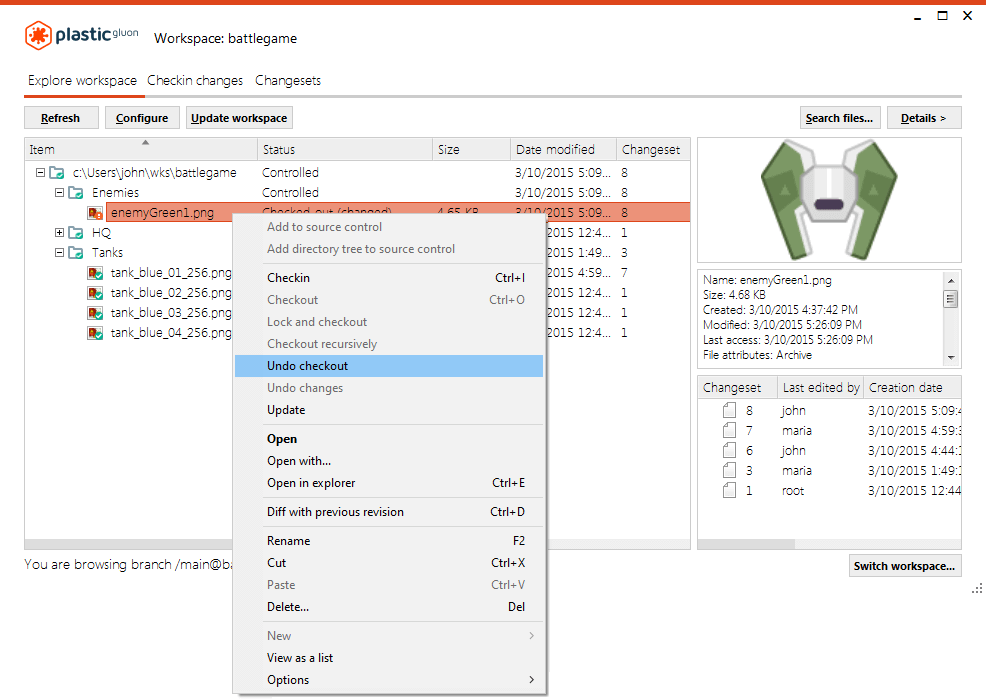
By selecting the Undo checkout option, Gluon displays a warning message indicating that all the changes done on the file will be discarded. By clicking the Yes button, the undo operation will remove John's changes, and the file will restore as if nothing was ever done to it:
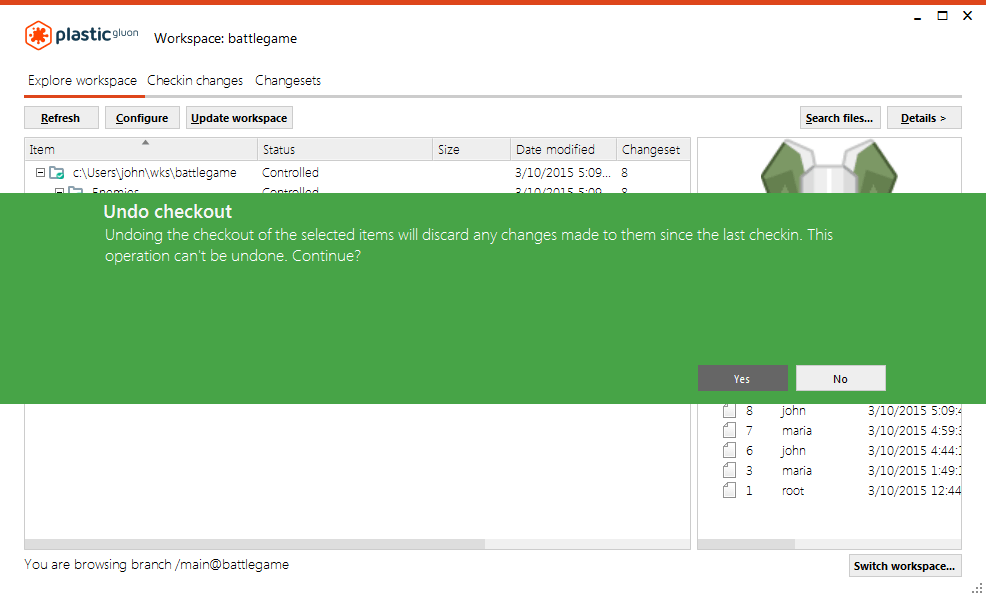
Run the following command to undo checkout from the command line:
cm partial undocheckout c:\Users\john\wks\battlegame\Enemies\enemyGreen1.pngThis operation can also be performed from the Checkin changes view by first selecting the files you want to undo and then clicking Undo:
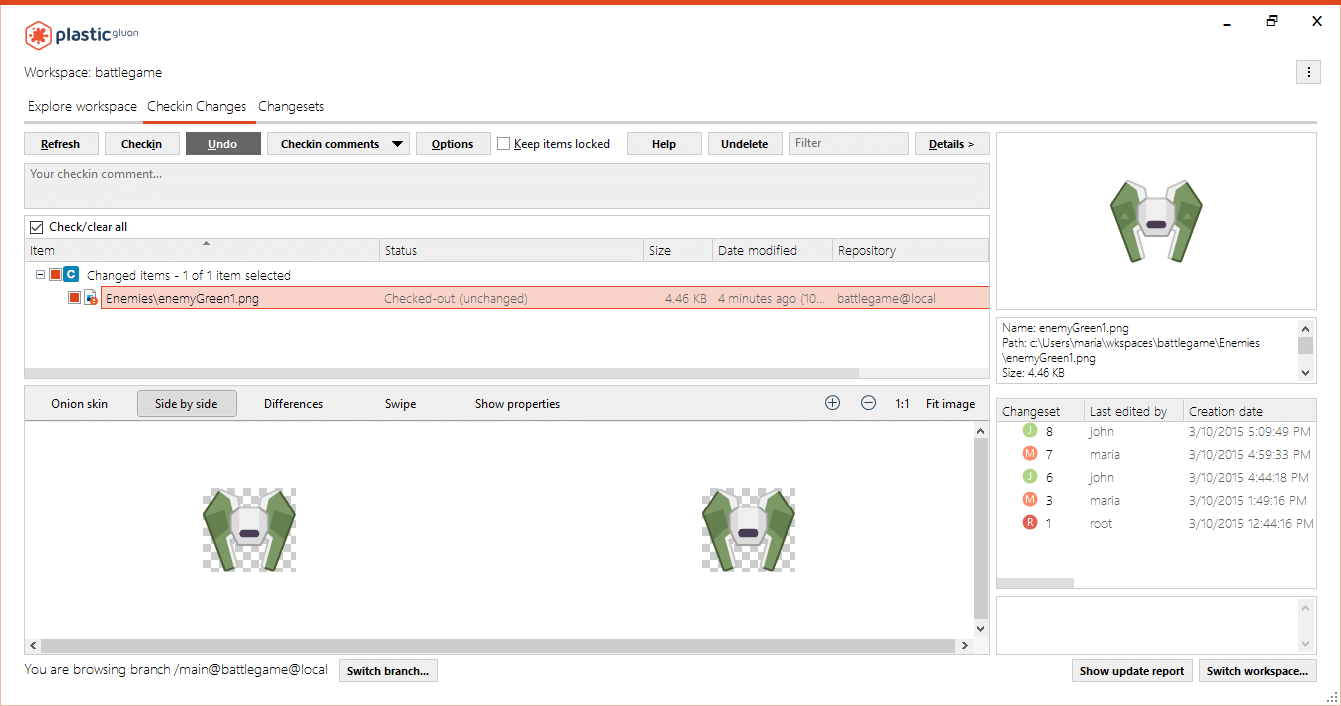
And you can get the same result by running the following command:
cm undochange Enemies\enemyGreen1.pngNote: This command doesn't require the partial option because it is not a Gluon-exclusive command; it's also used in Plastic SCM.
John can change the files by editing them using his favorite image editor and without performing a checkout action.
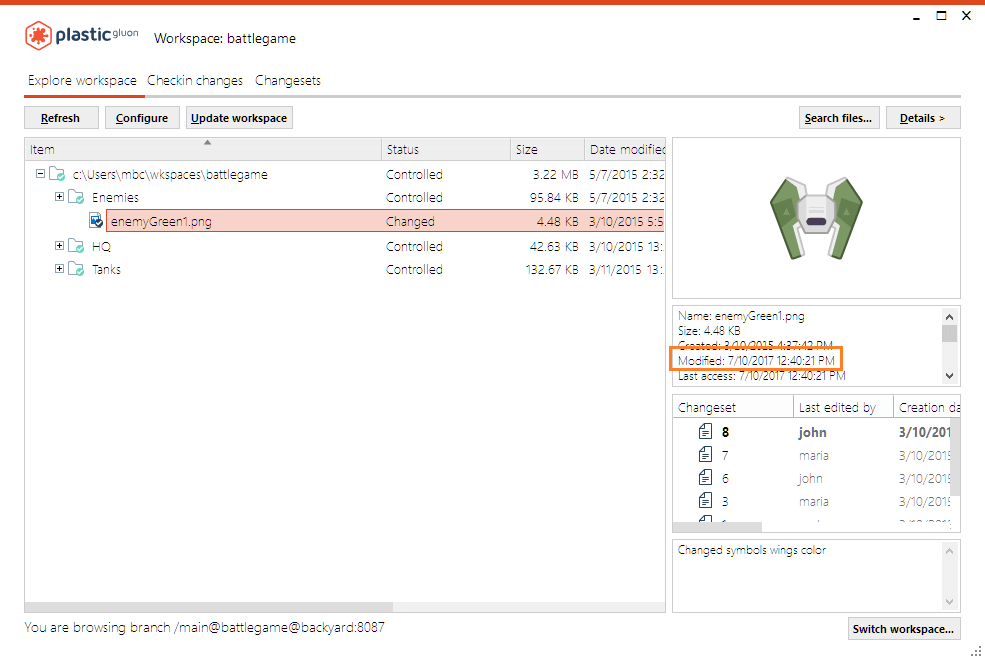
If John changes the file without checking it out, the file will have a new status, Changed:
Gluon offers John the Undo changes action to go back and discard the changes he applied:
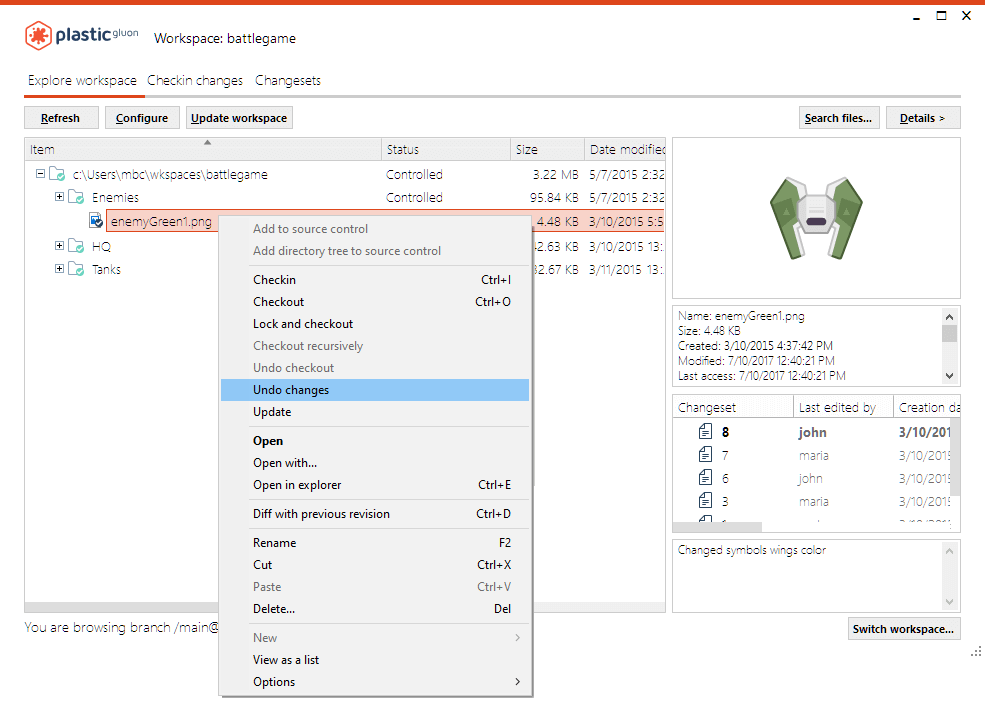
John can run the following command to undo the changes:
cm undochange Enemies\enemyGreen1.pngNote: This command doesn't require the partial option because it is not a Gluon-exclusive command; it's also used in Plastic SCM.
The team's Project Manager sent Maria the new design requirements to implement in the soldier_blue_04_256.png file. After loading the file in her workspace, she can perform the changes.
After completing her updates, she wants to show her colleagues the changes she made to the image. To do this, she can explain all these changes by, for example, reading the comments added on every check in action she performed. But, she thinks it might be better to show them graphically, which is a function supported by Gluon. So, let's take a look.
In the History view, she can see all of the changes that were made to the file.
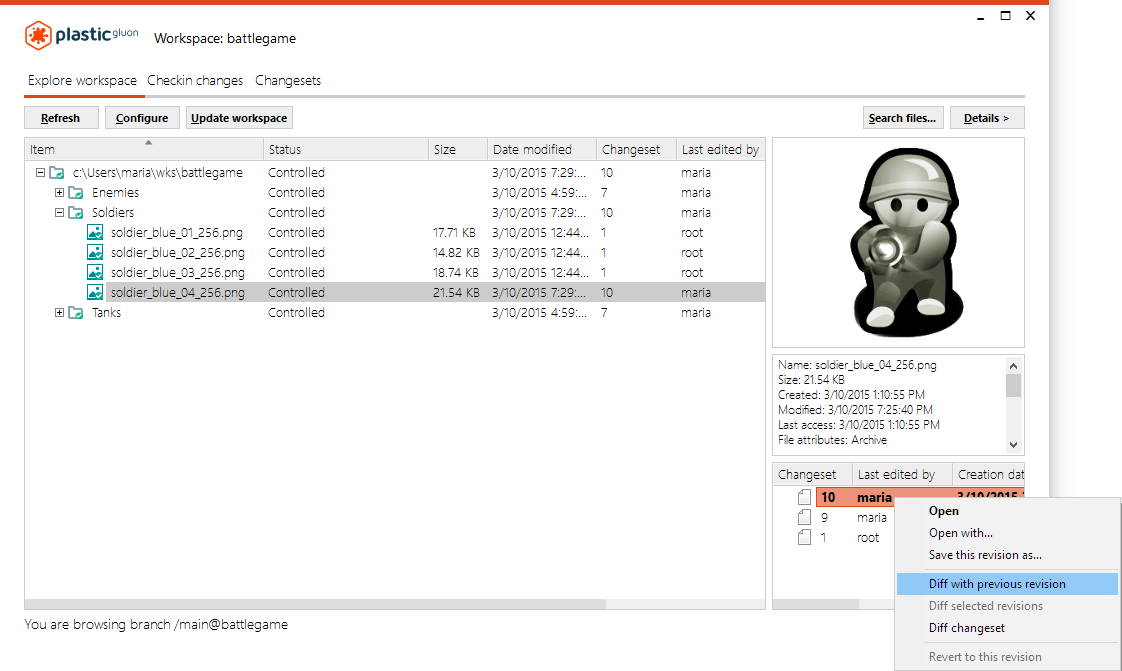
Or, she can run the following command:
cm diff Soldiers\soldier_blue_04_256.pngNote: This command doesn't require the partial option because it is not a Gluon-exclusive command; it's also used in Plastic SCM.
When she selected the option Diff with previous revision, a Side-by-side Diff Tool window opened and displayed the two images. In this window, she can see the differences between the images of the two selected revisions (changesets). On the right, it is the last revision. And on the left side, it is the previous revision. The changeset version will display in the caption above each image. She can also display the properties of each image so that she can see the differences between the last and the previous revision:
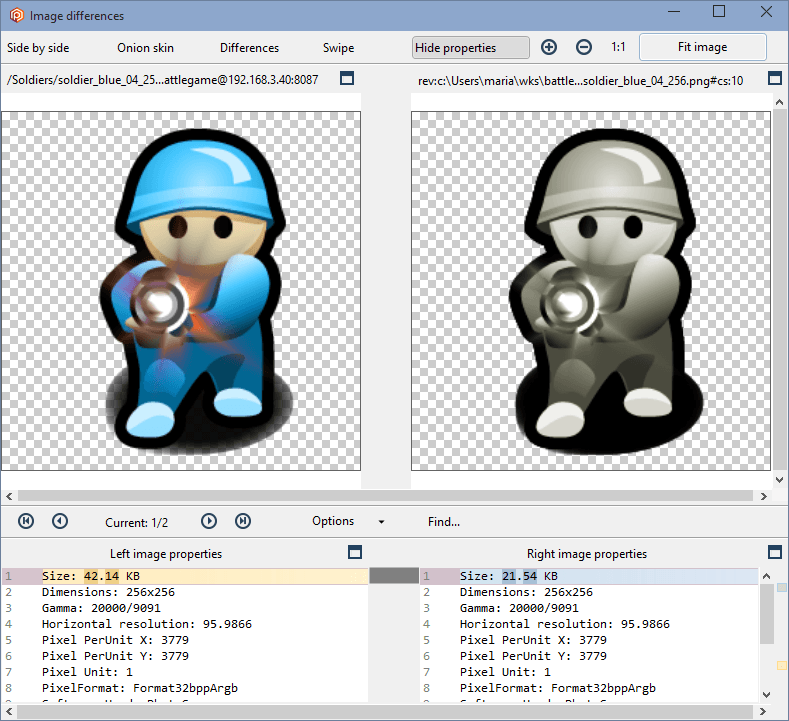
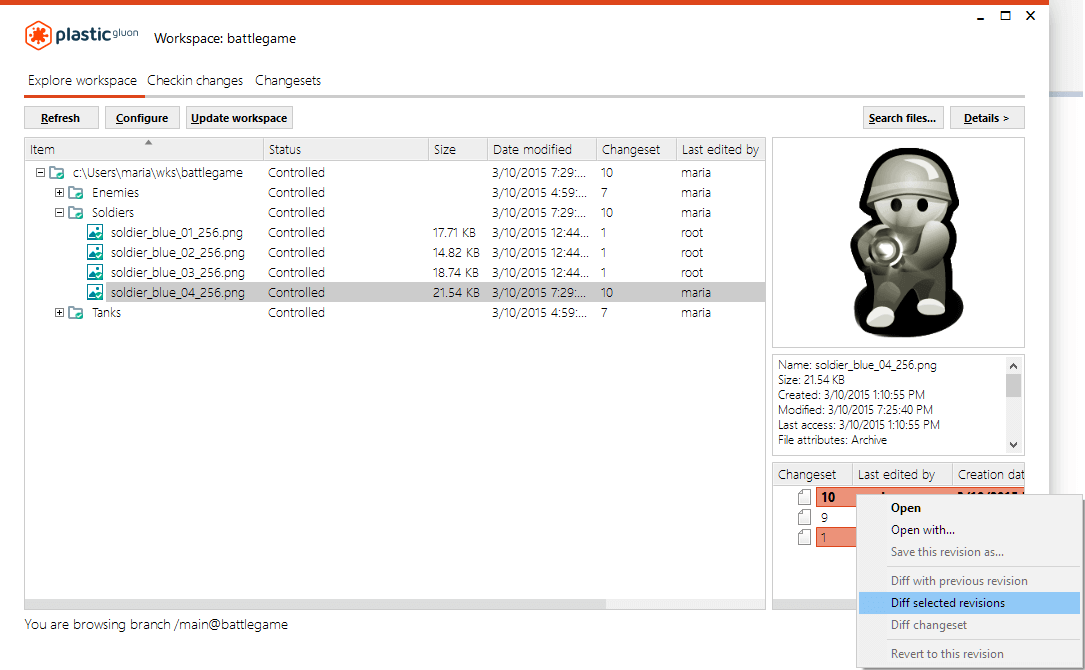
Or, she can run the following command:
cm diff Soldiers\soldier_blue_04_256.png#cs:1 Soldiers\soldier_blue_04_256.png#cs:10Note: This command doesn't require the partial option because it is not a Gluon-exclusive command; it's also used in Plastic SCM.
Gluon will then launch the Side-by-side Diff Tool and display the differences. Maria's colleagues can now see how the first revision looked compared to the last revision. By choosing the Swipe option, she can use the scrolling action to clearly show the differences in a split view:
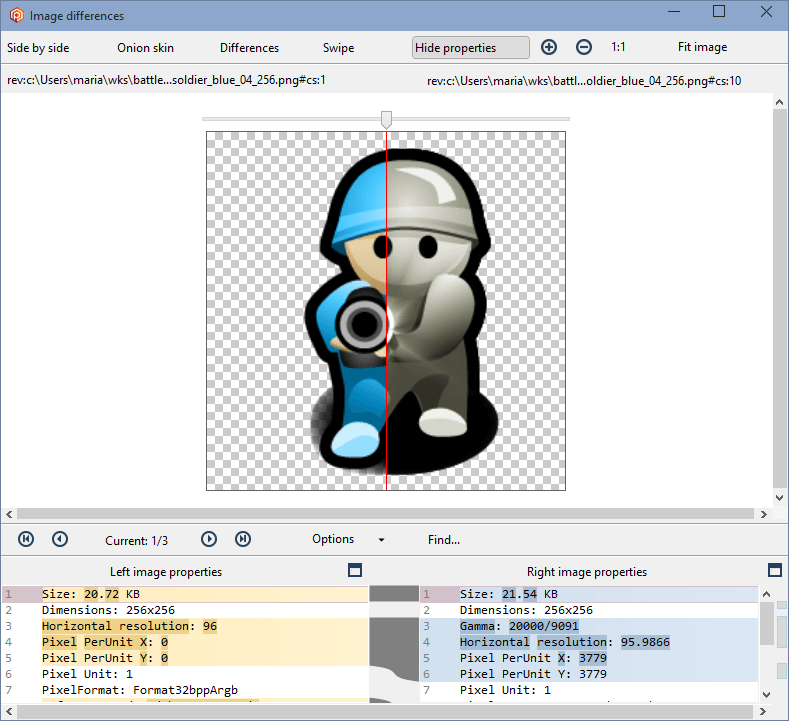
Find information about the Side-by-side Diff Tool and binary files. As you can imagine, the Side-by-side Diff Tool will launch too if you want to see the differences between two text files. Read how the Side-by-side Diff Tool can help you.
The Side-by-side Diff Tool is helpful to find out what every user did in every change.
Gluon lets you also see the differences between your workspace content and the changes you are performing. Select one of these actions:
Let's imagine that Maria has checked out the soldier_blue_03_256.png file. Then, she opened it with her favorite editor and saved some changes. If she wants to see the differences between these changes and the workspace content, she can run the following command:
cm diff Soldiers\soldier_blue_03_256.pngNote: This command doesn't require the partial option because it is not a Gluon-exclusive command; it's also used in Plastic SCM.
Maria can also save a given revision of a file to her computer.
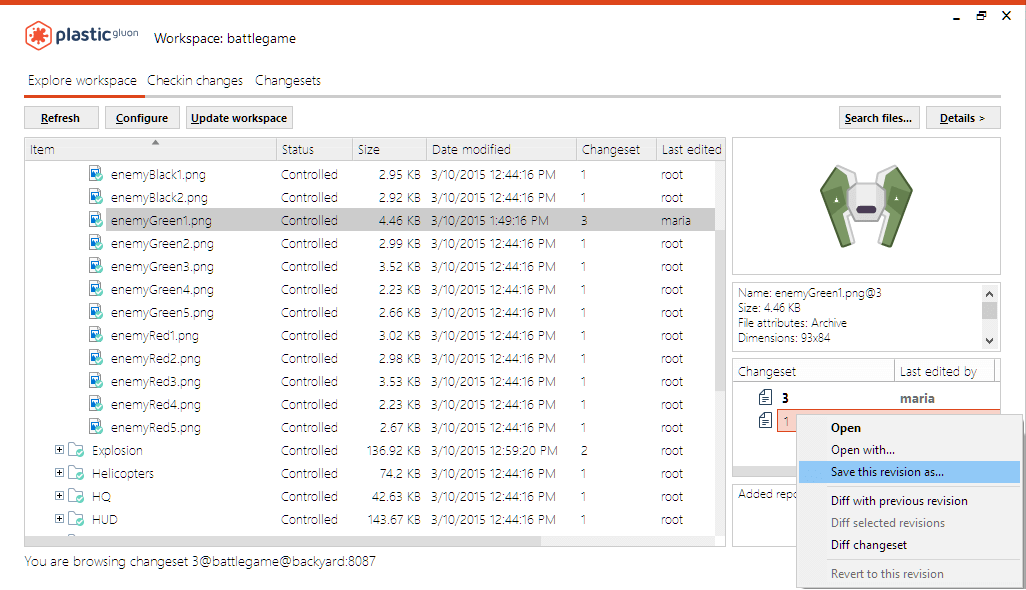
She can also save a specific revision from the command line using the following command:
cm cat Enemies\enemyGreen1.png#cs:1 --file=Enemies\enemyGreen1.png#1.pngNote: This command doesn't require the partial option because it is not a Gluon-exclusive command; it's also used in Plastic SCM.
Looking back on the last two changes that Maria made to the soldier_blue_04_256.png file, the team decided that the image still does not have the design they are looking for. They want to keep the original color and add some contrast. To do this, Maria could checkout the file and apply colors and actions to recover the original blue color. But, it might be quicker and easier to go back to a previous revision, which is a function supported by Gluon. So, let's take a look.
The first step is for Maria to go to the History view and locate the revision that she wants to go back to, in this case, changeset 1. Then, she right-clicks it and selects the Revert to this revision option:
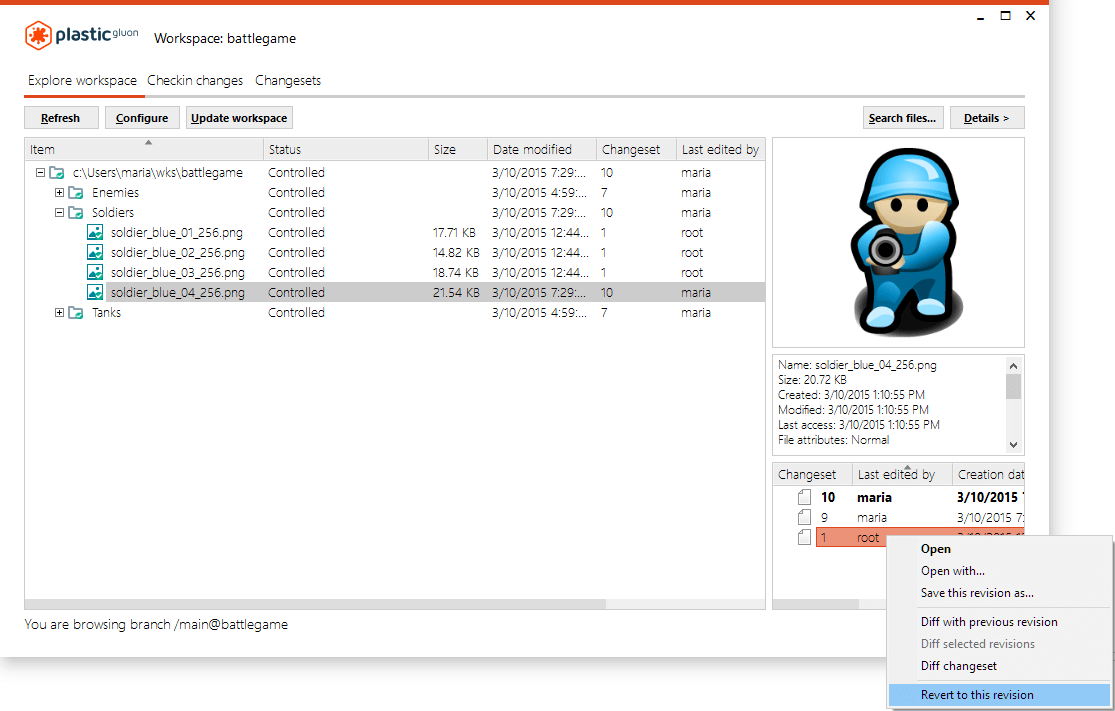
Or, she can run the following command:
cm revert Soldiers\soldier_blue_04_256.png#cs:1Note: This command doesn't require the partial option because it is not a Gluon-exclusive command; it's also used in Plastic SCM.
when selecting Revert to this revision, a dialog box opens asking Maria to confirm the revert operation:
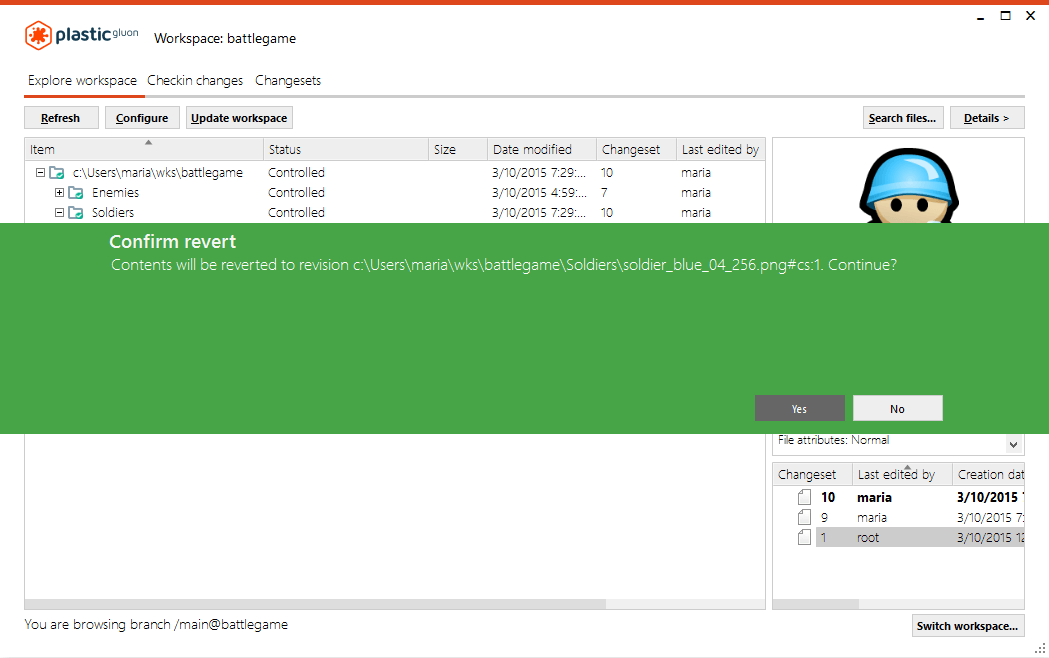
As a result of Maria's revert confirmation, the following actions took place in the workspace:
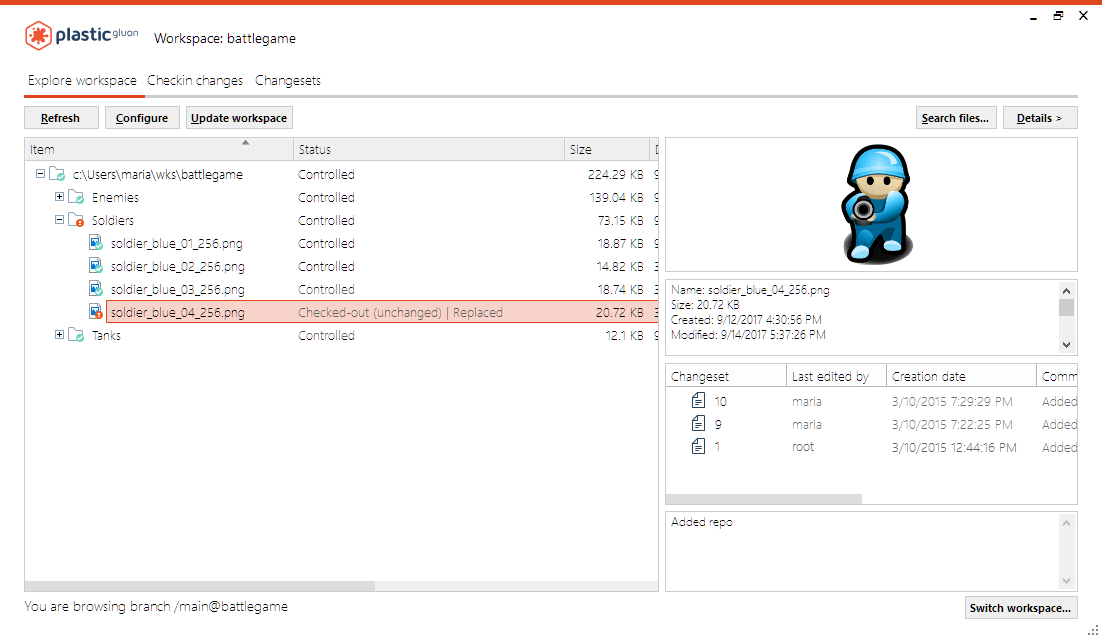
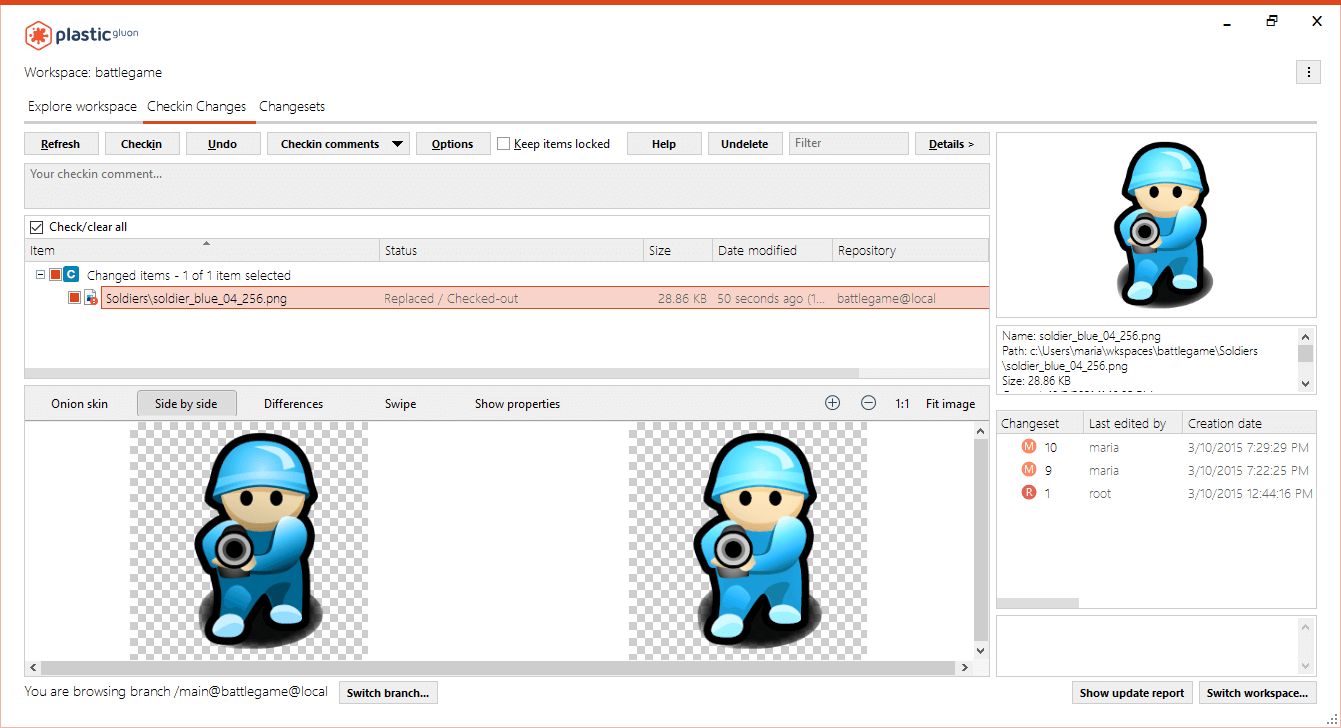
Once Maria adds the contrast and saves the change, she must perform a checkin operation. In the Checkin changes view, you will see a new status assigned to this item: Replaced/Checked-out:
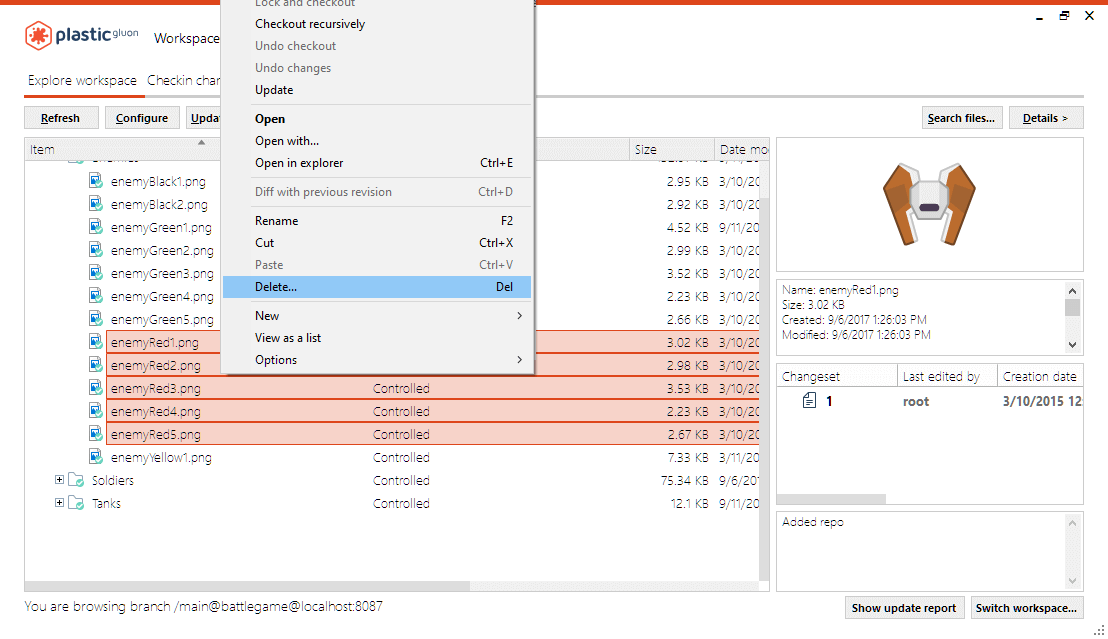
Maria has decided to delete all the "red enemies" items that she doesn't need anymore. She knows that this operation will remove these items from the server. So, she selects the items to remove and right-clicks the Delete option:
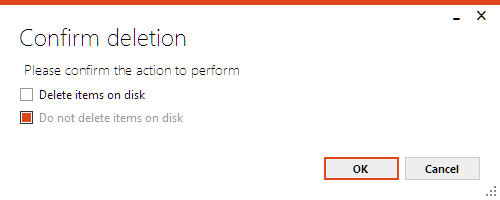
A new message will appear asking her to confirm the deletion. Maria has to select if she also wants to remove the items on the disk or only delete them from the server. She wants to keep them on the disk. So, she selects the right option and clicks OK:
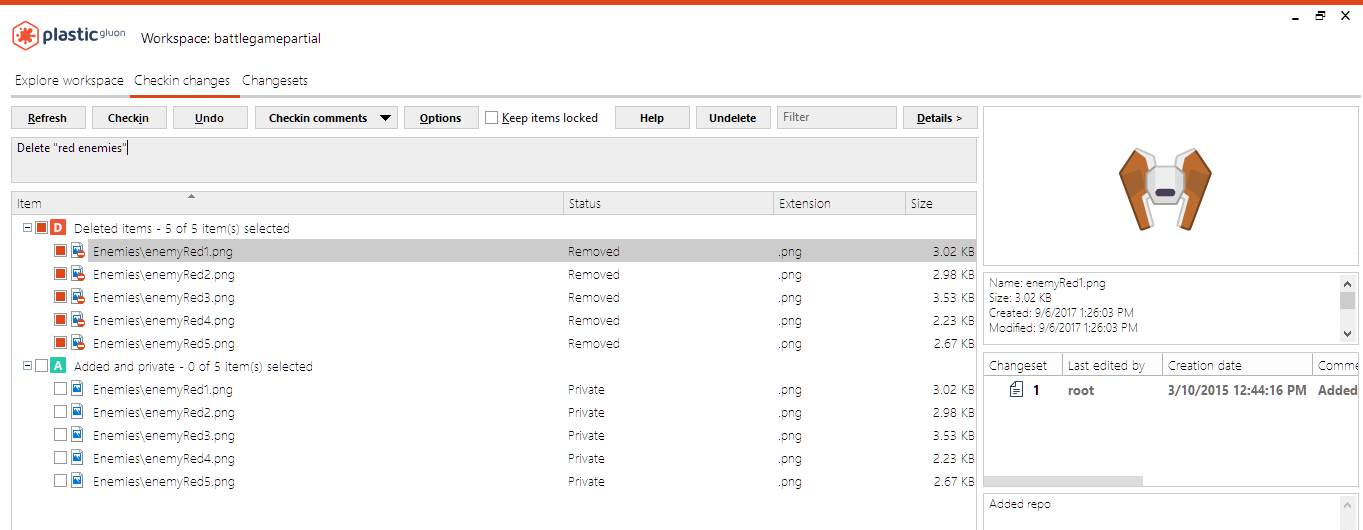
Now, she must checkin the changes to save them into the server. As you can see, the items appear as Private because Maria decided to keep them on the disk:
After the checkin action, Maria will see these items in her workspace as Private items:
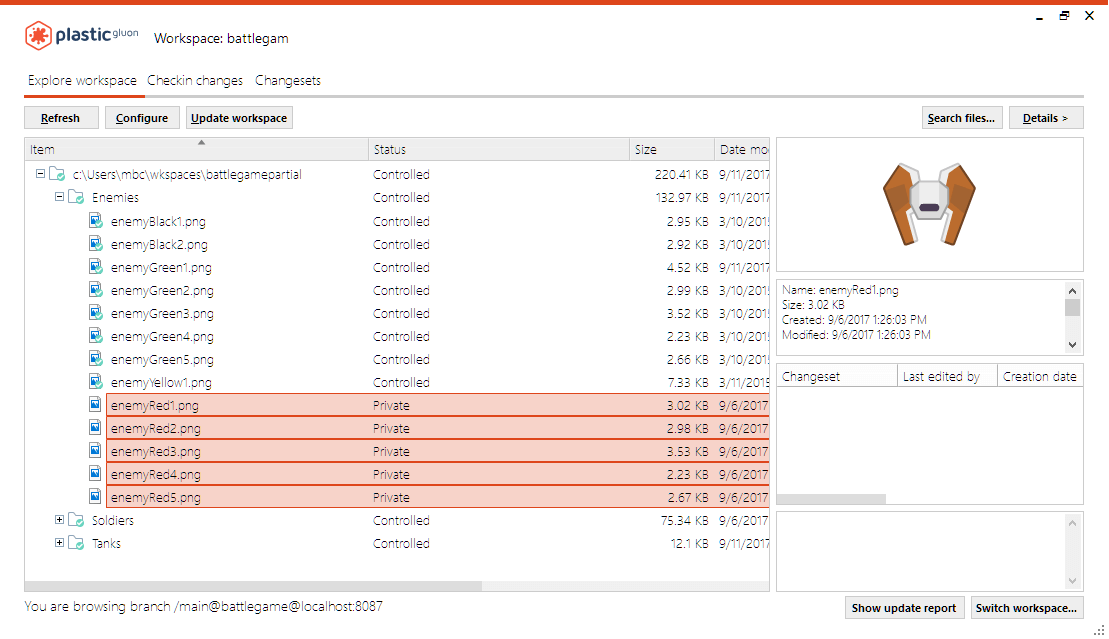
Maria can remove these items (and keep them on disk) from the command line by running the following:
But, where can John see how many deleted revisions there are? Is there a way to recover them?
If John opens the Checkin changes view, he'll see the Undelete button. John clicks this button and a list of the deleted revisions displays. The list can be filtered by owner and by date:
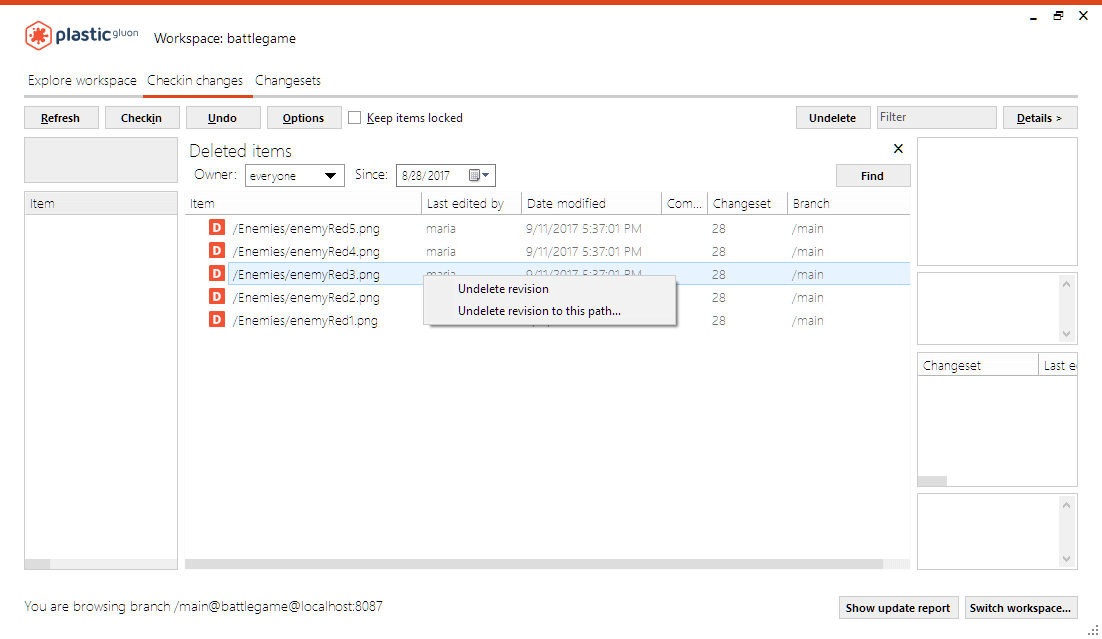
To recover or undelete a deleted revision, he right-clicks a revision and selects one of the following options:
Run the following to undelete a revision from the command line:
cm undelete serverpath:/Enemies/enemyRed5.png#cs:27 Enemies\enemyRed5.pngAs you can see, John will undelete the changeset 27 related to the enemyRed5.png, and he is going to place it in the Enemies folder. The changeset 28 was created when those "red enemies" were deleted, so there is no revision linked to those files (no changes were made while deleting files).
Note: This command doesn't require the partial option because it is not a Gluon-exclusive command; it's also used in Plastic SCM.
The Project Manager has some new requirements for Maria to do, including adding new figures related to the background textures in the story game. First, Maria needs to create a new folder called Textures. She can do this from the explorer, but this is also a function supported by Gluon. So, let's take a look.
Gluon enables Maria to create new folders and new files as needed. A submenu opens by right-clicking the parent folder, and Maria selects the New option, which opens another submenu. From here, Maria selects the Directory option so that she can create a new directory:
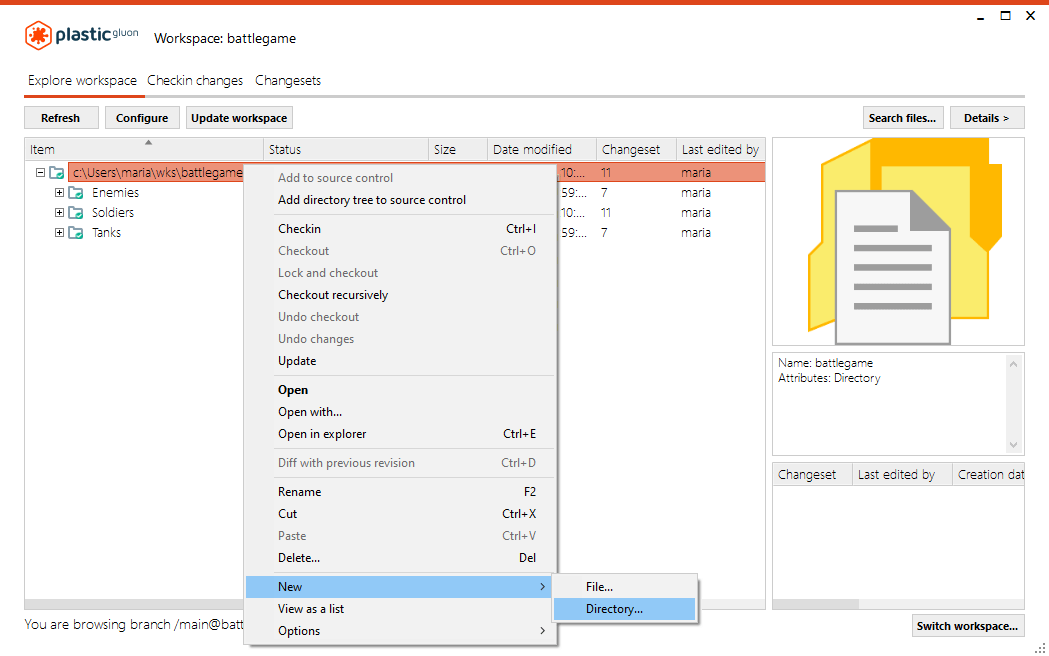
She then enters the name of the new directory and clicks OK:
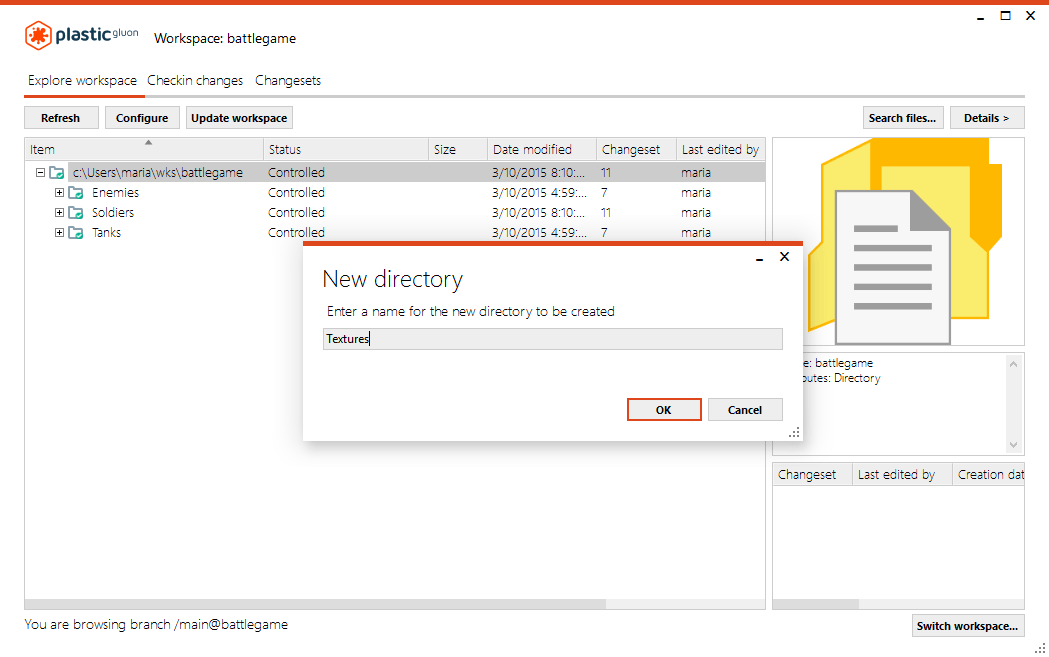
This action creates a new folder called Textures with a Private status, which means that it is in Maria's computer, but it's not under version control. Since the repository on the server does not control it, no one can access it:
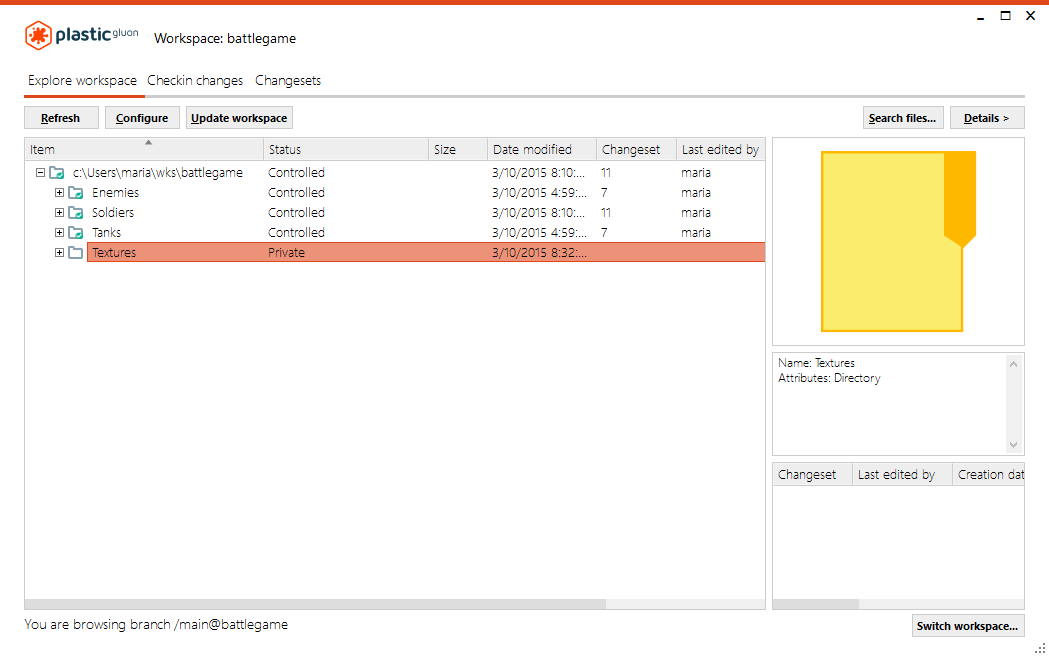
Maria used her design tool to create a new figure called text_wall_01.png which she saved in the new Textures folder. If she does a refresh on the Explore Workspace view, she sees the following:
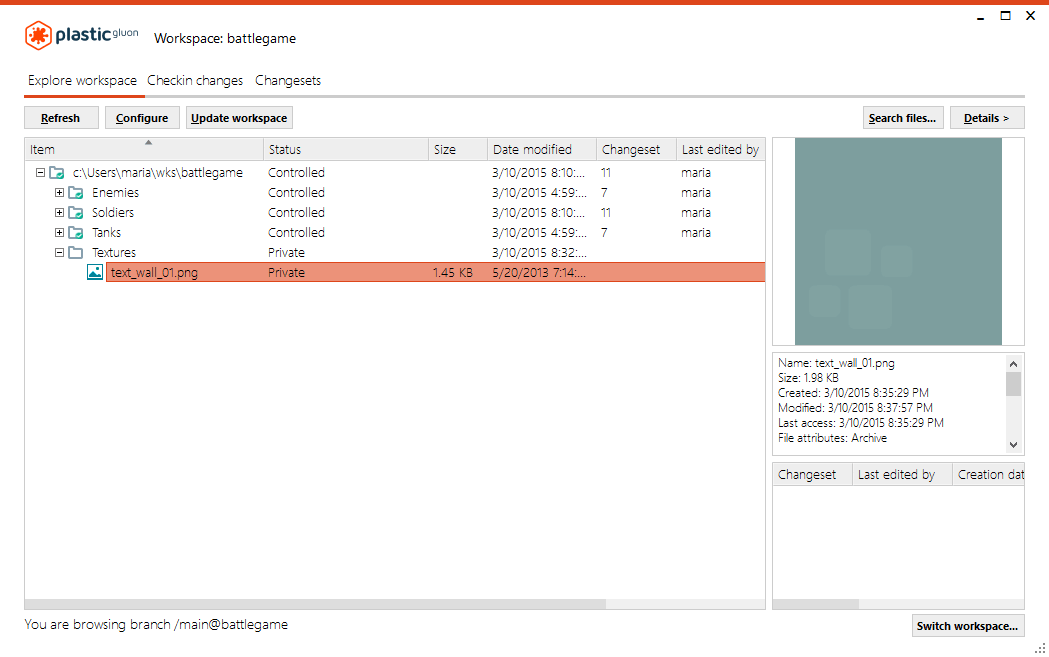
As you saw previously, with a new folder, this new file is private as well. You should also note that there were no revisions in the history view because it isn't under version control. So, the server does not know anything about the file.
Once Maria creates the file, she needs to save it into the server repository. Gluon provides two methods for accomplishing this. So, let's take a look.
Note: If you compare both the Explore workspace view method with the Checkin changes view one, you will see some differences in the status and icons associated with the selected items. Both methods will result in saving the items selected to the server.
If Maria selects the new folder and right-clicks it, she will be able to choose the option Add directory tree to source control from the submenu:
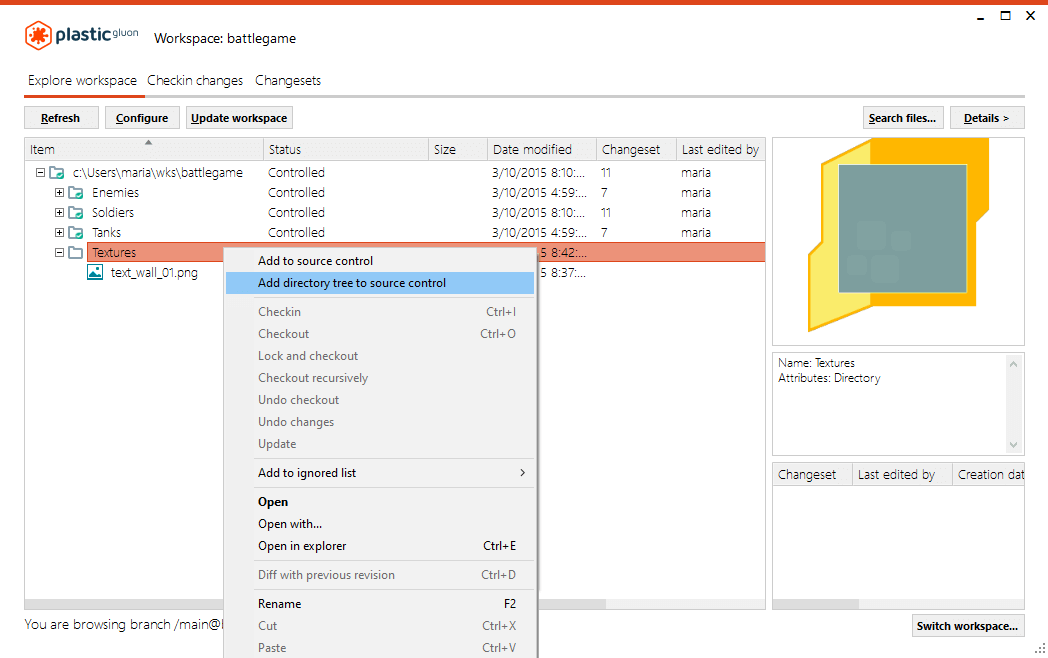
This action marks the new folder and all its associated files to be added to the repository. Each of the files to be added is marked as checked-out. Upon closer inspection, the file size is zero. This is not a problem because the file is not yet under source control:
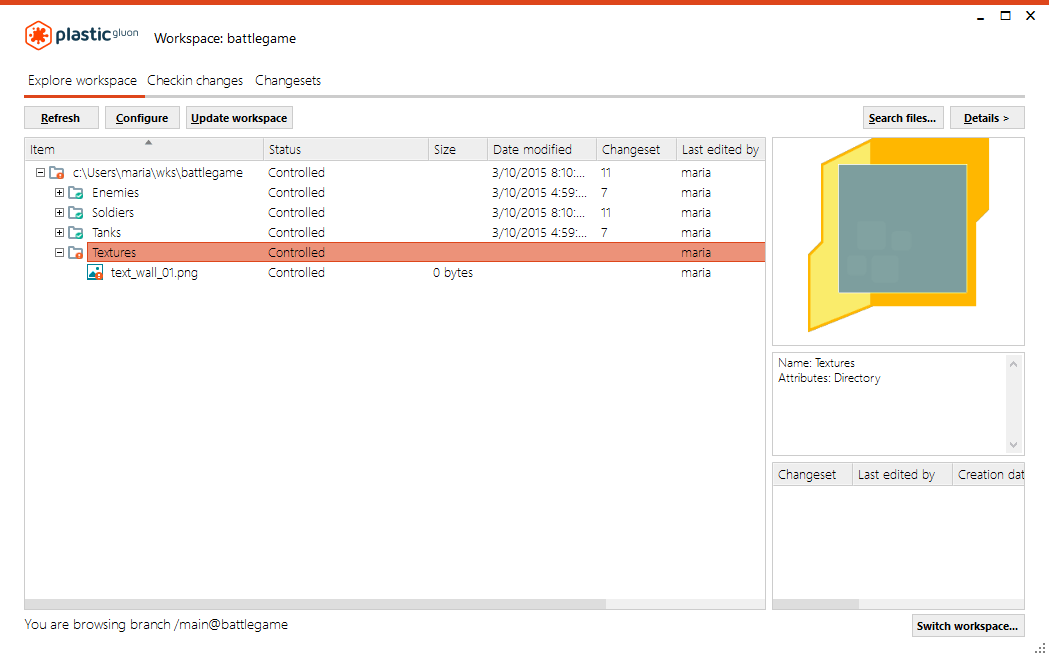
Maria can also add the directory tree to the repository by running the add action from the command line in the following way:
cm partial add -R TexturesTo complete the operation, Maria must run a checkin operation on those items. In the Checkin changes view, Maria sees the new items selected and under the Added and private category with status Added and marked with the Checked-out icon. Maria now must enter a comment and click Checkin to save the new items to the server:

And let's remember how to save all the items from the command line:
cm partial checkin -c="Added textures" --applychangedBy clicking the Checkin changes tab, Maria sees the new items under the Added and private category:

Using this method, Maria must complete the following steps to save the new items to the server:
The steps above match the commands that we saw in the previous method. This means that you have to run both commands:
Now that you are familiar with adding new items to the repository, let's look at how the Manual and Automatic modes work when someone else adds a new item.
John received new requirements from his Project Manager, which means that he must create new yellow figures related to the enemies and tanks design.
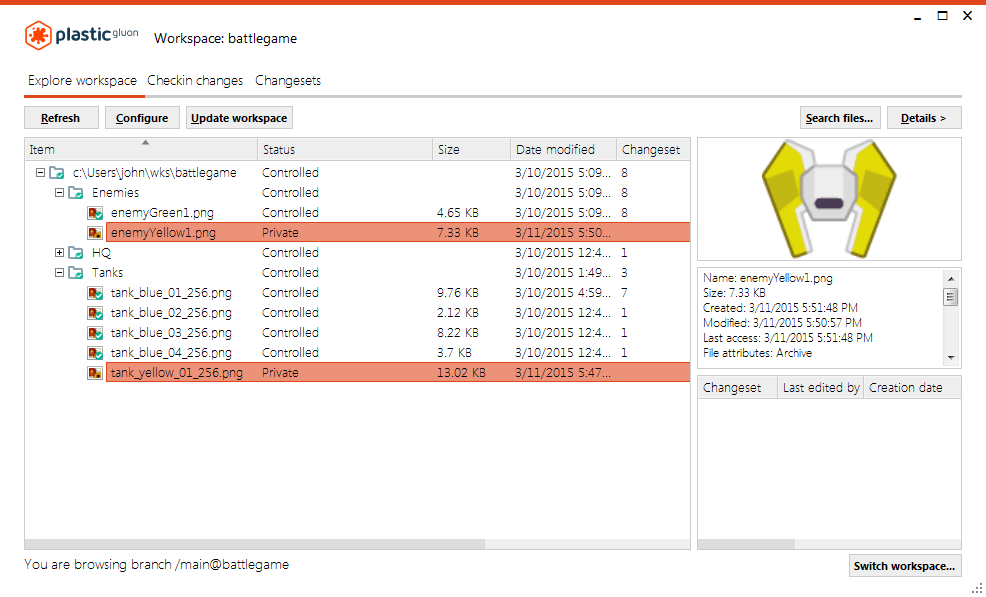
To create them, John uses his design tool and then saves his changed files to the Enemies and Tanks folders. As you can see, these files have the status Private:
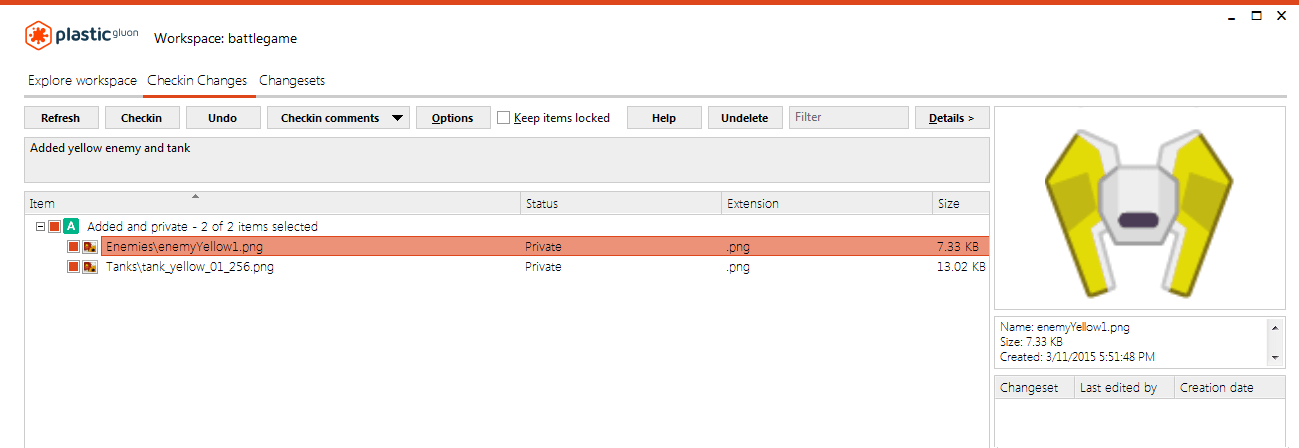
Once John completes his changes, he must add the files to the repository using the Checkin changes view method to perform this action:
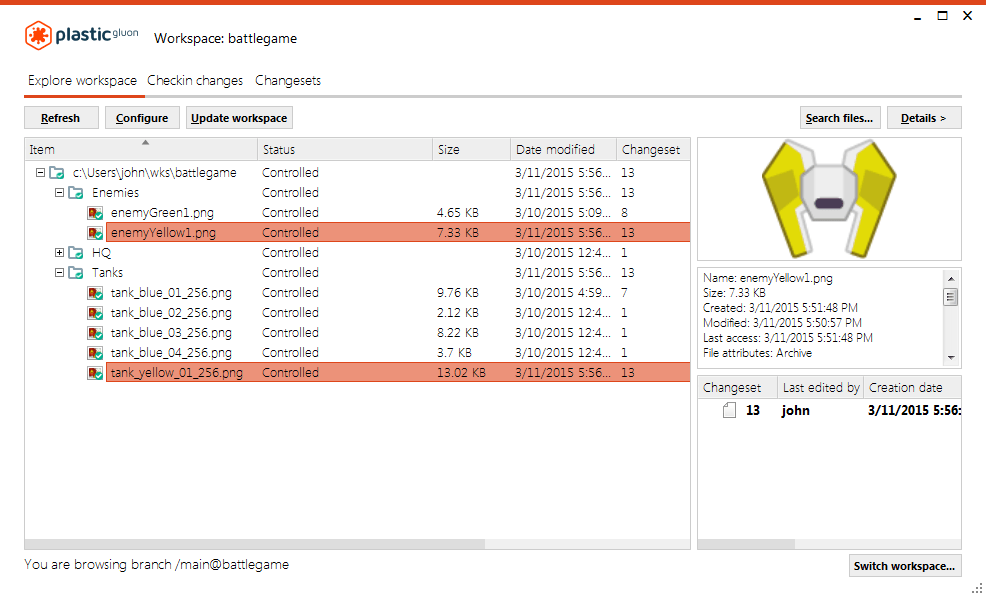
Once these new files are added to the repository, their status changes to Controlled:
As a reminder, previously, Maria loaded the complete Enemies folder (Automatic mode) and several files in the Tanks folder (Manual mode), so this is what her workspace looks like now:
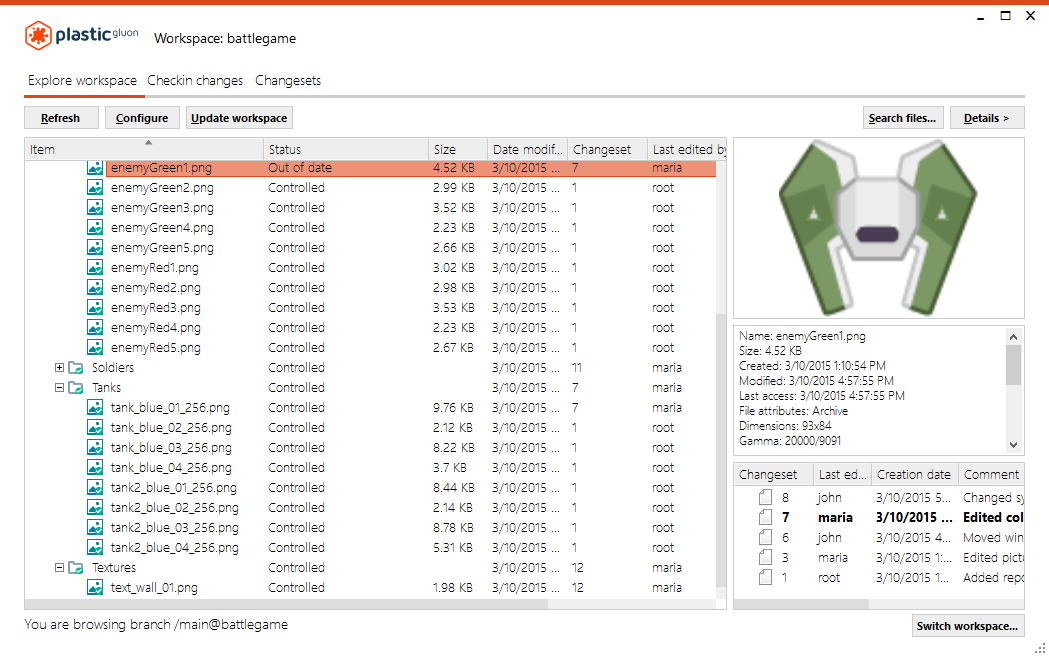
As you can see, Maria doesn't have the new yellow files in her workspace because they are in the repository, and she hasn't performed an update yet. You will also notice that the enemyGreen1.png file is out-of-date, but after Maria performs the Update workspace action, her workspace now looks like this:
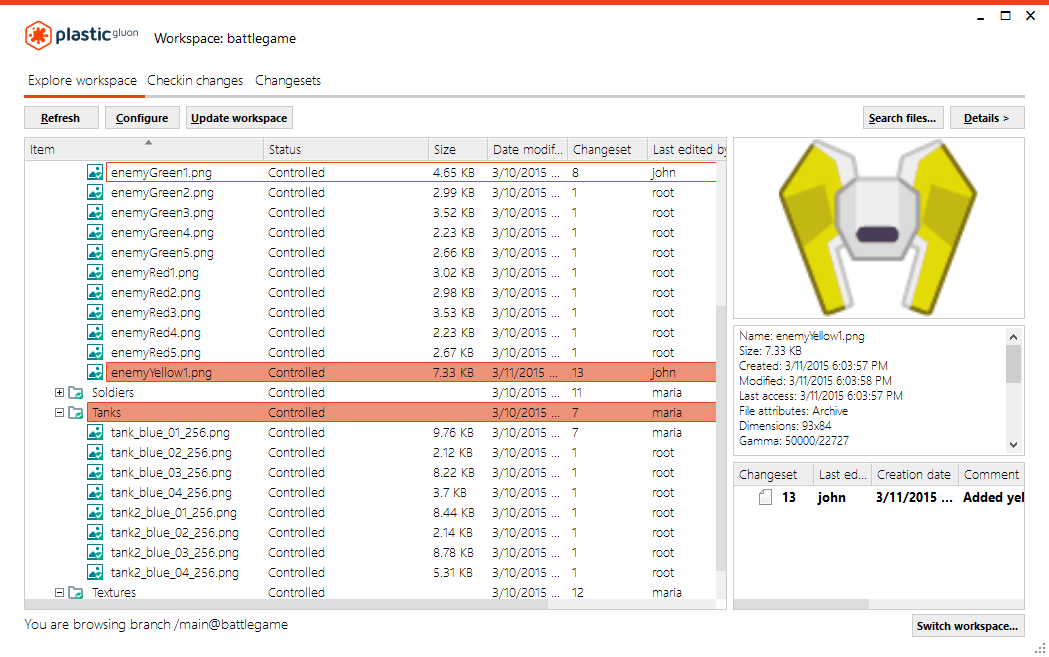
Let's take a look at what happened when Maria performed the Update workspace action:
Gluon creates a new changeset every time you run a checkin action and the involved files change.

Since you can perform a checkin with one or several items, a typical changeset will involve one or more changes.
At any point along the way, you can review the changes done in every changeset by comparing one with a previous one. The History view shows all the changesets for every item. Let's take a look at how this works.
The enemyGreen1.png file has several changesets associated with it. Maria sees in the History view that she created changeset 3 as well as others. To view the contents of changeset 3, she right-clicks the changeset 3 in the History view and selects the Diff changeset option from the submenu:
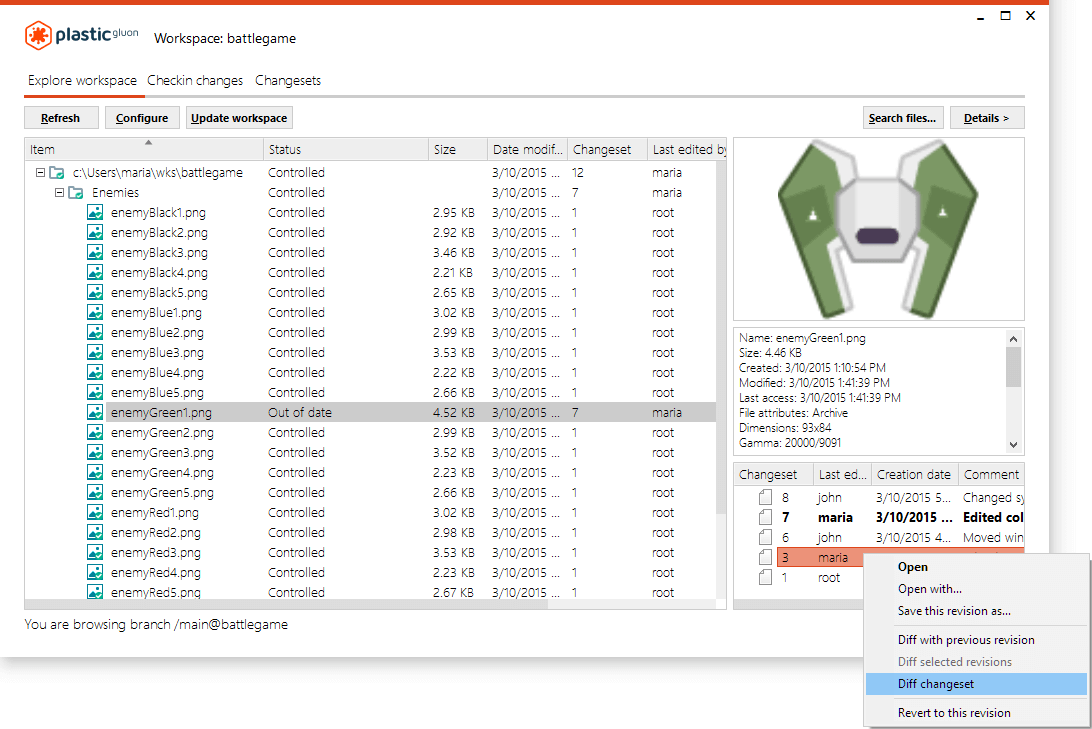
Maria can run the following command to get the contents of changeset 3:
cm diff cs:3 --format="{status} {path} {owner} {date}" C "Enemies\enemyGreen1.png" "maria" "3/10/2015 1:49:16 PM" C "Tanks\tank_blue_01_256.png" "maria" "3/10/2015 1:49:16 PM"You can see that Maria changed the files enemyGreen1.png and tank_blue_01_256.png where changed (C) on that changeset.
Note: This command doesn't require the partial option because it is not a Gluon-exclusive command; it's also used in Plastic SCM.
This will open a Diff Window that displays the "content" for the changeset 3. The Diff Window has two sections:
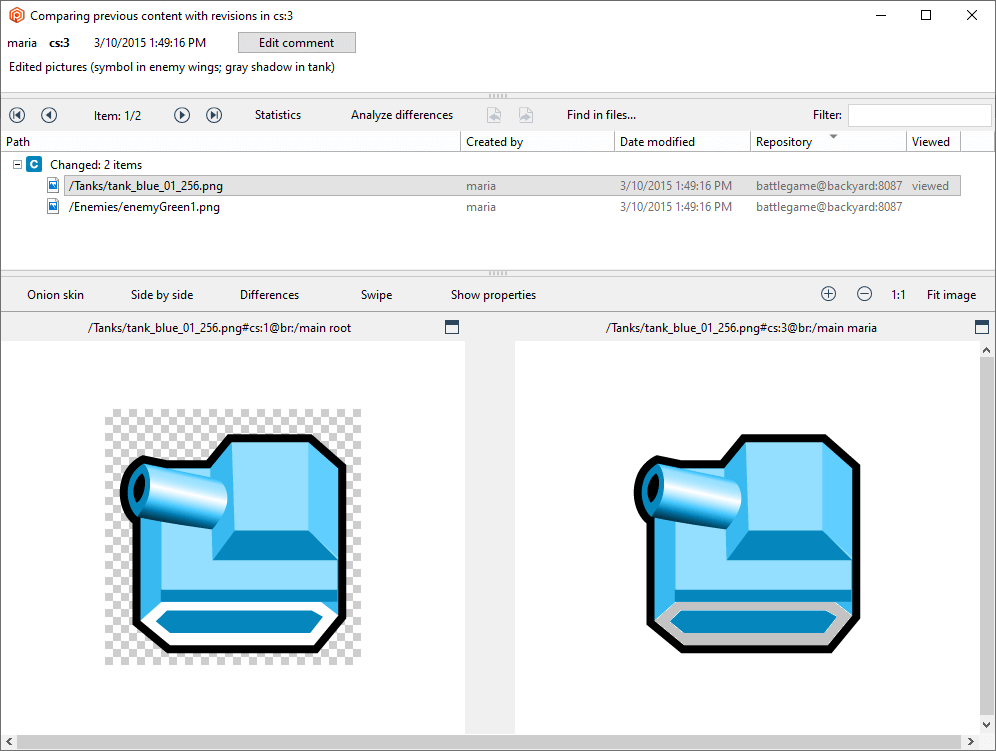
For example, if Analyze differences is clicked, two new columns (Status and SLOC) appear in the top section and display information about the text lines if the selected file is a text file.
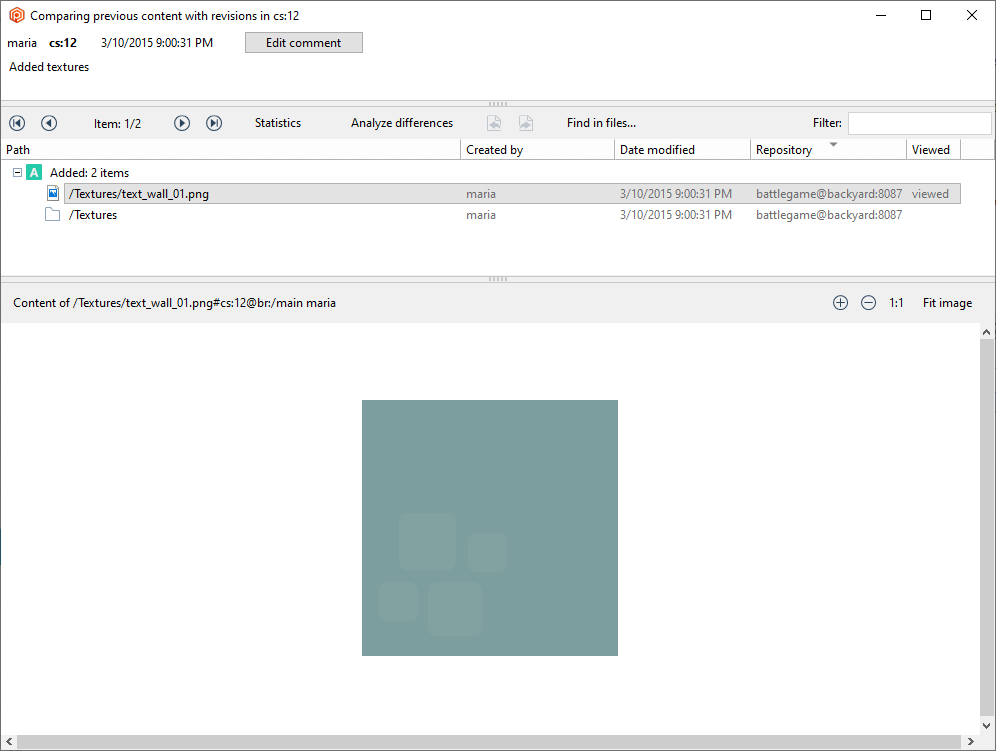
If a Diff changeset action is performed on the changeset 12, the result displays the items uploaded (added) by Maria in the previous chapter:
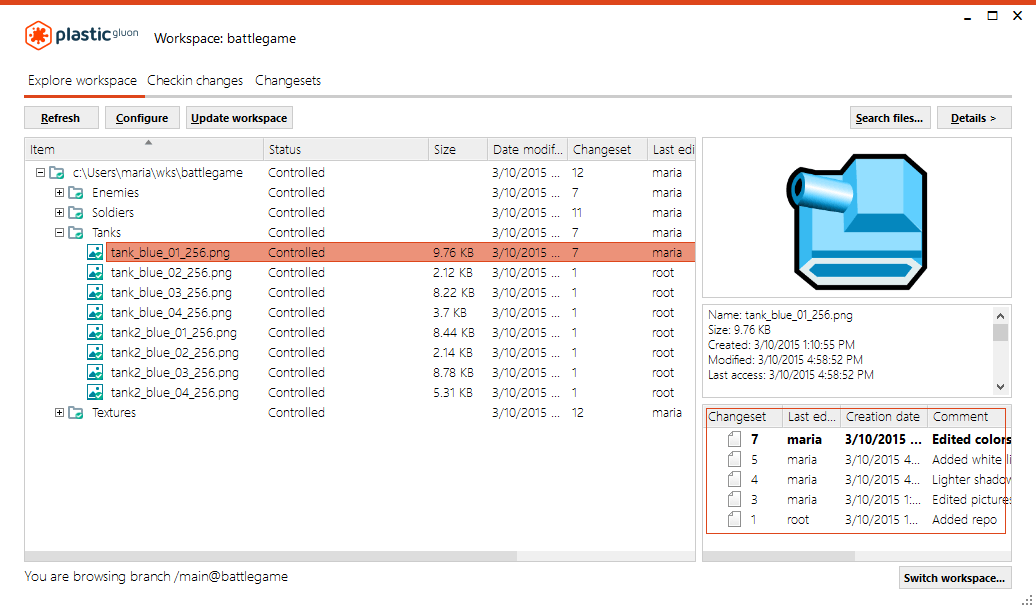
By this point, you understand that each time you run a Checkin action, a new changeset is created. Each item in your workspace is associated with one or more changesets displayed in the History view:
Gluon lets you see all the changesets created in the repository you're working on. Click the Changesets tab, and you will see the Changesets view:
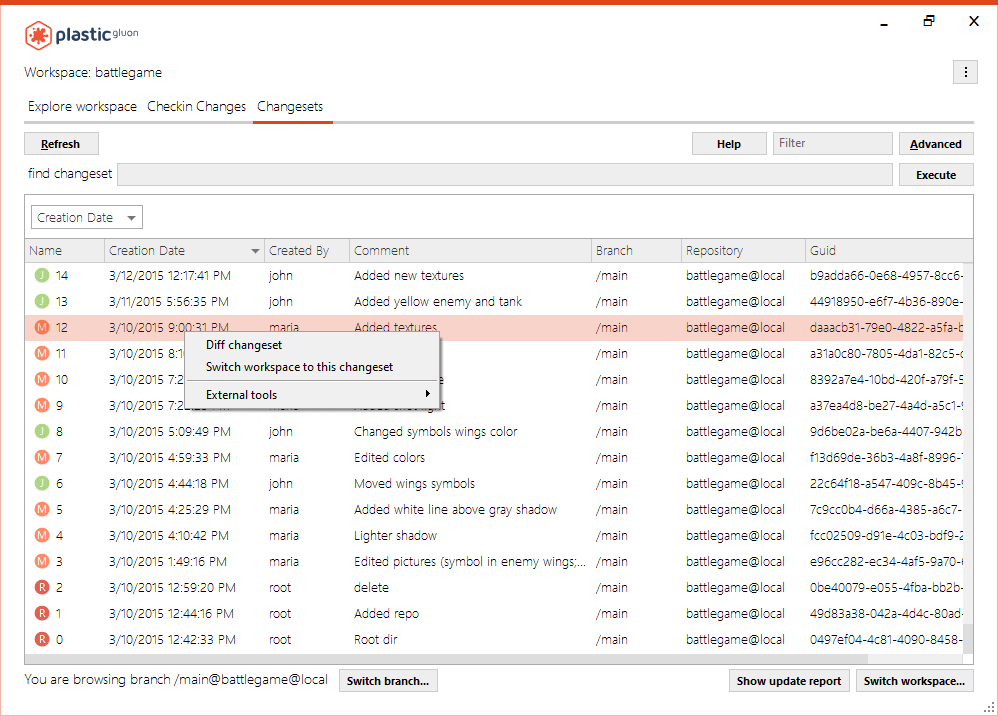
There are several options you can run when right-clicking on a specific changeset:
If you haven't use this feature with Plastic, let's see how to configure:
externaltools.conf. (Read
here where
to place this externaltools.conf file.). It allows you to specify external applications
and arguments to pass to them.
changeset | <toolName> | <pathToExecutable> | <args>
where:
toolName - The name of the tool to be displayed in the context menu.
pathToExecutable - Absolute path to the targeted application
args - The arguments to be passed to the targeted application. There are three currently
supported placeholders: @object (replaced with the object name), @repository (replaced with the repository of the object),
and @wkpath (replaced with the current workspace path). Please note that the replaced values might contain
blank spaces, so they'll probably need to be surrounded with quotes.
For example:
changeset | Label changeset | "C:/Program Files/PlasticSCM5/client/cm.exe" | label create lb:MyLabel cs:@object
This configuration will create a menu item called Label changeset under External Tools which applies the label MyLabel to the selected changeset.
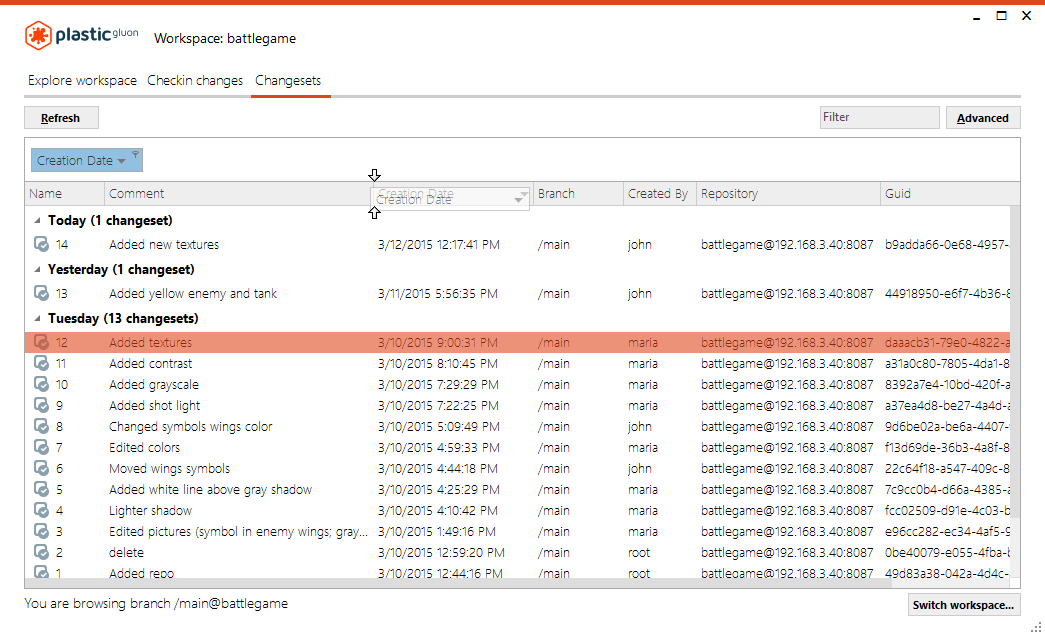
By default, the first time you launch the Changesets view, you'll see all the changesets in the repository created by any team member, and these changesets are grouped by the Creation date. But the Changesets view also offers a lot of additional settings to customize the view, such as:
Any customization you create automatically saves for any workspace. So, the next time you open the Changesets view, you are presented with your last customized view.
You can display the changesets as a standard list without using any "group by" column by dragging and dropping the Group by box into the columns header:
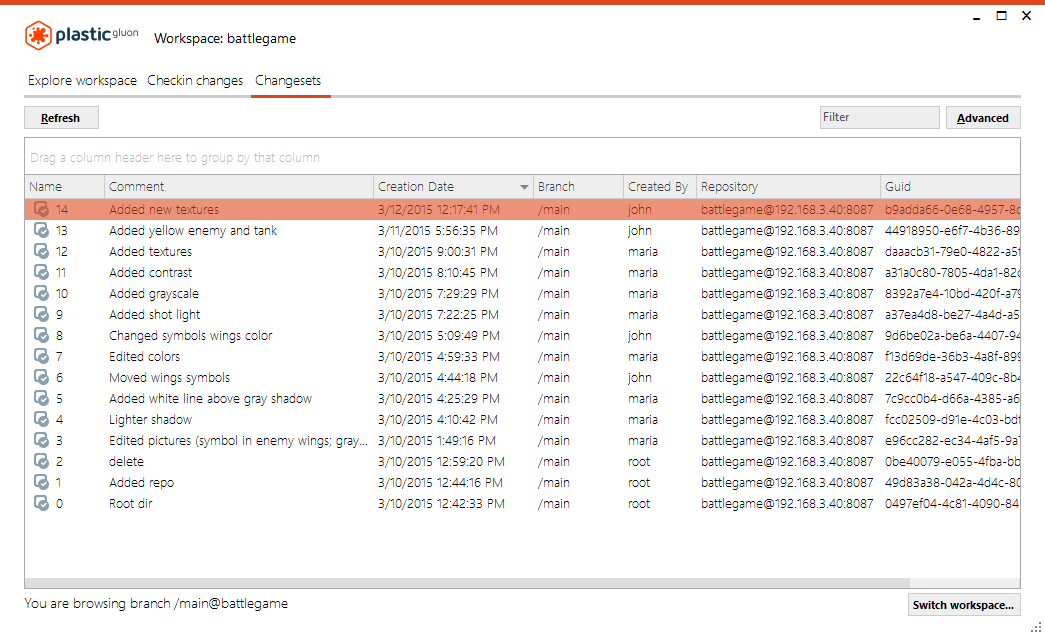
After you perform this action, the result is a standard list:
You can hide/show the Group by box by right-clicking the Group by section or the columns header. In the submenu, select the option Hide Group By Box or Show Group By Box:

At any time, you can choose what field/column to use for grouping the changesets simply by right-clicking the column header you want to use and then selecting the option Group By This Column in the submenu:
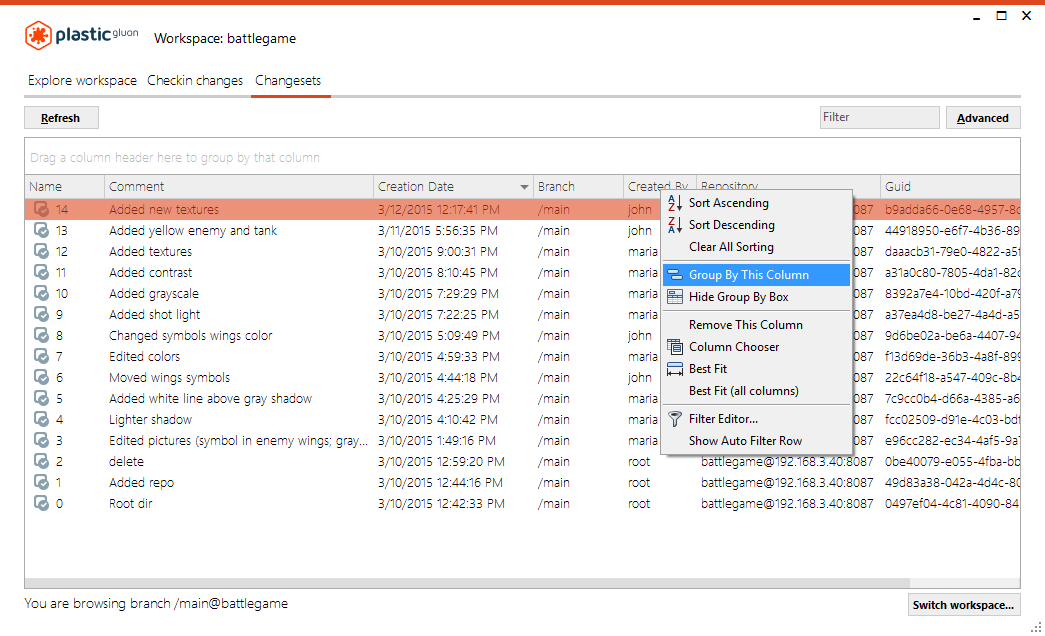
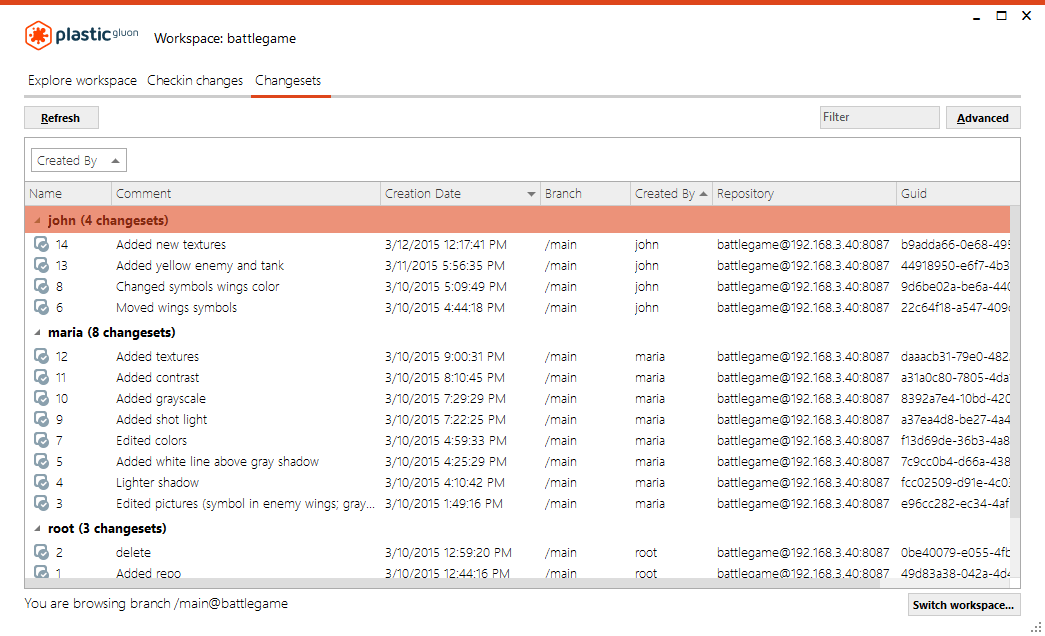
You can also group the changesets by dragging and dropping the column into the Group by box:

After you perform this action, the results display the changesets grouped by the person who created them:
You can also add more columns by performing the previous action on any column you need. Adding columns in this way creates a nested "group by" option:
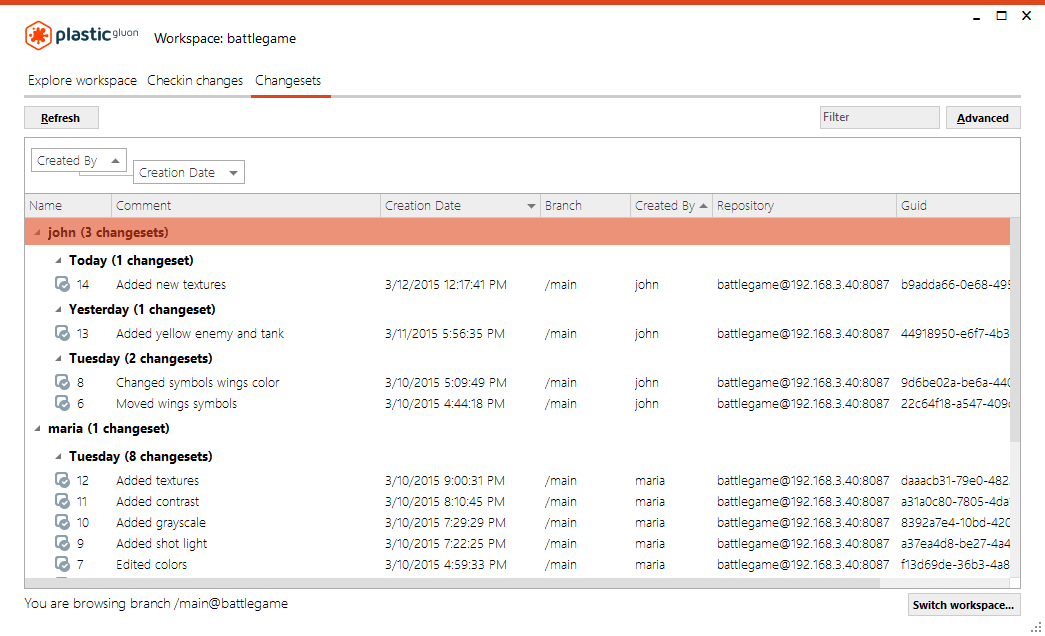
You can arrange the columns in ascending or descending order by clicking the specific triangle next to the column name in the columns header or the Group by box/es.
Another setting for customizing your Changeset view is choosing which columns to show or hide. If you want to remove (hide) a column, right-click the selected column header and select the Remove This Column option in the submenu:
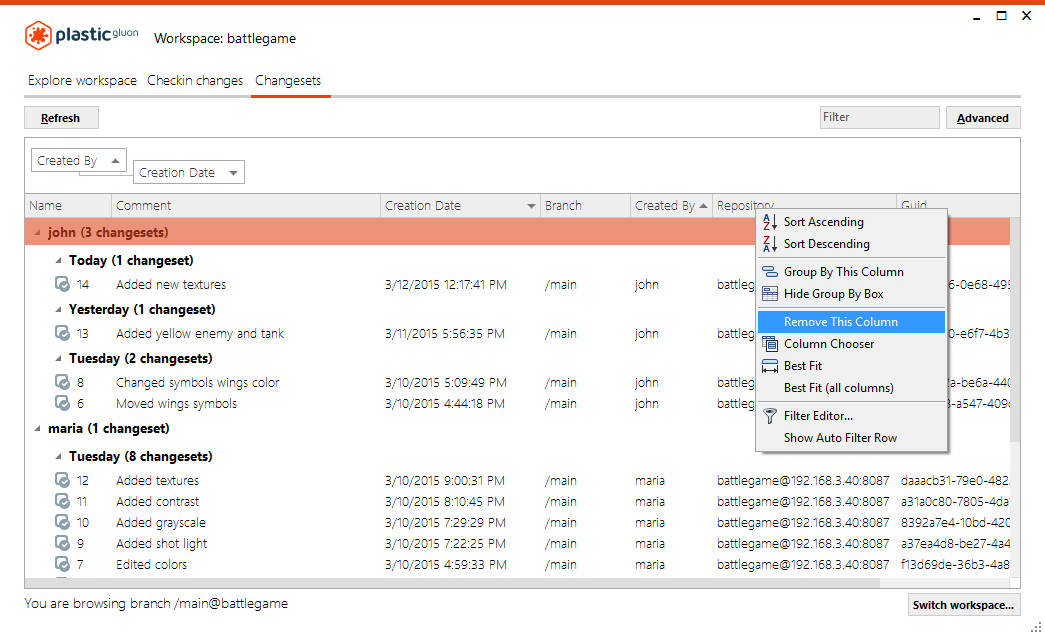
After you perform this action, the results will be that the repository column is hidden from view:
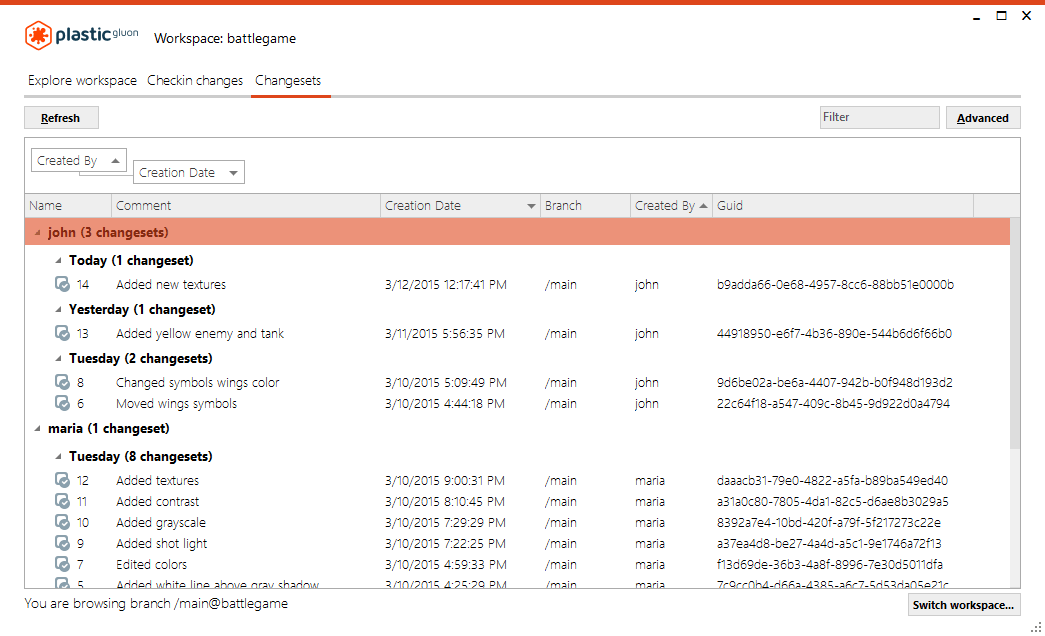
To restore (show) any removed columns, right-click the columns header and select the Column Chooser option in the submenu:
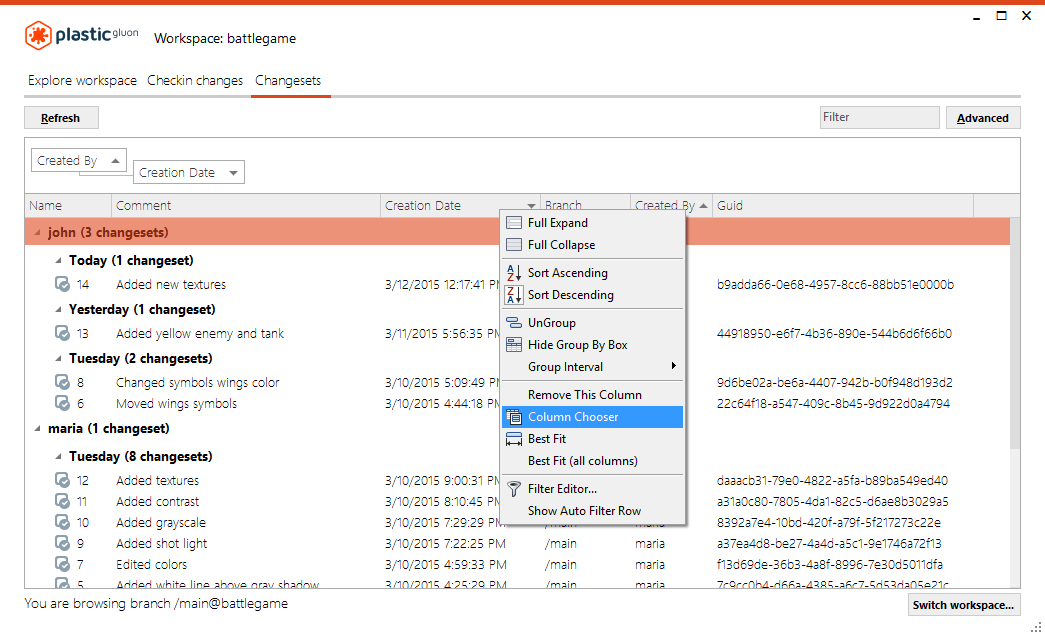
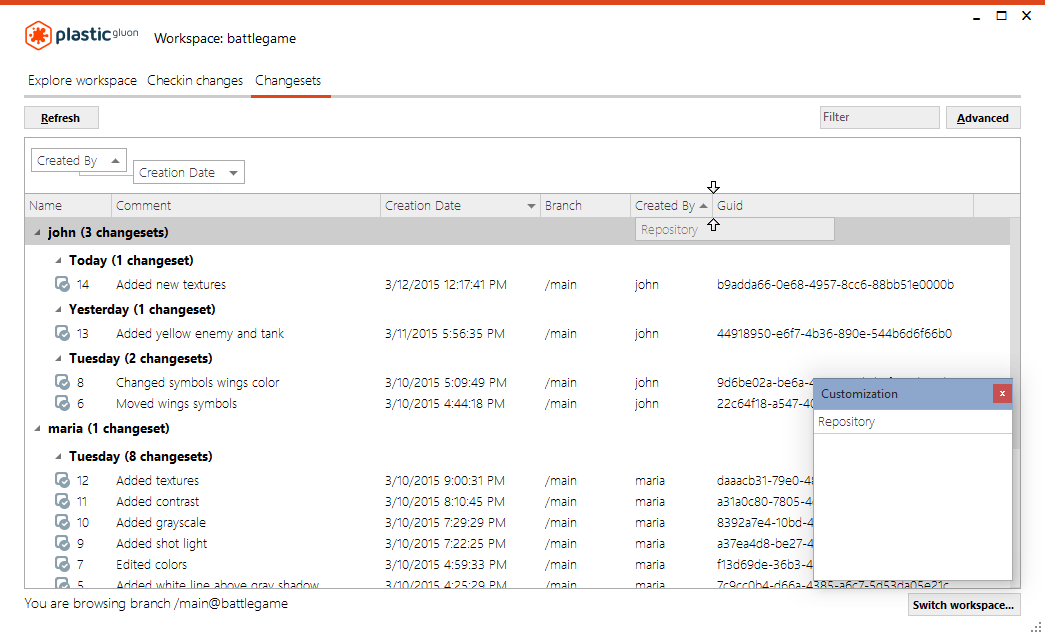
Performing this action will launch a new window with all the "removed" columns. Select the columns you want to restore by dragging and dropping them into the columns header:
If you want to retrieve changesets from the server based on specific search criteria, you need to click Advanced. This action opens a new search box to enter the search string criteria that will return the changesets from the server. By default, the advanced search retrieves the changesets created during the last 30 days. To perform the search, click Execute, and the changesets that meet your criteria are retrieved:
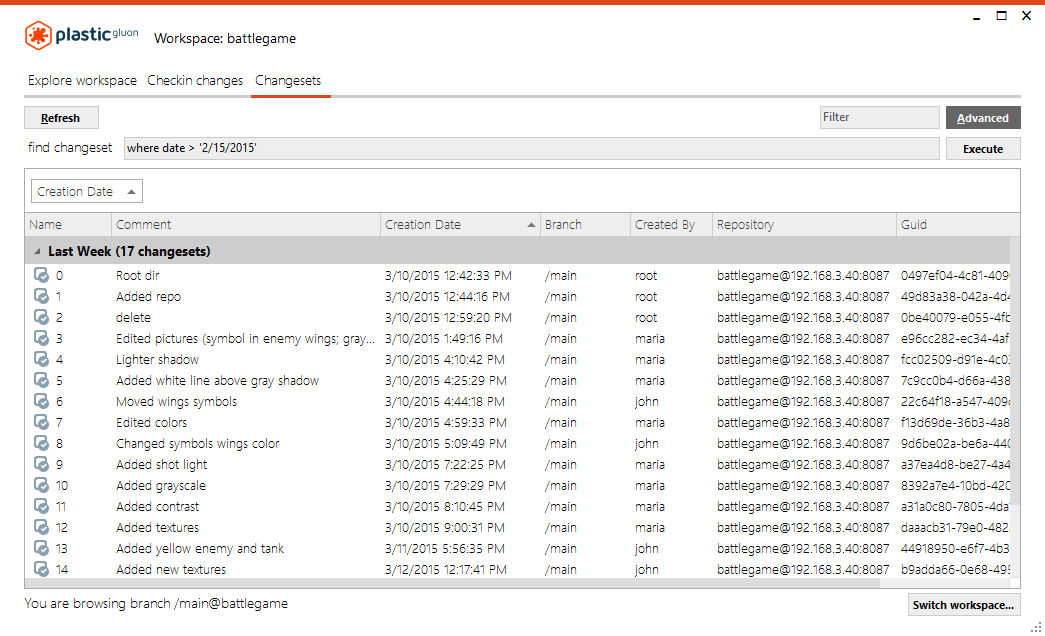
Going back to our example, Maria created a search string criterion to retrieve all the changesets created by John (the owner) where the creation date is greater than March 10th. When she clicked Execute, then she retrieved the following changesets:
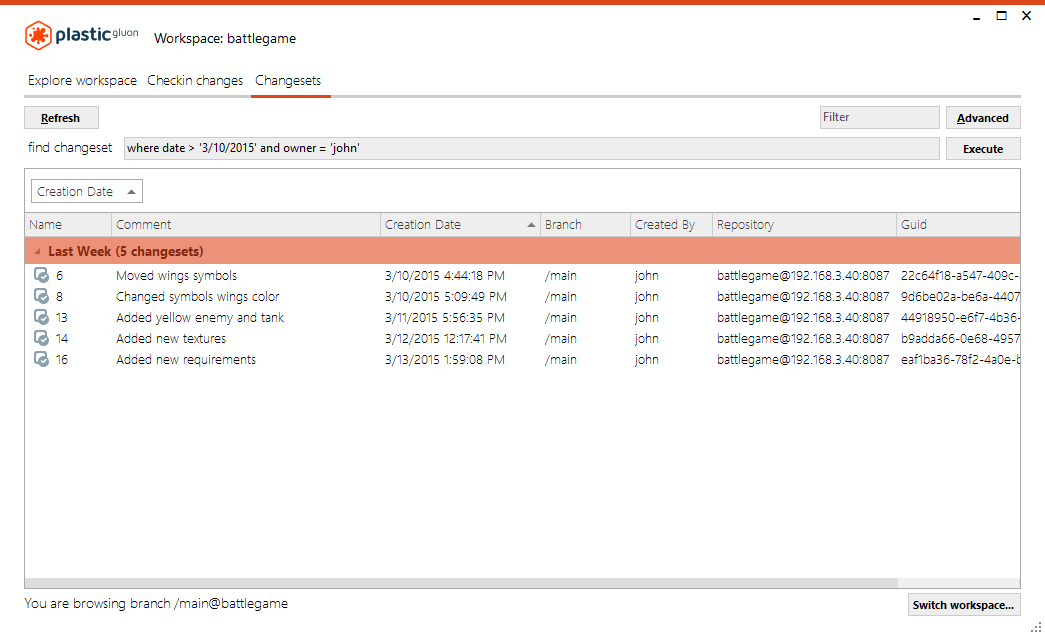
Once you've retrieved the changesets you requested from the server using the Advanced search utility, you can use filters to hide or show changesets that match one or more filter types offered in the Changesets view. By entering your filter criteria (text) in the Filter box, you can hide any changesets from the list that do not match your criteria and only display changesets that match your filter criteria.
Going back to our example again, let's suppose that Maria retrieved from the server all the changesets created by anybody during the last 30 days:

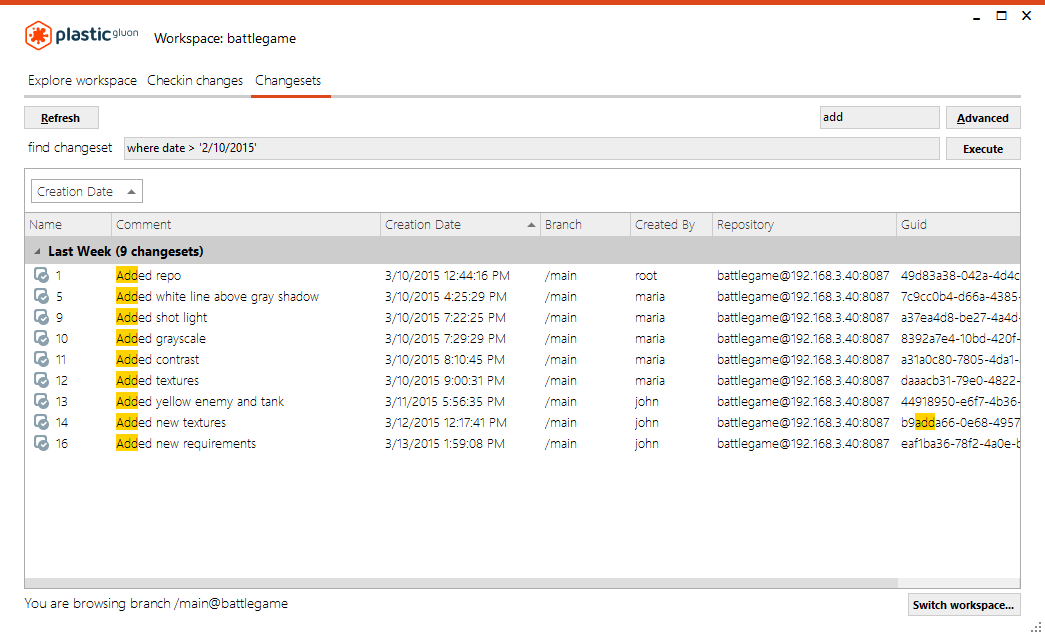
If she only wants to see the changesets that have the add text in any of the changesets fields, then she needs to enter text in the Filter box to filter out the changesets that do not meet her criteria. The cool thing is that while Maria enters the text in the Filter box, the changeset list updates in real-time to show only the changesets that fit her filter:
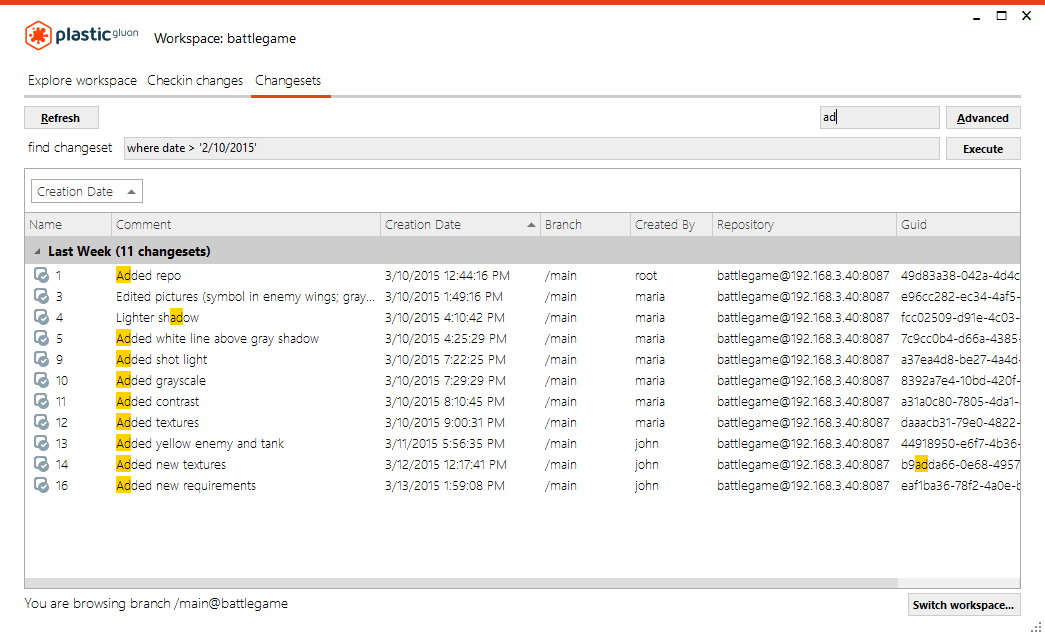
When she enters add, the result is the following:
Another method of filtering is using column filters. By hovering over each column header, a "pin" icon displays. If you click it, then you'll be able to filter using one value in that column:
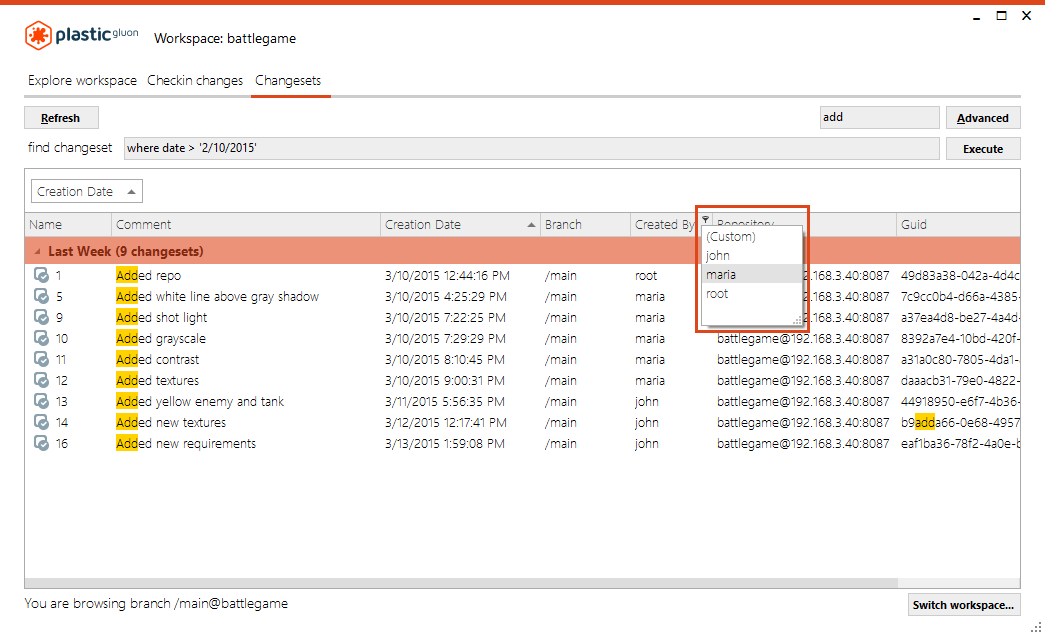
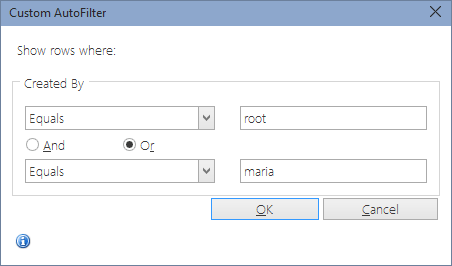
If you select the (Custom) option from the list, then you will see additional custom filtering options for that column:
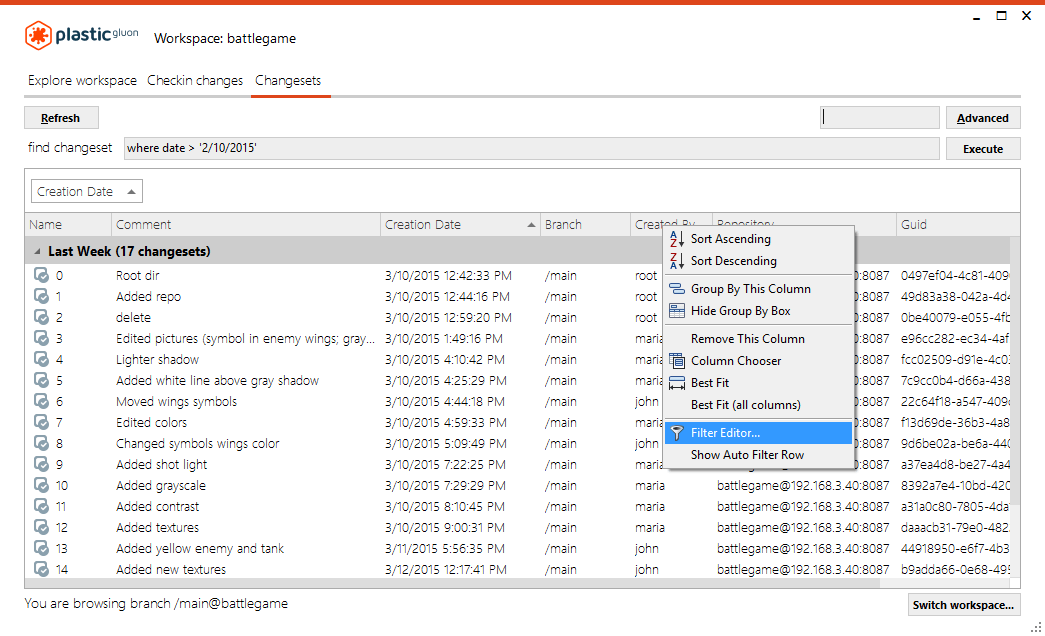
The Changesets view lets you create even more complex filters by using the Filter editor option. You launch the editor by left-clicking any column and then selecting Filter Editor from the submenu:
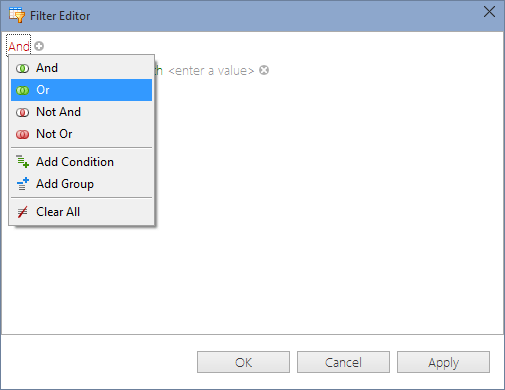
The filter editor enables you to create a complex filter using multiple filters:
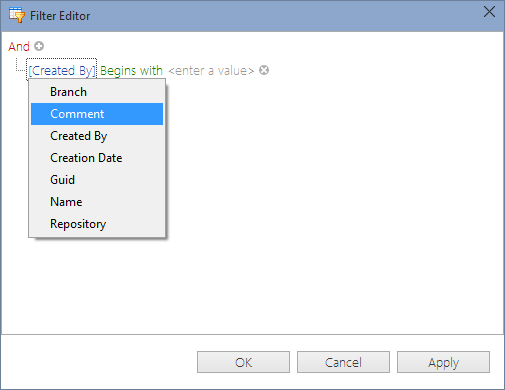
...using multiple columns:
...using more than one operator:
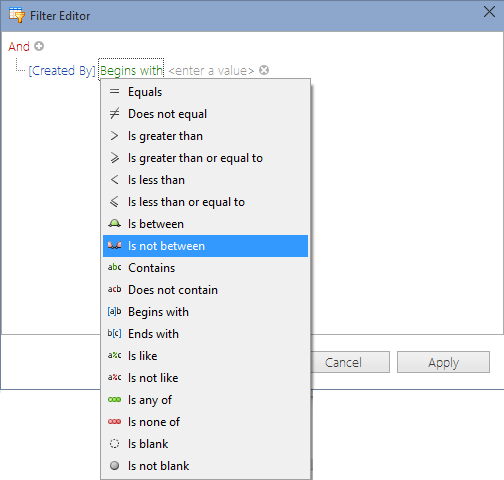
...and entering the value you want to filter by:
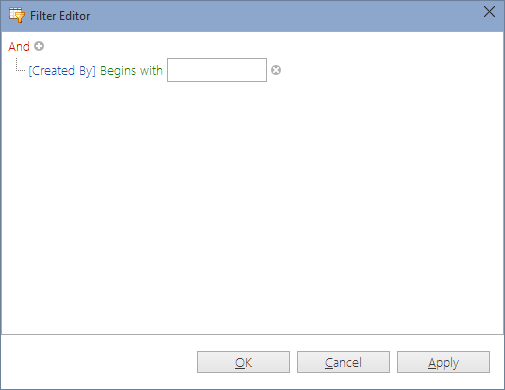
Going back to our example, let's look at how filters are used.
Let's suppose that Maria wants to display a list of changesets created by John, or somebody whose name starts with ro and the comment contains the ad string. So, using the Filter editor, she builds the following complex filter:
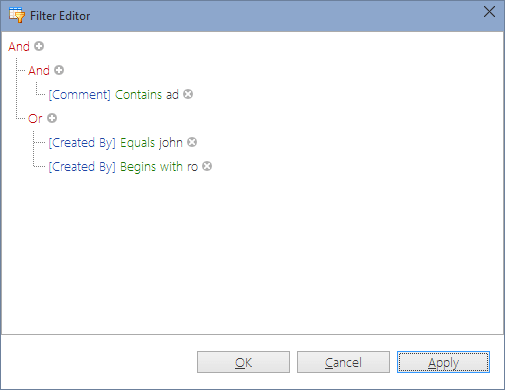
By clicking OK, Maria gets the following results:
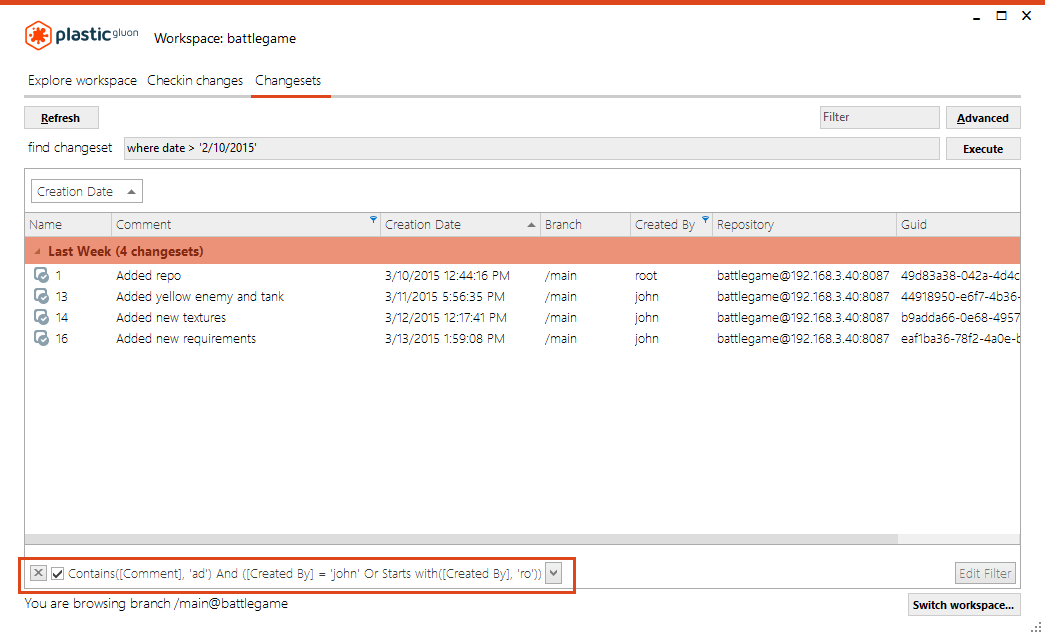
At the bottom of the window, the filter text that Maria entered displays. She can edit the filter criteria by clicking Edit Filter in the bottom right corner. Or, she can remove the filter by clicking X on the left side of the filter text box.
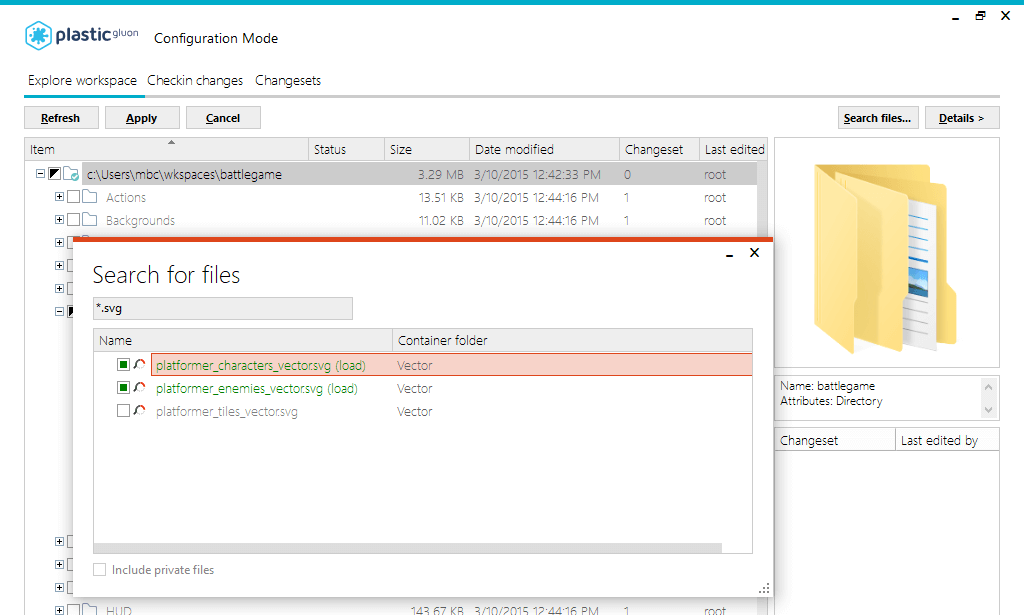
Gluon contains a Search files utility in the Explore workspace view and the Configuration Mode view. This utility enables you to search files matching the filter you created in the search box by clicking Search files.
In the Configuration Mode view, the search helps you localize files in your workspace to the same level as the server repository (including the files that are not loaded into your workspace). In the image below, you can see that the files loaded into your workspace are marked with the checkin tip:
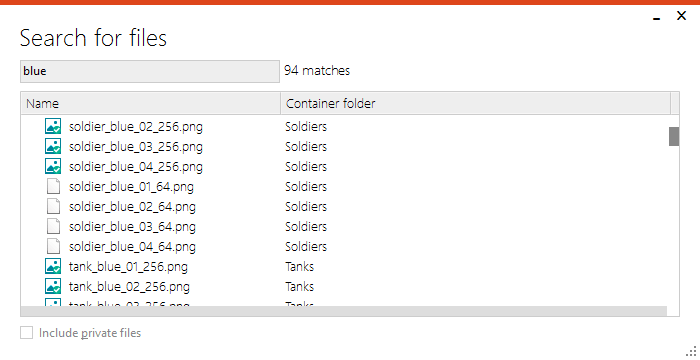
In the Explore workspace view, you can search the files in your workspace that match your filter. If you select the Include private option, then the search results will include your local items too.
It is possible to search files or folders by using patterns. Let's look at some examples:
\PNG folder:
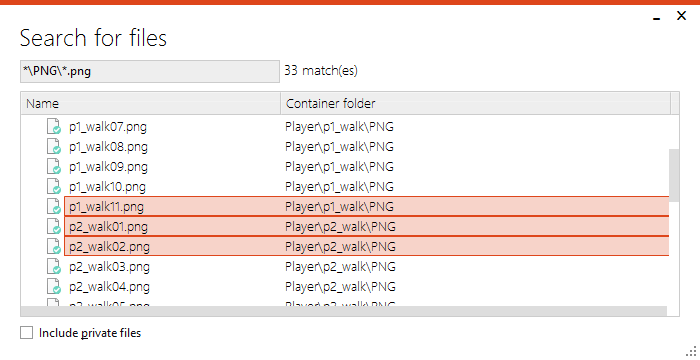
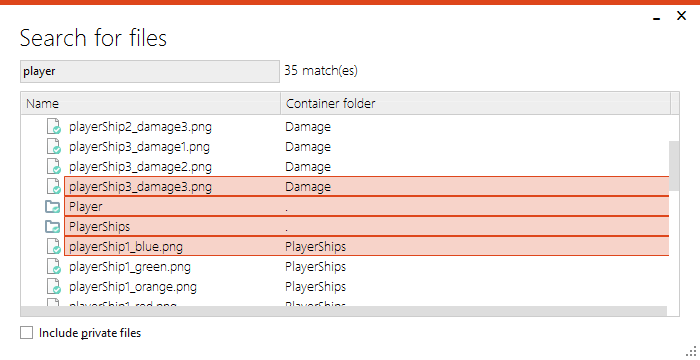
Power-ups directory that include the substring green:
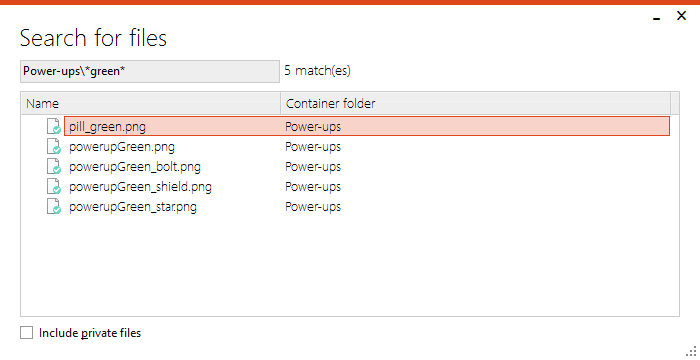
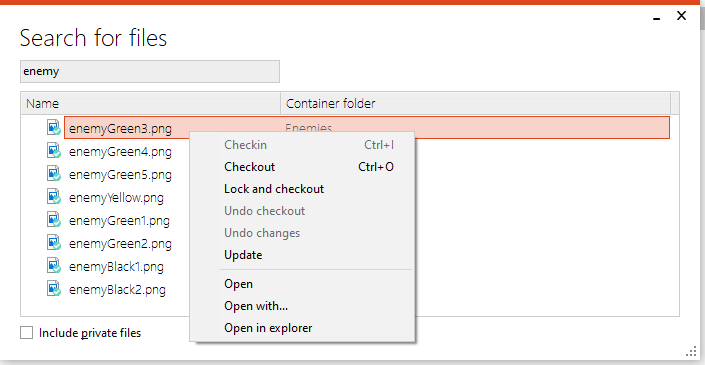
When you perform a search in the Explore workspace view, you can directly execute the following operations from the search results instead of going to the item in the workspace window. Just right-click any of the highlighted files (you can select more than one) and then select the required operation:
This guide shows you how to manage your repository and your workspaces in a "normal" environment using Gluon. But as you can imagine, you and your teammates may encounter some "strange" situations while using Gluon, so let's address some situations you may encounter.
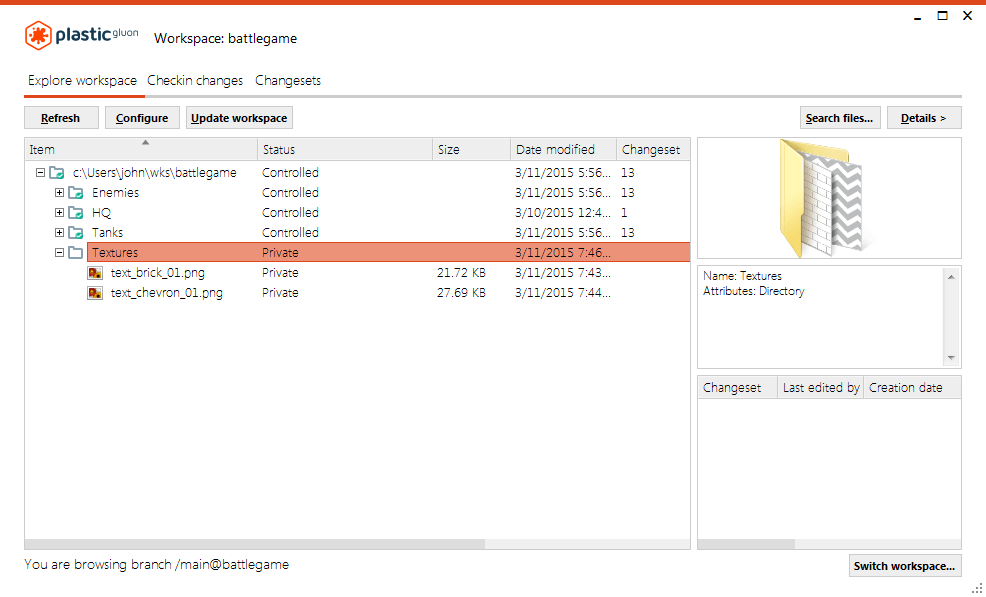
Going back to our example, John designed some texture images to be used in the story game. He saved those files in a new local Textures folder, and this is what his workspace looks like:
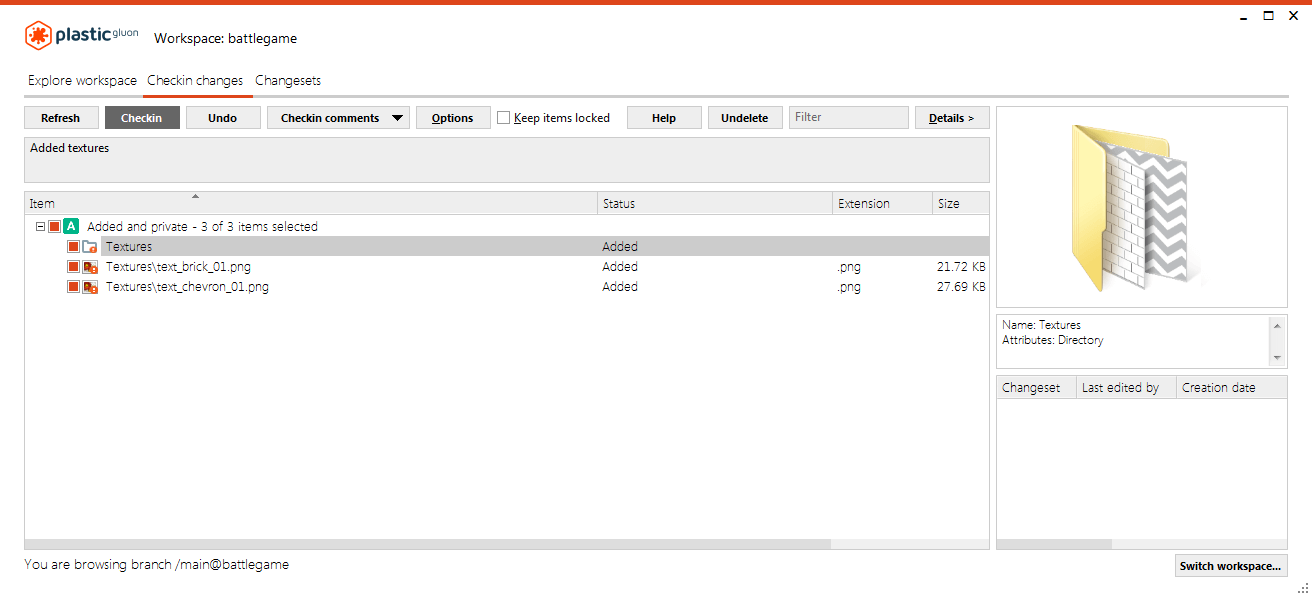
He now decides to add those files to the repository because another teammate needs them to create a new game scenario. So, he performs an Add directory tree to source control action and performs a Checkin to save the new items in the repository:
But unfortunately, he receives the following message:
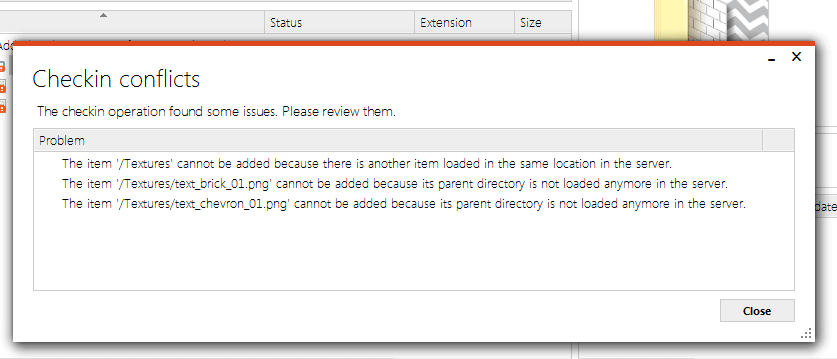
John got this message because several days ago, Maria created a folder called Textures so Gluon detects the conflict and alerts John that a Textures folder (Maria's) already exists on the server.
After clicking Close, John must complete these steps to solve this situation:

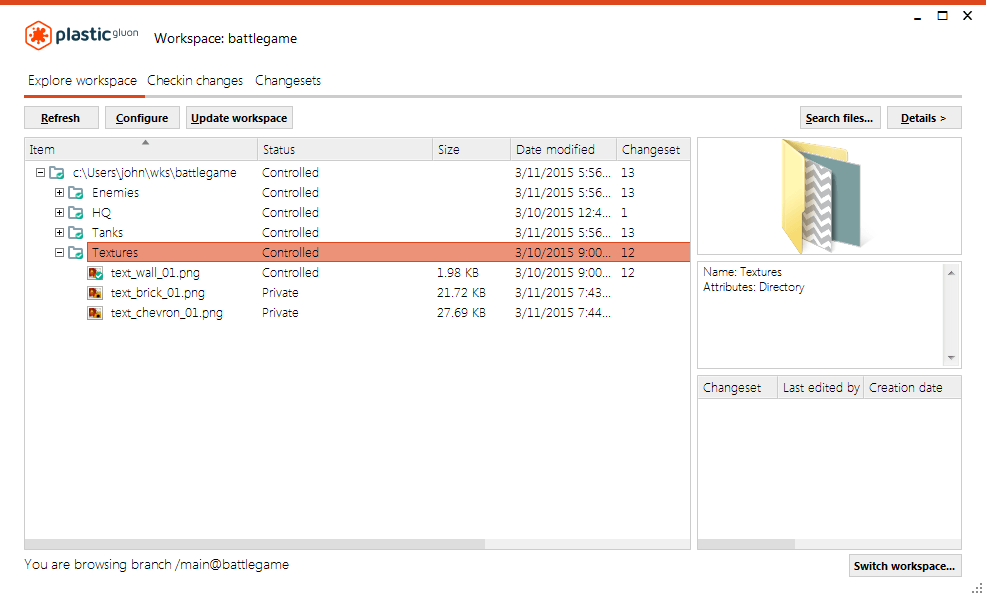

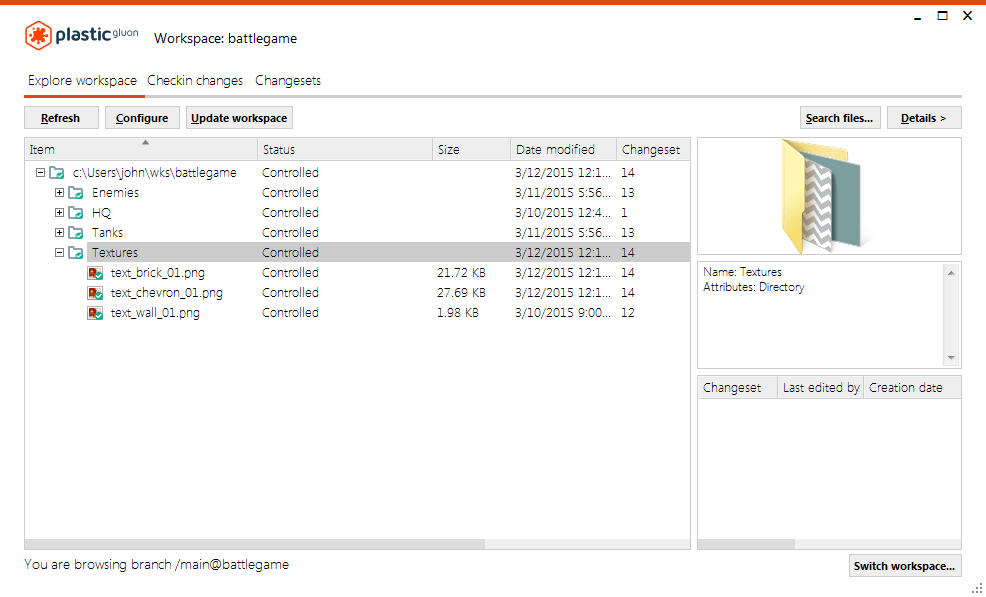
At this point, Maria could perform an Update to the Textures folder or an Update workspace to get John's textures files into her workspace.
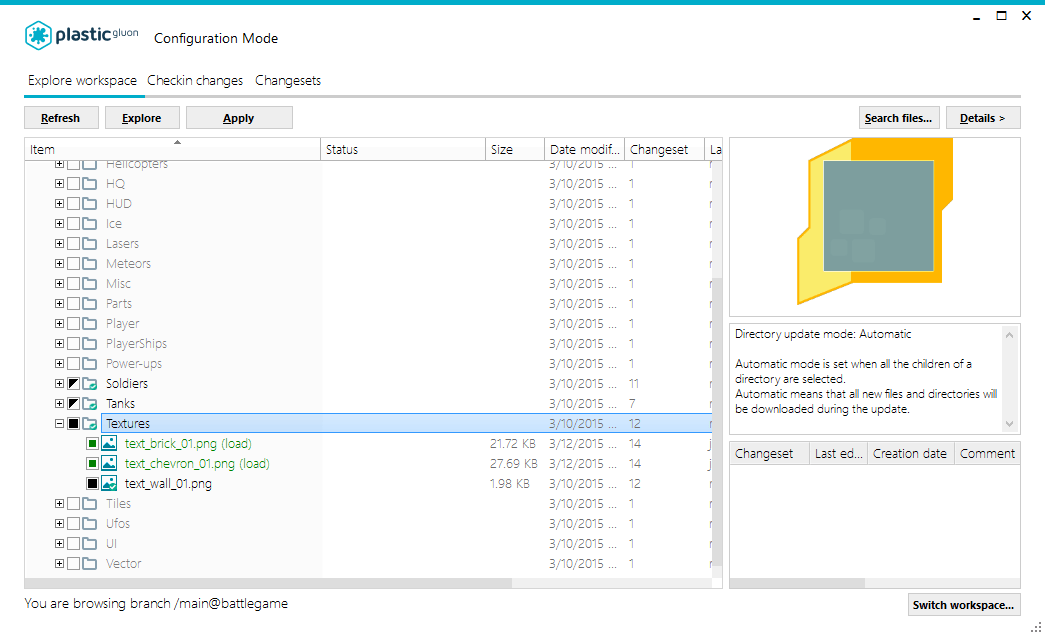
But let's suppose that Maria doesn't perform any of those updates. Since the Textures folder in the repository was created by Maria, this means the folder is under the Automatic mode in her workspace. So, when she opens the Configuration Mode, the two new files that John created will automatically be marked as "to be loaded". If Maria applies the changes, those files load into her workspace:
Going back to our example, John has a new design requirement that must be applied to the text_wall_01.png file. As you've seen in this guide, John needs to perform a checkout to edit the file with his design tool:
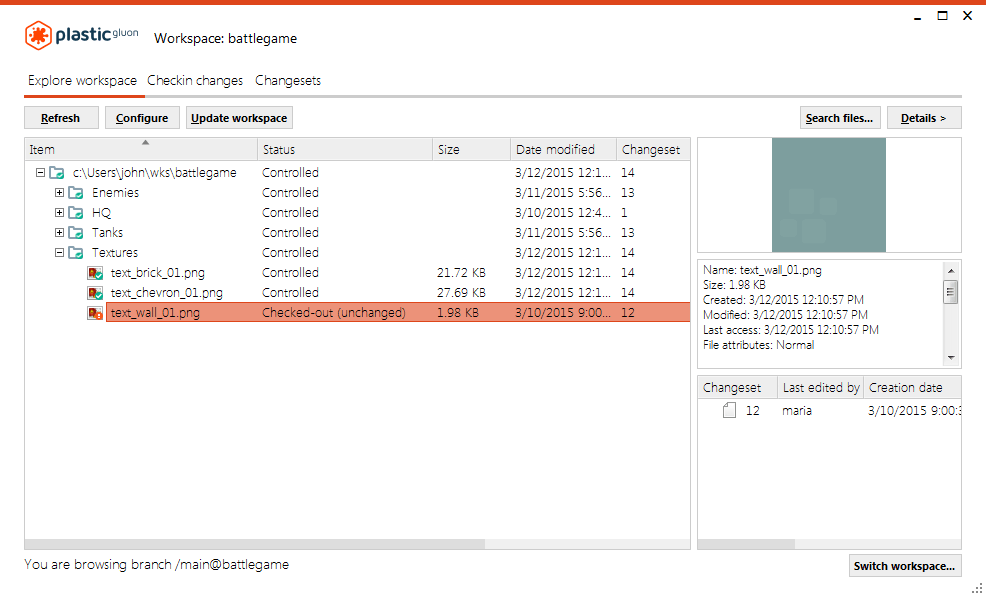
John can perform the checkout operation from the command line:
cm partial co c:\Users\john\wks\battlegame\Textures\text_wall_01.pngWhile he's working on the file making the required changes, the story game team decides that the textures figures are too closely related to the enemy scenarios. So, the Project Manager asks Maria to move the Textures folder into the Enemies folder resulting in a new folder structure. As you can see in her workspace, the text_wall_01.png is locked by John, but Maria moves the Textures folder into the Enemies folder anyway:
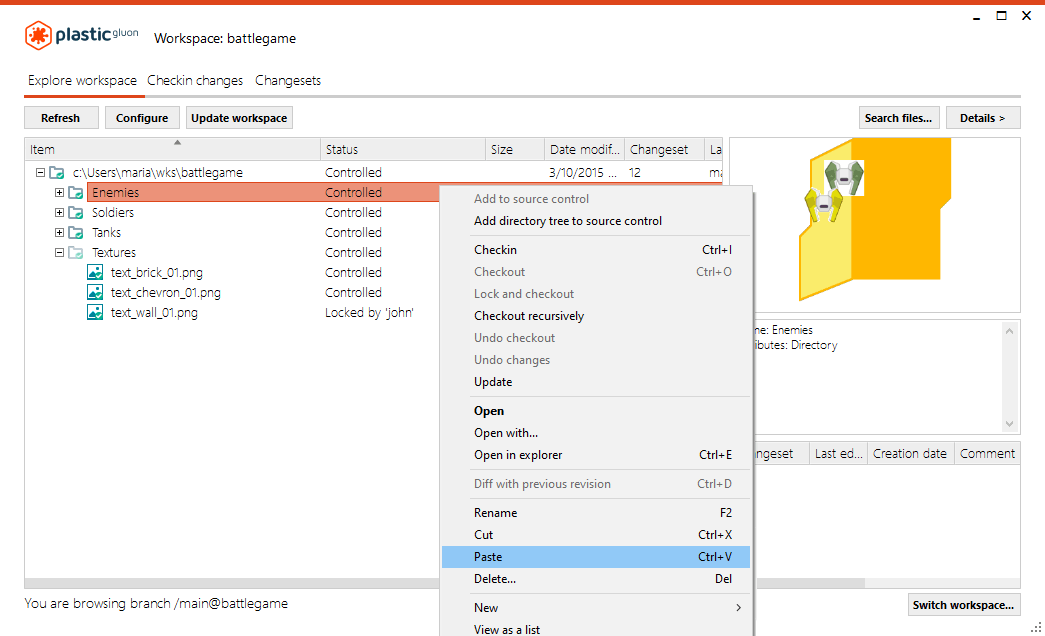
Run the following command to move the folder from the command line:
cm partial move c:\Users\maria\wks\battlegame\Textures c:\Users\maria\wks\battlegame\EnemiesAfter completing this move, Maria must perform a Checkin action to save this change to the server:

And remember how to checkin the changes from the command line:
cm partial checkin -c="Move Textures folder" --applychangedNow, Maria's workspace and the Configuration Mode view look like the picture below. The text_wall_01.png file is still locked by John:
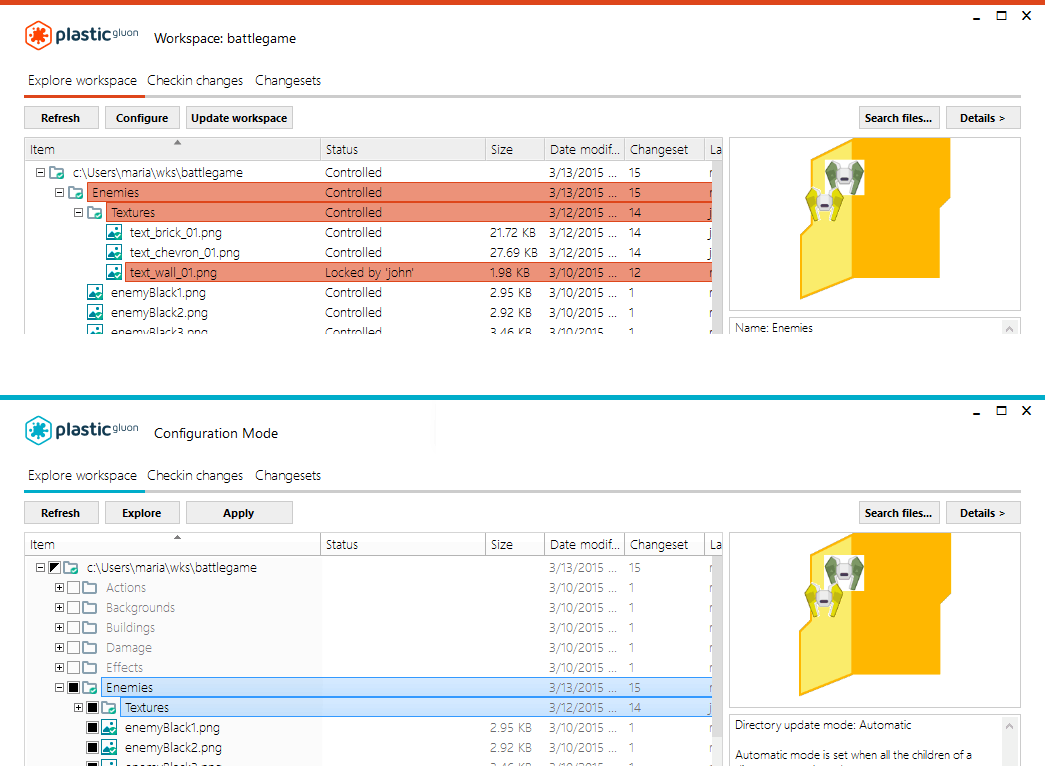
John has now finished making his changes and is ready to checkin them into the repository to make them available to the team. A new changeset is created (by John), but he has not received any message or any error about the move of the Textures folder. This is because Gluon transparently performed all the actions to all users:
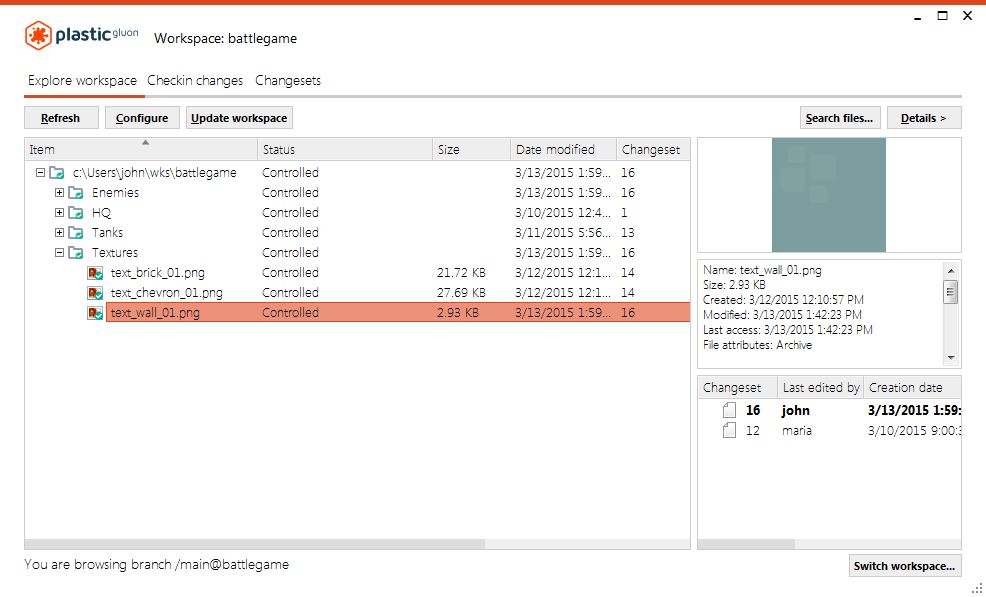
At this point, if we compare John's current workspace structure to the repository workspace structure, you will see that they are inconsistent. John can continue working in his workspace as he usually would, but maybe, at any moment, he will load that change (the folder move that Maria performed). If he opens his Configuration Mode view, he will see a new folder structure. His current Textures folder is still loaded, but now he can see the Textures folder moved by Maria with his changes applied to the text_wall_01.png file:
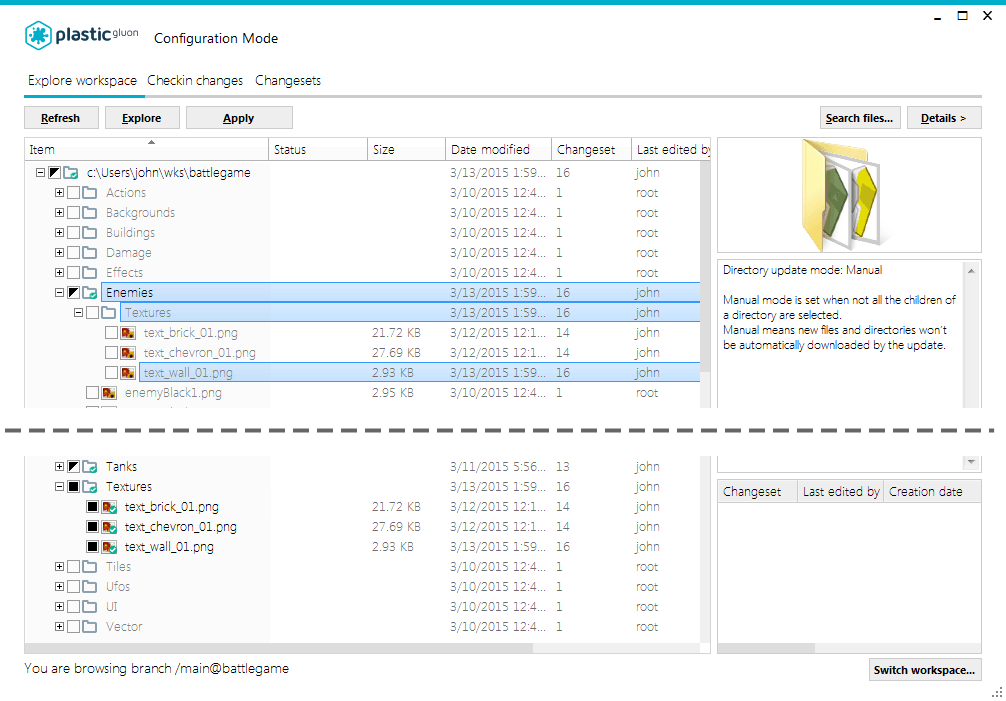
To resolve this, John must update his workspace by clicking Update workspace in the Explore workspace view. After the update is finished, the workspace has the same structure as the repository in the server, which contains the moved folder:
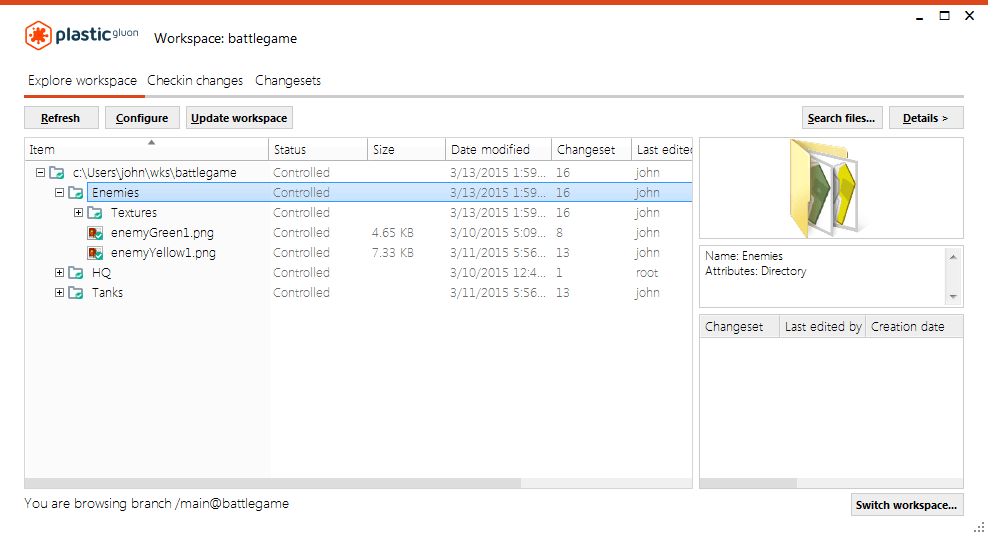
John can perform the update workspace operation from the command line:
cm partial updateIf John now opens the Configuration Mode view, he will see that his "old" local Textures folder is not loaded and the moved Textures folder is loaded instead:
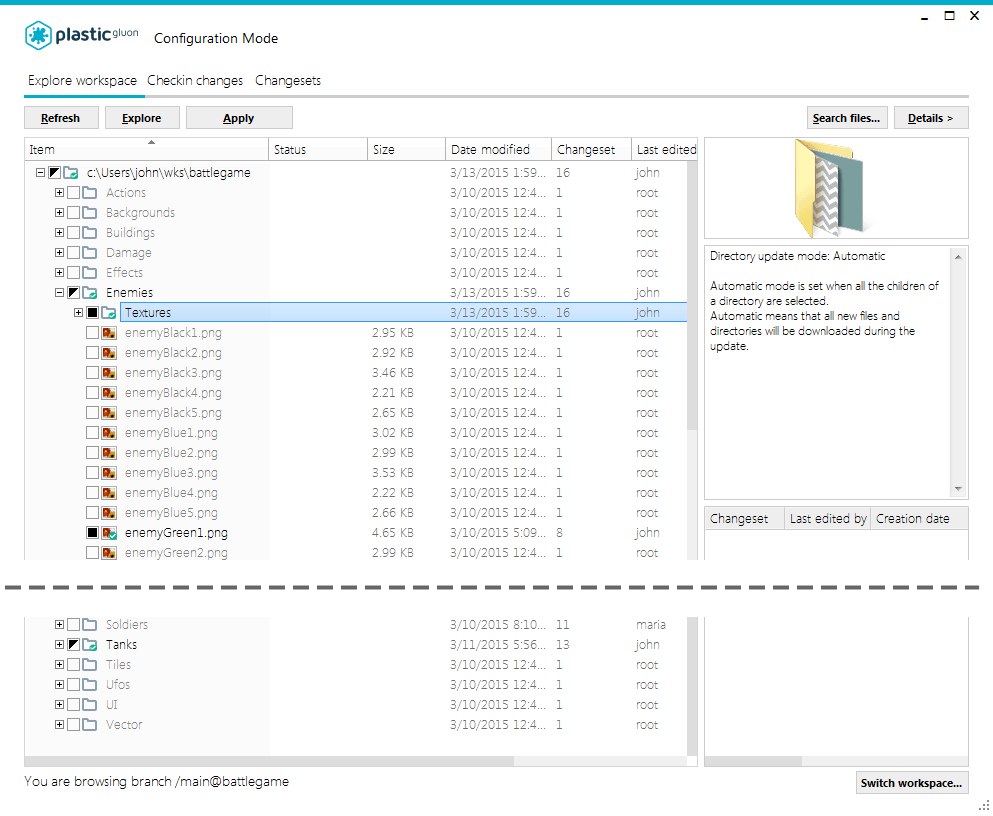
John has successfully resolved the inconsistency between his workspace structure and the repository workspace structure.
The Options dialog in the Checkin changes view lets you configure the following:
Click the Options button to configure the settings above:
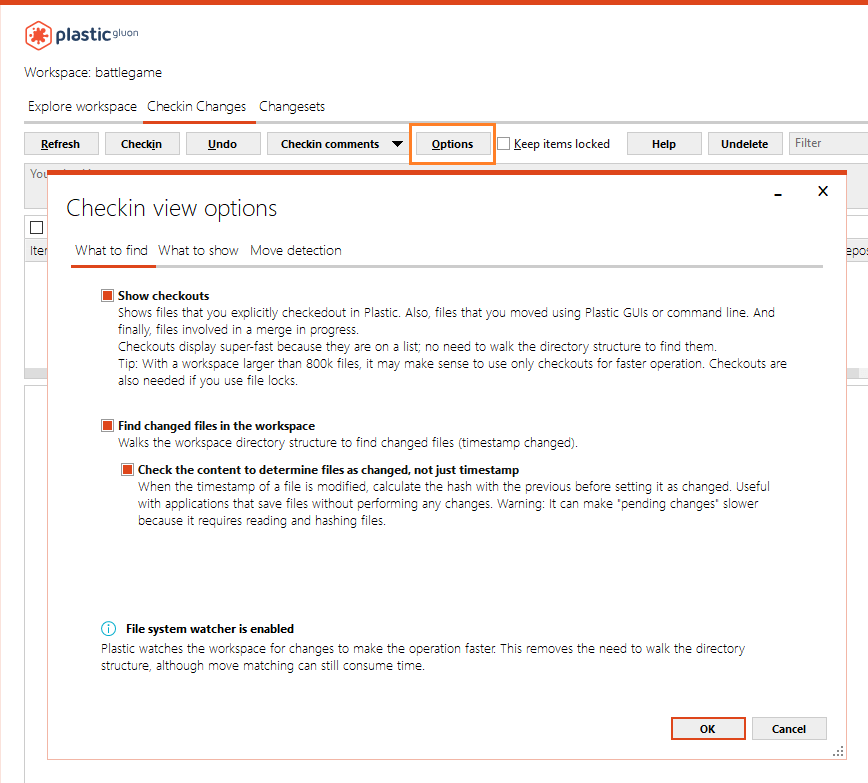
Gluon - Windows - Checkin changes options
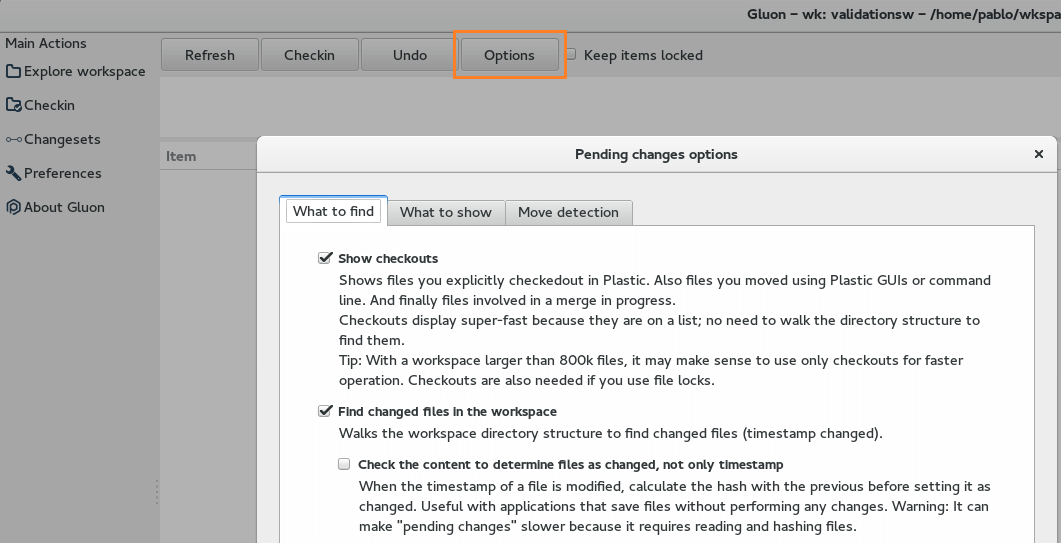
Gluon - Linux - Checkin changes options
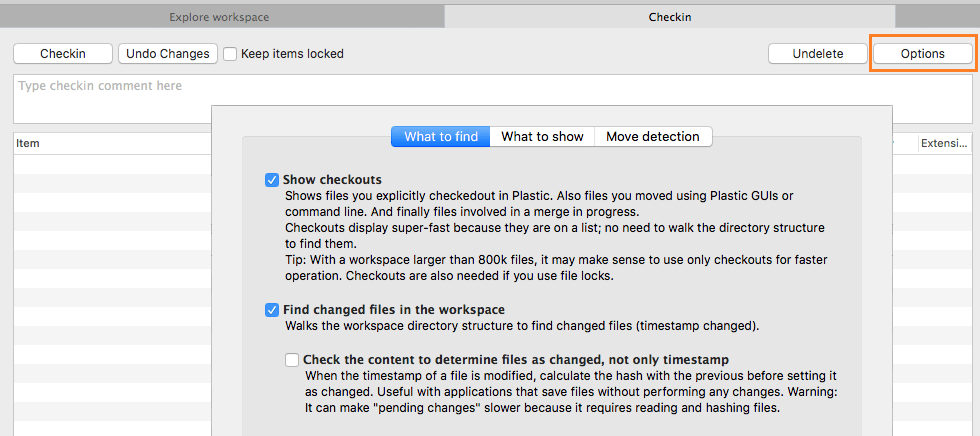
Gluon - macOS - Checkin changes options
ignore.conf to avoid adding temporary files
to version control.
ignore.conf.
hidden_changes.conf.
The initial design of Gluon was "as an artist I don't want to see branches". But some of you needed to switch branches easily. Gluon lets you do just that!
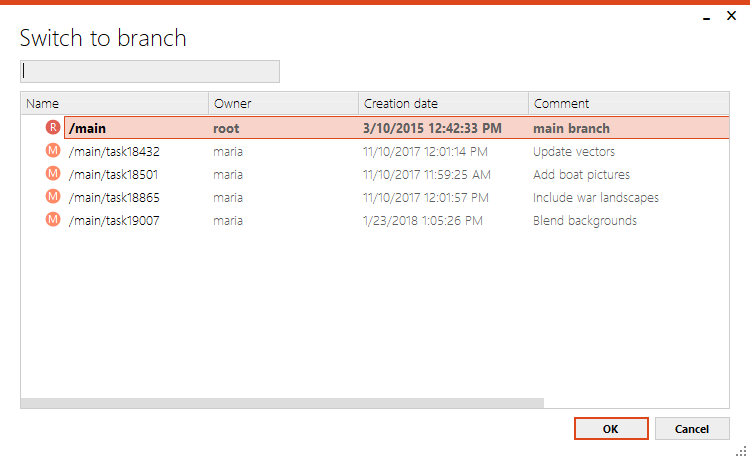
Gluon - Windows - Switch branch dialog
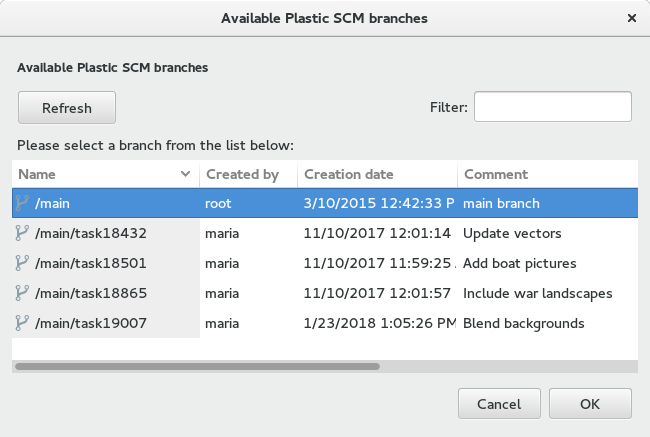
Gluon - Linux - Switch branch dialog
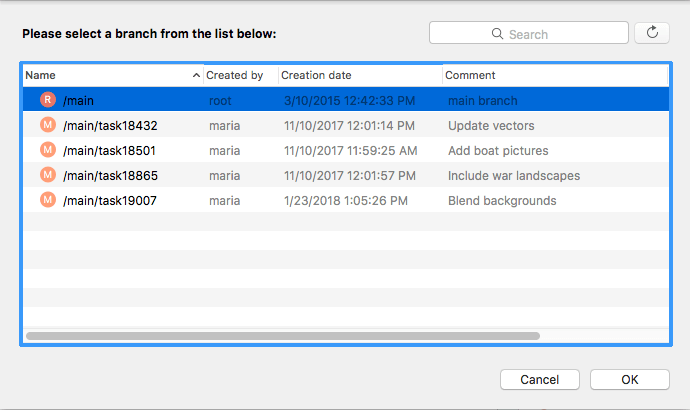
Gluon - macOS - Switch branch dialog
Gluon also has merge capabilities. So, when files conflict during checkin, Gluon launches the configured merge tool (same tool configured for regular Plastic) and helps you solve the conflicts.